What to do if the floorboard creaks? Where to escape from this obsessive sound that cuts the ear and disgusting nerves? Who will save the situation? Perhaps you yourself can correct the shortcomings, of course, if you are ready to incur some financial costs and inconveniences associated with the work? Ready? Still would! After all, this terrible, exhausting creak has completely become impudent and has crossed all the boundaries of what is permitted! It’s time to fight him back!
Content
- Common Squeak Causes
- Annoying Squeak Sources
Common Squeak Causes
Wood has one very “interesting property” – over time, it dries out and parquet because it is made of wood, is also not immune to drying. Its surface becomes uneven, delamination occurs and gaps appear between the individual dies. Such metamorphoses do not pass without a trace – a very strong tension arises, which is accompanied by a characteristic sound – a creak that you hate so much.
Squeaking may occur on a completely new coating, but the reasons for this incident are understandable:
- either the tree was not sufficiently dried;
- or the process of drying was carried out in accelerated mode.
Both that, and another can entail emergence of an unpleasant rattle and creak arising when walking on a parquet. True, you can still partially avoid the problem of squeaking on a fresh coating – take a special instrument for measuring wood moisture to your store with you. But it’s almost impossible to find out by what technology the parquet was produced – the seller and the manufacturer will never tell you all the intricacies and nuances of the production process, so rely only on your own instinct and honesty of the manufacturer.
Annoying Squeak Sources
And yet, why does the floorboard creak? After all, there is probably something that causes a similar sound and so gets on your nerves. In fact, there may be many sources of creaking. This is the friction of the die on the nail, and the glue or mastic that has dried up under the parquet, and the uneven screed, and the incorrect location of the lag, and the incorrectly chosen substrate, and many other similar reasons. Also, rattle can occur due to improper fixing of the skirting board to the floor and wall.
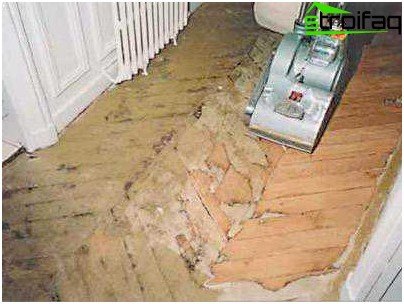
Only restoration will help this parquet
Eliminate the creak: ways
So, you found the reason for the creak, found its source, the only thing left is to eliminate the flaw and permanently get rid of the obsessive sound that tears your soul into small pieces. Consider ways to get rid of a creak, depending on the cause of its appearance.
Uneven rough floor
If, after a long clarification of the relationship with the parquet, you came to the conclusion that the reason for the squeak is in the uneven base of the floor, then there is only one way out – to break everything and start from scratch. Parquet will have to be removed, and the subfloor cleaned of debris and dust. Coat all irregularities with cement-sand mortar, and make a new screed on top or use ready-made mixes for bulk floors.
Make sure that the unevenness of the fresh screed does not exceed 2 mm per 2 square meters. m of the base of the floor, otherwise the elements of your new (well, or old) parquet will again begin to creak and collapse. For reliability, it is best to lay chipboard sheets on a concrete screed – this way the floor will be perfectly smooth and your chances of a quiet and peaceful life will greatly increase.
Loose chipboard to concrete
Vile sound can come from sheets of chipboard, laid under the floor. This happens because in some places plywood (chipboard) does not fit snugly to the concrete base. Unfortunately, eliminating a creak without using cardinal methods is practically impossible in this case, although there is still a method that can save the situation, but it will only help if the creaking is local, that is, the sound is heard in one or more places on the floor.
So you will need:
- bit
- drill with 10 mm drill
- cement-sand mortar (1: 3)
- syringe
Determine the place where the sound comes from and using a chisel, remove two or three planks of parquet. Then drill a hole with a diameter of 10 mm at the bottom of the floor with a drill. After collecting the solution in the syringe, pour it into the hole and leave this small mess for 24 hours alone. After a day, repeat the procedure and let the solution set again. After the second 24 hours, you can put the dies in their place and check the quality of their work. Most likely, your parquet will be quieter than water, below grass.
Humidity mismatch
It also happens that parquet begins to creak only in certain months, for example, in October-November. This happens, as a rule, due to a sharp change in the humidity level in the apartment. All summer the parquet breathed fresh street air and was silent with pleasure, and in the fall, with the beginning of the heating season and the arrival of heat in the houses, the dies began to give up moisture accumulated over the summer and dry out – here’s the creak.
In this case, you can eliminate the nasty sound with very simple methods:
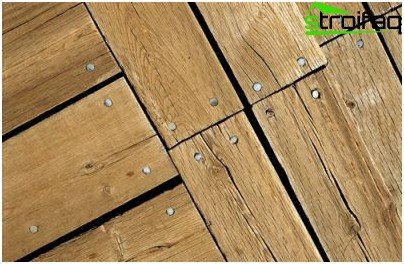
Low humidity in the apartment is the reason for the creak
- Constantly monitor the humidity level indoors by measuring this parameter with a hygrometer. For parquet humidity indicators should not be lower than 50-60%.
- During installation, monitor the humidity and temperature in the apartment, not forgetting that the humidity level of the parquet itself should be 9-10%. The optimum temperature for laying parquet is 15-20? C.
- Follow the rules for parquet care: wash it with a damp (not wet !!!) rag and avoid getting water on the floor surface. Moisture is quickly absorbed into the dies and clogged in the gaps between them, which leads first to the swelling of the plates, and then to their deformation.
Peeling parquet from the base of the screed
If the creak is heard only in several places in the room, then radical methods of eliminating it can be avoided in a very simple way.
- Find all the “creaky” points and select these sections with chalk..
- In the center of each of these areas, using masking tape, make markings in the form of small pieces of tape located at a distance of 20 cm from each other.
- Drill holes with a diameter of 2 mm directly in the marking until the drill bit rests in concrete.
- Using a medical syringe and glue for parquet, squeeze a small amount of glue into the holes and allow it to dry for one hour.
- During drying, the glue will begin to foam and part of it may come out. It is in order that the viscous mass does not spoil the parquet, and you used masking tape. Just separate it from the floor and throw it away. If, however, a little glue gets on the surface of the parquet, remove it with a solvent..
- It is advisable not to walk on the “sick” parquet during the day, and to crush the places where the “operation” was done with any heavy objects – sandbags or flour, kettlebells, etc..
- After 24 hours, you can do restoration work: pieces of colored wax crayon are laid in the holes and polished. The main thing is that the color of the crayon matches the color of your parquet.
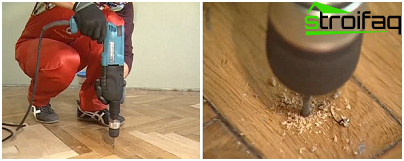
Parquet elimination by pouring glue under the parquet
Reason: poor quality substrate
An improperly selected or poor-quality substrate can also cause squeaking. In this case, there is only one advice – to remove the parquet layer and remodel the substrate. No other way! Although you can avoid the incident even at the stage of buying an insulating layer, if you make the right choice in the store.
The most optimal option is the Tuplex substrate. It consists of three layers: the upper and lower layers are polyethylene, and the core is expanded polystyrene. This material perfectly aligns the base of the concrete screed, holds heat well, and also has elasticity and resistance to mechanical damage..
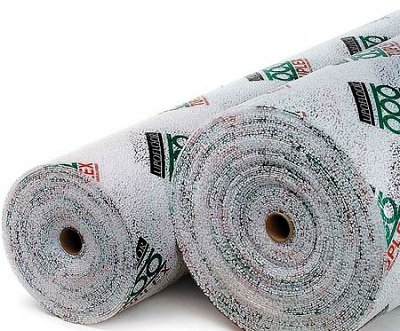
Substrate “Duplex” – a great option for parquet
A foam polyethylene backing is, of course, good, but it requires additional moisture insulation, and its thickness is not quite suitable for laying parquet.
The cork substrate that is now fashionable, unfortunately, is not suitable in the case of flooring on it parquet boards, since any large leakage can cause decay and mold.
There is no gap between the coating and the wall
Sometimes when laying the parquet, the boards are placed so close to the wall that there is not even the slightest crack left. This is wrong, because the dies are constantly changing their shape – then they increase in size from high humidity, then decrease from its lack. Swollen dies can no longer fit in the space allotted for them and, when walking on them, they begin to “attack” the walls intensely, which causes a creak. If you increase the distance between the wall and the planks of the parquet, the creak will disappear. So there’s only one piece of advice – remove the skirting board and cut the parquet canvas around the entire perimeter of the room.
Shriveled Parquet Boards
Non-observance of the humidity regime in the room will surely have a deplorable effect on your floor. If excess moisture leads to swelling of the dies, then its lack can cause them to dry out. Therefore, always maintain the desired humidity level in the apartment. But if your parquet in some places has already dried up and cracked, then you can solve the problem of squeaking in the following ways:
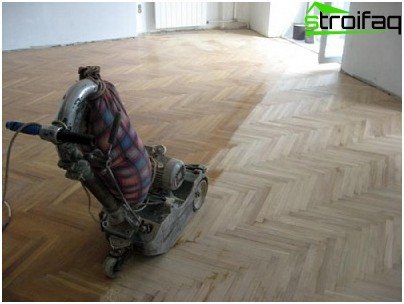
Parquet looping – a way to restore the technical characteristics of a wooden floor
- Scrap the old parquet with its subsequent varnishing. The varnish will penetrate the pores of the boards and into the gaps between them and the creak will finally stop.
- Conduct a special operation, codenamed “Find and Defuse”, in other words, find creaking dies, remove them with a chisel and replace with new ones.
- If the boards creak, but have a quite presentable appearance and you would not want to remove them permanently, then you can do this: gently pull out the die, clean everything under it and cover this gap with thin cardboard. Lay the die on top of the cardboard base and nail it tightly with nails so that the nail caps are recessed 1-2 mm into the parquet board. Next, redecorate the damaged plate: coat the nails and polish the surface.
There is another way to eliminate the creak of individual parquet dies, which consists in driving wooden pins into planks that make an unpleasant sound. To do this, between the creaking dies you need to drill a hole with a diameter of about 8 mm at an angle of 45 degrees to the floor surface. Thin wooden pins made of wood, lubricated with wood glue, drive into these holes, and cut the ends sticking out from the outside with a chisel. Fill the flaw with wood putty and polish to a shine.
If you have a parquet board creaking – you don’t know what to do and how to deal with it, then our tips will surely come in handy. Follow them and you will succeed.


