
Wood flooring
Wooden flooring is one of the most environmentally friendly and healthy flooring options. In winter, such a floor is not cooled too much, it is quite comfortable to walk on it barefoot. Moreover, under it, you can lay the heating system “warm floor”. The arrangement of the wooden floor can be performed on a solid foundation of concrete or wood, as well as on a soft earthen base – on the ground. Most often, such a floor is laid on the logs, which are a frame-crate made of bars, but sometimes installation occurs on plywood sheets or chipboard. Flooring of a wooden floor is the last stage of arrangement of such floors. The quality and durability of the entire floor will depend on how well the boards are laid..
Content
- Wood quality for flooring
- Solid wood flooring
- Work stages, sequence
Wood quality for flooring
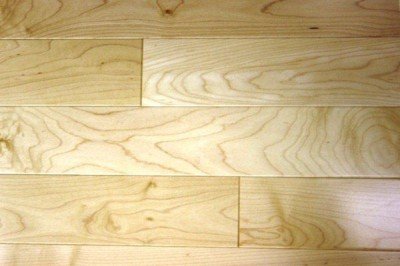
The floor is an element of the interior, which is often subjected to mechanical stress. Therefore, the material for its arrangement should be as wear-resistant and durable as possible. Coniferous wood is suitable – pine, spruce, cedar, larch, fir, and the most durable option is oak or ash.
Wood Requirements:
- Residual moisture should be around 12%. Neither damp nor overdried wood can be used. During operation, the wet dries out, and cracks and cracks form in the floor, and the overdried crack.
- There should be no visible imperfections of wood: chips, cracks, tar spots.
- Boards should be treated with flame retardants to reduce their fire hazard.
- Mandatory antifungal treatment of wood. The microclimate of the living room is most acceptable for the life of fungi and other pathogenic flora. Therefore, it is necessary to process all the linings and logs of the wooden floor, and it is enough to process the flooring boards directly only from the bottom.
- If you plan to open the floor with varnish, you need to pick up light and durable boards with a beautiful pattern.
There are several options for wooden flooring: solid wood plank, parquet board solid wood, glued parquet board, planed board and parquet. They differ significantly in size and characteristics. The technology how to make a wooden floor with your own hands will depend on what material you choose.
Solid wood flooring

Solid wood flooring – beautiful, practical and prestigious
Solid wood flooring is still the most prestigious, natural, natural and environmentally friendly flooring material. The use of massive boards goes back many centuries to the depths of history. To date, the processing of such a board has been improved: it has a spike and groove, which greatly facilitate installation.
Features of a massive board: length – 2-6 m, thickness – 20-60 mm or more, has a spike and grooves on both sides.
Work stages, sequence
1. We bring boards from the array into the room. They must be in a heated room for at least three days before installation, “getting used to” the internal microclimate.
2. Humidity in the room should be about 40-60%, and air temperature – + 20 ° C.
3. After preparing the base for the flooring, we determine the center line of the room. We measure the width of the room, divide in half and draw a line with a cord.
4. Set aside an equal distance from the center line to the wall with which we will begin to lay the floor. Without reaching 15-20 mm to the wall, we outline another line. On it we will begin to lay the floorboards. Insert wood gaskets into the gap between the wall and the line.
5. We lay the first row of boards clearly along the line with a spike to the wall. We align the boards and screw them with screws or screws from the side of the wall so that in the future the heads of the screws hide the baseboard.
Important! The length of the screws or screws must necessarily be 2-2.5 times greater than the thickness of the board. For them, pre-drill holes.
6. On the opposite side of the wall of the board we screw to the lags obliquely in the groove, at an angle of 45 °.
7. The next row of boards is inserted into the grooves of the boards of the first row. On the other hand we fix with screws in the groove. If the length of the boards is less than the length of the room, then we start laying not from the whole board, but from a piece of 500-1000 mm so that the joints of the ends of adjacent rows do not coincide.
Important! Alternate annual rings. Nearby adjacent boards should be with oppositely directed annual lines. Laying boards “open” is necessary if the length of the board is less than the length of the room.
8.
Laying floor boards “razdrazhka”
We stack all the other rows of boards “in the open” according to the algorithm.
Important! Boards are pressed tightly to each other. You can use pads for this. We fasten the boards to each lag.
9. The last row is fixed from the side of the wall with screws in such a way as to hide the baseboard fastening. Screw the screws into the front of the board and recess 3-4 mm.
10. Let dry for 7-15 days. Then we grind and varnish in several layers.
Massive flooring

Flooring laid with solid wood parquet boards
Fundamentally, the technology of laying the floor from a parquet board does not differ from laying from an array. The main difference between the parquet board from the array is that it is shorter.
Characteristics of a parquet board made of solid wood: length – 0.5-2 m, thickness – 18-25 mm, has spikes and grooves on four sides.
Features styling tips
- Only be secured with screws on the tenon side.
- It is imperative to carry out the laying “apart” so that the joints of the ends of the boards do not coincide in adjacent rows.
- If a plywood base is used, it is advisable to stick parquet boards to it. To do this, you can use mastic or glue and additionally fix it with self-tapping screws, as in the case with a massive board. It is necessary to glue over the entire area, without voids.
- In addition to the traditional direct styling, you can use the diagonal. Especially in a spacious room, laying at an angle of 45 ° to the wall with a doorway looks exquisite.
Laminated wood floors

The floor of the glued parquet board is less deformed by the temperature difference
Do-it-yourself flooring from a glued parquet board is done using the “floating floor” method or with the help of brackets. The principle of the “floating floor” method is that the boards are not attached to the subfloor, but only glued together at four ends. The method of attachment using brackets is that parquet boards are attached to the subfloor with brackets, which are hammered into the lower “cheek” of the tongue.
The characteristics of the glued parquet board: length – 0.5-2 m, thickness – 20-60 mm and more, glued from three layers, the top layer most often of valuable wood species – 4-5 mm, two lower layers of less valuable species . Has spikes and grooves on four sides.
The glued parquet board differs from the parquet board from the massif in that it is glued from three layers, due to which it practically does not change its size under temperature extremes. But at the same time, this type of board is less environmentally friendly, since it uses adhesive joints.

Three-layer glued parquet board
The glued board algorithm
The stages of work are not much different from laying a floor from a massive board:
1. We unpack the boards in advance and bring them into the room a few days before the start of work.
2. The non-front side of the boards is treated with drying oil or other protective paintwork. This is necessary to protect the wood from waterlogging..
3. We determine the center line of the room, outline the line with which we will begin laying the boards. At the same time, we retreat 15 mm from the wall or other obstacles: doorways, sewer pipes or heating.
4. We lay the first parquet lamella with a groove to the wall, apply all other panels without gluing.
5. The last panel in the row is cut 8 mm to the wall.
6. Each row does not start with a whole board, but with a piece that remains after the previous row.
7. After laying the first two rows, be sure to check their evenness with a cord. Now you can start gluing.
8. We glue the end and longitudinal spike of the parquet panel. We connect the panels very carefully with a hammer and gasket. Tighten with belts.
Important! When knocking panels together, glue should protrude from the joints. We remove it with a spatula and wipe it with a rag.
9. We press the last panel of the row with a screed.
10. We lay and fix the skirting board, pressing the parquet board.
11. After drying for 7-10 days, paintwork can be applied to the surface..
12. If, after laying and drying the parquet boards, “overhangs” appeared, the differences in the thickness of the board, they must be removed with a sandpaper. The sizes of abrasive particles of the skin should be 0.15 mm. By the way, a thickness difference of 0.1 mm is allowed. Grind necessarily along the fibers.
13. If mechanical damage is found after installation, they must be puttied. To do this, we use mastic, to fill the defect we use a larger volume of mastic than the defect itself forms, since after drying its composition is compressed. Fill deep defects with several layers.
Plank flooring
To perform in the garage or utility room flooring with your own hands, it is not necessary to buy an expensive massive board or parquet. It is enough to purchase ordinary boards from 20 to 60 mm thick. They do not have a “tongue-and-groove” system, which greatly facilitates laying, so it is necessary to ensure a tight fit of the edges.

Planed flooring is a good option for attic or utility room
Features of flooring from boards:
1. Stack and nail the first board.
2. We lay the second board side by side. We drive the brackets into the lag at a distance of 100-150 mm from the board. Put the gasket to the board. We drive wedges between her and the bracket.
Important! We drive the brackets into the first lag, following after 2 m. Ordinary staples split the lags, so we use a three-end squeegee bracket. We wedge the wedges until the second board is pressed tightly to the first.
3. Nail the second board, recessing the hats of nails or screws 3-4 mm.
Important! The gap between the boards can be no more than 1 mm.
4. We stack and fix almost all the boards according to this algorithm. We leave only those that cannot be condensed using lags.
5. The last boards are laid freely. The last board near the wall should create a gap of 12-15 mm. If necessary, cut off the excess.
6. If the wall is wooden, we drive wedges between it and the board. We press the boards and fasten them with nails or screws.
7. If the walls are plastered, we put plywood near the wall, thus protecting the plaster from mechanical damage. We put the last board and hammer it between the fixed boards and plywood with a hammer. If the gap is too large, we install wedges between the plywood and the board. We drive in the wedges, seal the boards, then fasten with nails.
Important! We strike with a hammer not on the board itself, but on a wooden gasket, which we stack on top so as not to leave dents on the front of the board. You can also use a rubber mallet or a mallet to not deform the boards.
Arrangement of wood flooring requires special care when performing work. It is necessary to check the accuracy of installation and the absence of cracks several times. And, nevertheless, this type of work is quite capable of doing independently.


