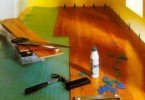
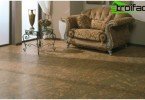
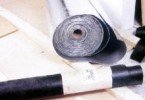
Laying linoleum on a wooden floor
Want to make home repairs on your own? That’s quite possible. The main thing is not to take up too hard work right away. What can any person do, even if he has no experience in repair work? Whitewashing the ceiling, wallpapering, laying linoleum. This is enough to make the house shine with new colors. Well, whitewashing and wallpaper are easy to figure out. But about linoleum is worth talking separately.
Content
- Linoleum – there is plenty to choose from
- Preparation of floors for laying linoleum
- Rough floor leveling
- We use plywood (chipboard, OSB or MDF)
- Apply a self-leveling mixture
Linoleum – there is plenty to choose from
The need of mankind for a high-quality, convenient and beautiful flooring has always been great. The earthen floor was replaced by clay, then concrete, covered with boards, then parquet – the history of the development of the floor is considered not centuries but centuries. After all, it is much more pleasant to walk on a flat, warm, even soft surface. So people thought of oilcloth – a mixture of oil, resin and wax on a fabric basis. Now science and technology are giving us ever new types of linoleum, using both natural and artificial materials..
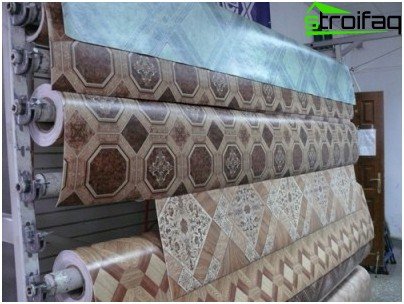
A variety of colors of linoleum
To repair an apartment with your own hands, it is recommended to choose PVC linoleum. But what qualities should be guided when choosing linoleum?
- Operational characteristics. For rooms, household PVC linoleum of medium strength is suitable, and for the kitchen and corridor it is semi-commercial, whose wear resistance is greater than that of the previous type, and just enough for active use.
- Softness and firmness. For an apartment, linoleum with a base of felt or foam, which gives the coating good sound and heat insulation properties, will be more convenient. The foamed base, moreover, almost does not shrink and does not fear water, which is why it is often used in the kitchen.
- Colors. The largest number of patterns and colors of multilayer linoleum made of foam materials. The thickness of the layer with dyeing is 2-6 mm, the thickness of the protective layer (on which the service life depends) is 0.15-0.7 mm.
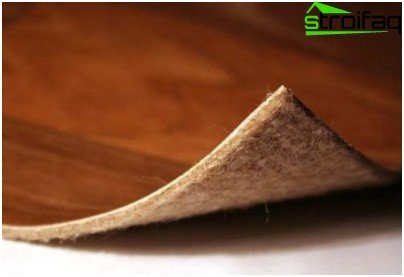
PVC linoleum with a non-woven (felt) basis
Remember that the most wear-resistant types of linoleum are used in those rooms where the load on them is maximum – the kitchen and the corridor.
For rooms with medium and light loads, increased operational properties are not required..
Preparation of floors for laying linoleum
Linoleum should be laid exclusively on a flat horizontal surface. Why so? The fact is that linoleum is a sufficiently thin and flexible coating, that is, over time it takes the form of the surface on which it was laid. And if the floor is uneven, with protrusions and tubercles, then in these places the linoleum will rub faster, or even break, forming cracks. Therefore, first you need to tidy up the base.
Rough floor leveling
Consider the situation with ordinary painted wooden floors. What you need to do before laying linoleum on a wooden floor?
- Remove the baseboard;
- Remove paint (this can be done with an ordinary spatula, heating the paint with a construction hair dryer);
- Check the strength of the flooring from the boards (if some boards began to rot, then they need to be replaced with fresh ones);
- Eliminate mobility and creak of floorboards (the easiest way here is to use a self-tapping screw to attach the boards to the logs);
- Deepen the heads of nails and screws into the boards, preferably to a depth of at least 5 mm;
- Fill cracks and chips, in patches with a width of more than 5 mm lay patches;
- Level the floor surface (it will be most convenient to walk with a parquet grinder);
- Thoroughly clean the floor of debris and dust (vacuum, mop, dry well).
If the height differences are small (not more than 1-2 mm), then you can proceed with laying linoleum. In case of too old floors, when perfection was not achieved, you can try a couple of the simplest options for leveling the surface to the desired state.
We use plywood (chipboard, OSB or MDF)
The choice of substrate depends on the roughness of the rough floor. The greater the difference in height, the thicker we select the sheets of the substrate. For small differences plywood from 5 mm thick is suitable. If we level the floor in the kitchen or bathroom, then the plywood must be taken waterproof. We select the plywood sheets so that they are stacked in strips with an offset relative to each other somewhere on a half-sheet (brickwork). We leave a gap of about 10 mm near the walls, but it should not be between the sheets.
We apply special glue or mastic to the pre-treated floor (add gypsum to the PVA glue to the state of thick sour cream). This mastic should perfectly fill the bumps. We lay the plywood sheets, fix them with screws with a pitch of 15-20 cm, maximally deepening the head. We glue the gaps between the plates and the heads of the screws and grind. And at the joints you can even walk a plane.
We are waiting for the plywood to dry, and we process it with hot drying oil (you can simply paint it with quick-drying paint for the floor). After drying, linoleum is already laid on a wooden floor..
Apply a self-leveling mixture
To level the floor in a simpler way, a self-leveling mixture is used. Such mixes for a wooden floor can be bought at hardware stores. With their help, differences up to 2 cm are equalized. However, it should be remembered that the mixture is quite liquid, therefore, during pre-treatment, it is necessary to putty well on all cracks, ensuring tightness.
We impregnate prepared dry floors with a special primer that enhances adhesion between the floor boards and the mixture. We close the walls at the floor surface with insulating material, and we glue the joint of the floor and walls with polystyrene foam, creating a deformation seam. In the doorway we put a wooden plank limiting the future floor.
We stele a reinforcing mesh (with an overlap of 5 cm), we fasten it with a construction stapler to the floor boards. Mixing thoroughly, add the dry mixture to the water. Fill the floor, evenly distribute the mixture with a rubber spiked roller or a rubber mop. We dry the floor in accordance with the manufacturer’s recommendations. After drying, we lay linoleum on a wooden floor.
Linoleum flooring on wooden floor
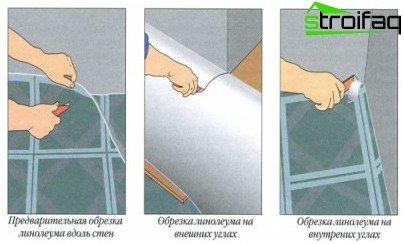
We lay linoleum on a wooden floor (steps 1-3)
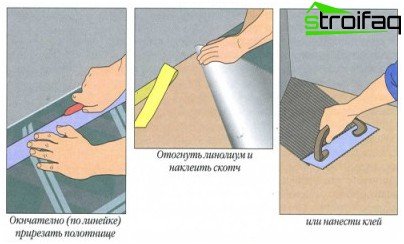
Lay linoleum on a wooden floor (steps 4-6)
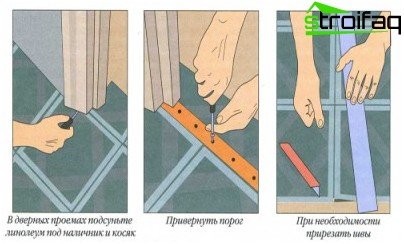
Lay linoleum on a wooden floor (steps 7-9)
The dimensions of linoleum are measured by the largest values of the length and width of the walls, taking into account doorways, protrusions and niches, with a margin of 5 cm on all sides. If you choose linoleum with a pattern, then add to the dimensions another rapport of the picture in each direction.
The temperature in the room where the linoleum will be laid must not be lower than 15 ° C (and the optimum is 18 ° C) and held for 48 hours before laying and the same after it. Humidity – 40-60%, the floors are maximally dried.
The purchased linoleum should be spread on the floor with the pattern up and left for a day or two, so that it is well straightened and acclimatized. If linoleum was bought in the winter, then before rolling let it stand for a day in a roll.
Linoleum is laid in several ways. For any of them, we first lay out the linoleum on the floor (an inlet at the baseboards of 4-5 cm – if the walls are with ledges or niches; if at least one wall is even, then we lay linoleum along it with a gap of 1 cm, an overlap is placed on the opposite wall). We level the linoleum canvas from the center to the walls. Linoleum should lie smoothly, without bends and creases. The drawing should go along the longest wall. We make cuts in the corners for a better fit of the coating to the walls. We do the whole trimming of linoleum in small segments along a metal ruler.
Free Stacking Rules
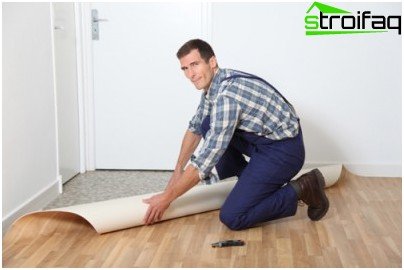
Free installation of linoleum on a wooden floor
It is used for rooms up to 20 square meters. m inclusive, where there will be no large load on the floor (for example, the constant rearrangement of heavy furniture). For such styling linoleum on a thick base, most often foamed, is well suited. Linoleum should be selected in a whole piece, so as not to make unnecessary joints, which with this installation can move.
We straighten the linoleum web along the skirting boards so that 10 mm gaps remain along the walls. Along the walls, the edges are closed with aluminum nozzles under the baseboard, in the doorway they are fixed with metal battens.
Double sided tape mount
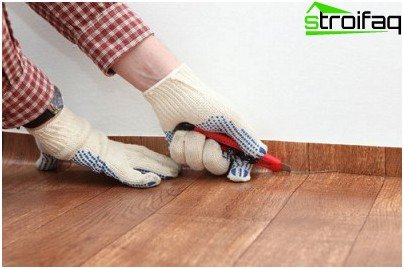
The stock of linoleum is cut off under the baseboard
To fix linoleum stronger, they put it on a double-sided tape. Glue the adhesive tape on one side around the perimeter of the floor. For better fixation of linoleum (if there are enough intense loads on it), the adhesive tape is glued with stripes over the entire surface of the floor, or crosswise at the places of highest load.
Linoleum itself is glued in parts. Bending half of the canvas, remove the protection from the tape. We straighten this part of linoleum, fixing it on tape. We bend the second half, repeat the operation. After the linoleum is evenly laid and glued, we trim the laps with 10 mm gaps near the walls. Next we lay the baseboard and fasten the linoleum rail in the doorway.
Bonding technology for linoleum
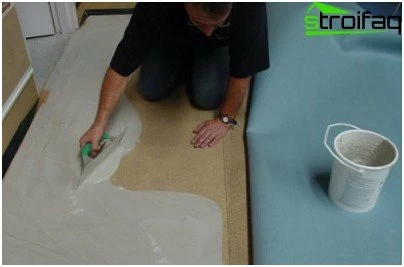
Application of glue for laying linoleum
If the room is more than 20 square meters. m or more than two strips of linoleum will fit, then it needs to be planted on glue. Which glue to use is most often indicated in the instructions for linoleum, and a seller in a hardware store can also give advice on this..
First, we cover the floor and the lower part of linoleum with a primer, and only then proceed with sizing. Just like with scotch tape, gluing linoleum make parts. Having bent off about a third of the canvas, with a notched trowel, evenly distribute glue or mastic on the floor. We lay linoleum on top of the adhesive layer, spreading it and carefully pressing it to the floor. It is best to press linoleum with a special heavy roller or wooden block. We carefully monitor that no air bubbles remain between the floor and the floor. We move the roller or block in the direction from the center to the walls. In the same way, glue the remaining linoleum.
We process the edge of linoleum along the walls in the same way as in previous cases, put the skirting board and fixing rail.
The glue should dry for 7 to 10 days. During drying, we make sure that there is no swelling of linoleum. If the bubble still appears, put a plywood sheet on it, and put something heavy on top, for example, a sand bag.
The connection of two or more strips of linoleum
If the room is too extensive or just not lucky to find linoleum of the required width and you have to put two (or more) strips of coating, then such joints also need to be glued. The overlap of the strips should be 10 cm minimum. We carefully monitor the coincidence of the picture. We cut both layers approximately in the middle of the overlap. We get the perfect combination of cloths butt to butt.
Now these joints need to be glued. The most convenient way is cold welding. Glue a masking tape along the seam. The tip of the tube with cold welding glue is carried out at the junction of the strips. The fusing adhesive must penetrate the linoleum seam at least 2-3 mm. Excess glue is left to evaporate. Never remove by yourself! After the edges of the linoleum are completely welded, the masking tape can be removed.
That’s all the basic secrets of the correct laying of linoleum. You see for yourself, the worse your sex is, the more you will have to work. But if you do everything honestly, then for 20 years you will not return to repairing floors. Well, unless you get tired of your chosen color. By the way, if you level the floors with plywood, then if you want, you can lay the laminate on the bored linoleum without additional preparation.
Have a nice repair!


