How to level a wooden floor
The wooden floor, even the highest quality, over time “gets” cracks; boards begin to bend, bend. But who wants the housing to be an ugly sight? Exactly – to nobody. Having made the decision to “refresh” the living space by laying laminate, linoleum or tile, it is important to understand that only a well-aligned wooden floor can become a reliable “base” for a new coating. Why is this event so important? And most importantly – how to level the wooden floor, what methods exist for this? We will try to answer these and other questions in this article..
Content
- Why level the wood floor?
- Scraping: difficult, but possible
- The use of self-leveling mixtures
- Puttying the floor
- Laying plywood sheets
Why level the wood floor?
Many people are interested in the question: why even level the wooden floor? We hasten to assure that this procedure is extremely important. Indeed, cracks and “humpiness” of the old coating can adversely affect the new “decoration” of the floor. And it doesn’t matter whether it is hard or soft; will it be tile, carpet, linoleum or something else – troubles with the wrong approach can not be avoided.
But if a soft (for example, linoleum) coating can still forgive you for small (or rather tiny) wooden irregularities, then the tile or laminate will be “indignant” at the slightest flaws. They are sure to “swell” in a defective place.
The most popular and effective ways of leveling a wooden floor today are considered to be:
- hitching;
- the use of self-leveling mixtures;
- puttying the floor;
- laying plywood sheets.
Scraping: difficult, but possible
Perhaps the most difficult way to align, but definitely effective. Optimal for those who do not plan to install a new coating, but decided to limit themselves to painting or varnishing “what was”. Allocate mechanical and manual scraping. The first is carried out with the help of a cycling machine, the second – with the help of a manual cycler (glass fragment). The manual process is extremely time-consuming and sometimes does not justify itself. Therefore, a mechanical method is more preferred..
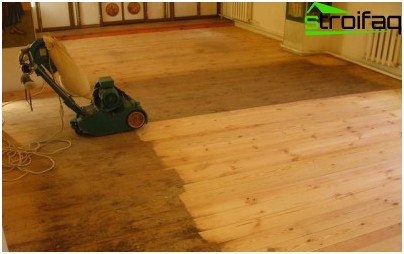
Wood flooring is done if the owners do not want to change the flooring
Thoroughly prepare for work with the looper. You will need:
- Headphones – to isolate yourself well from the noise it makes;
- respirator – so as not to breathe dust in the process;
- gloves, tight mittens – so you reduce the feeling of vibration from the device.
Important! Prepare not only yourself, but also the “processed” room: cover the furniture with polyethylene, remove the curtains, paintings. So you will be able to protect things from the inevitably formed fine dust.
Particularly dangerous for the machine blades is nails and buttons. Hats should be completely drowned on the floor..
Having finished with all the preliminary manipulations, you can proceed to the intended work. They begin the “transformation” from the corner and “move” the snake. So the first layer is removed.
Now you should close all the cracks, holes, holes with putty of the most suitable color. The looping process can only be continued after it has completely dried and polymerized..
If individual boards are badly damaged, they must be removed … and turned upside down, laid back. The procedure will help you avoid the “variegated” color scheme of the wooden coating: replacing the old boards with completely new ones does not work to maintain a uniform tone.
Floor treatment in hard-to-reach places (at baseboards) is carried out by a manual tipper.
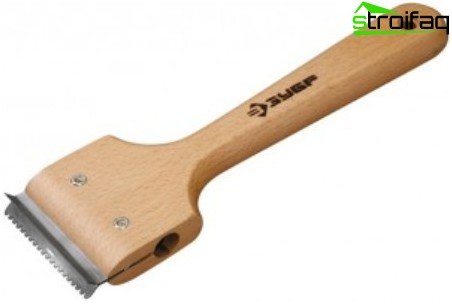
Manual cycler can be useful for processing hard-to-reach spots
At the end of the work, the room must be vacuumed – but do not rush: let all the dust settle. Before varnishing or painting, wipe the floor with a cloth dampened in white spirit..
The use of self-leveling mixtures
Does your plans include varnishing? Determined to lay laminate or tile? That means you can’t do just one hitching. Especially if you don’t even look at the floor without a shudder.
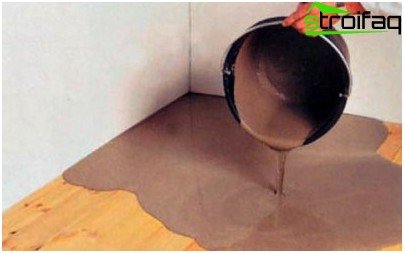
Self-leveling mix for wood flooring
The best option in this situation may be the use of self-leveling mixtures for wooden floors. With their help, you can get an exemplary smooth coating with a thickness of 5 to 20 mm.
How does alignment of this kind?
- Initially, the wooden base is brought in proper form. “Springing” structural elements must be made stationary – self-tapping screws or screws will come to the rescue.
- All hats, as in the case with hinge, need to be deepened into the floor.
- The base must be sanded, thereby cleaning it from the remnants of paint, varnish, dirt.
- All open slots and voids are closed up, covered with acrylic putty or with the same self-leveling mixture, diluted “thicker”.
- After drying thereof, the floor is primed with a special moisture-proof primer. It will ensure good adhesion of the mixture to the prepared base..
- Walls around the room perimeter should be covered with insulating material..
- In places of the “junction” of walls and floor, a seam of polystyrene foam is created.
- Next, the level of the bulk floor is determined. Be sure to consider the minimum and maximum coating thickness declared by the manufacturer..
- A reinforced mesh is attached to the primed floor with a construction stapler. The joints of her paintings are connected with an inlet of at least 5 cm.
- The mixture is prepared according to the instructions, thoroughly mixed with a drill with a nozzle. Let it stand for about 15 minutes, then mix again.
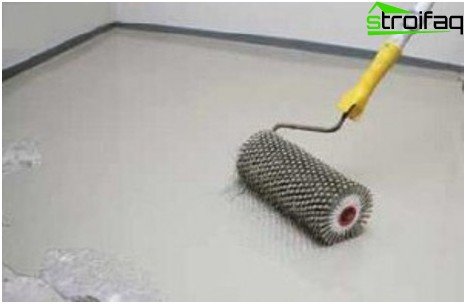
- The prepared “potion” is poured onto a reinforced surface; bubbles are removed with a roller.
- The surface is leveled with a spatula, rule or rubber mop.
- Drying must be done in full accordance with the recommendations on the packaging. A high-quality result is impossible without observing the optimal thermal regime.
Removing bubbles with a roller
Be careful! Excess water during the preparation of the mixture can provoke its separation. If you want to not only level the floor, but also raise its level, you should fill in two steps.
Puttying the floor
It should be noted the rapid growth in the popularity of filler mixtures based on PVA and sawdust (wood). Thanks to them, it became possible to level wooden floors of a sufficiently large area. And the cost of such putty makes the process more cost-effective..
Procedure:
- on the cleaned floor lighthouse rails are packed (in level);
- the space between them is filled with a mixture (consistency a la “thick sour cream”);
- so that the sawdust does not pull the water out of the glue too quickly, it is recommended to moisten it first and then squeeze it slightly;
- if you need a thick layer of putty, it is better to do this: form a coating in layers of 1-2 cm – apply each subsequent after the previous one has completely dried;
- the result is checked by the level. If necessary, apply additional servings to the “problem” places.
Lack of putty – an impressive time period for drying PVA.
Laying plywood sheets
Quite a popular, one might say “hit”, method of leveling a wooden floor.
And it begins with the installation of beacons – self-tapping screws screwed to the desired height. Their specific location is the corners of a square with a side size of 20-30 cm. Moreover, the distance directly depends on the thickness of the plywood: the thicker the plywood, the less often lighthouses are installed. Then lags (strips of plywood) are laid out. They are attached to the floor with glue or screws. If “voids” are visible between the lags and the boards, it is necessary to fill them with veneered plywood blocks.
Preparation of plywood sheets
It is considered to be optimal to cut plywood sheets into squares with a side of about 60 cm. Carefully consider the ends of the blanks – are there any delaminations? If you still find one, it is recommended to replace the defective sheet.
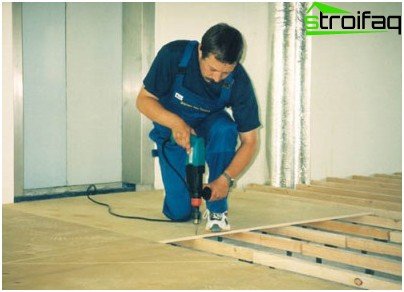
With the help of plywood laid on logs, the floor is leveled mainly in rooms with high ceilings.
Lay the finished squares on a pre-formed grid of lags, observing the location of the joints of plywood – they should fall on the lags. The laying itself is done by the method of brickwork – with offset – in order to avoid the intersection of four joints. Secured plywood with countersunk head screws.
Interesting! Having previously marked the joints with chalk, you will be able to save time and energy: improvisation “in the process” is more resource intensive.
This alignment allows you to get a fairly even rough floor, ready to “accept” any coating.
Alignment of the wooden floor is, of course, not an easy matter, but if you strictly adhere to the algorithm of actions and follow professional recommendations, everything will surely succeed.


