Do-it-yourself wooden floor repair
The wooden floor is a durable, warm and environmentally friendly coating. It occupies an important place in the interior of the house, so you want to keep its pleasant appearance for as long as possible.
However, any wooden floor, no matter how ideal its design, having served several decades, needs to be repaired – partial or capital. Uneven loads, temperature changes, changes in the humidity level lead to cracks between the boards over time, chips and cracks on the floorboards, and the floor starts to creak unpleasantly when walking. Therefore, the repair of the floor in a wooden house or apartment will be simply inevitable.
Content
- Overhaul of a wooden floor
- Partial or cosmetic option
- Ways and methods of alignment
- Sealing cracks in the floor
- Replacing damaged boards
- Floor squeaking
- Wood floor painting
Overhaul of a wooden floor
If the boards are rotten, the floor creaks and staggers, then, of course, it needs a complete overhaul. Consider the main stages of the repair process of a wooden floor, when it is supposed to change the flooring:
- dismantling floor boards;
- dismantling lag;
- beating a horizontal line;
- lag installation;
- fixing boards;
- installation of plywood or chipboard.
Floor repair begins, of course, with the removal of boards and the dismantling of the lag. We immediately discard old nails, as self-tapping screws will be used in the future. We also throw out a rotten tree.
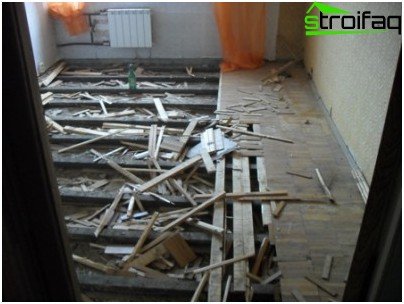
For major repairs, a complete dismantling of the floorboards is carried out
Next, we beat the horizontal line around the perimeter of the room. To do this, measure the distance from the floor to this line. We mark the highest point. We retreat from the floor in this place at a distance that is equal to the thickness of the log, put a mark. We measure the distance from this mark to the horizontal line. At all angles we put the same marks. Connecting new line labels.
The next stage of repairing a wooden floor is opening the boards and logs with a special tool that will protect the wood from mold and bark beetle. Let the tree dry well.
Then follows the fastening lag. First, nail lags on the dowel to the wall (along our line, around the perimeter). Dimensions of dowels – 10x100mm. Where the lags hang at least a little above the base, we make backups every half meter. For this purpose, wooden blocks, wedges, pieces of old fiberboard, plywood are suitable. Then we fasten the lag to the main square, perpendicular to the boards. We start them every 50 cm. If there is not enough wood – buy.
While fixing the logs on the floor, we pull the threads perpendicularly, every half meter. From the bottom we support with planks, not forgetting to leave a gap between the lags and the thread (1mm). We nail 10x100mm dowels to the floor in places where there are stops.
The next stage of repair is board fasteners. For this we use wood screws. For boards with a thickness of 35 mm, for example, 55-60 cm long self-tapping screws are suitable. Given that, most likely, the old boards are bent, it is better to turn them face down to get a smoother.
Important! Often at the joints of the boards the floor creaks, since when they bend, they rub against each other. To avoid this, a small gap must be left between the boards.
The final stage of the overhaul of a wooden floor is the fastening of chipboard or plywood to the boards. This is because modern coatings (linoleum or laminate) are laid only on a flat surface. We fasten plywood with wood screws. The repair of the wooden floor is over. Next you can lay a new coating.
Partial or cosmetic option
All homeowners are well aware that it is easier to prevent the occurrence of defects than to eliminate them. Sex in apartments is different. But everyone wants him to be even. How to do it? What is required for this: change some boards or disassemble it completely?
Ways and methods of alignment
When the floor is slightly uneven, this can be easily fixed with a minimum of materials and tools. If the wooden floor is quite outdated, the boards need to be removed, flattened and laid down, again adjusting them to the size of the floor. This method is relatively not expensive, but rather laborious and long..
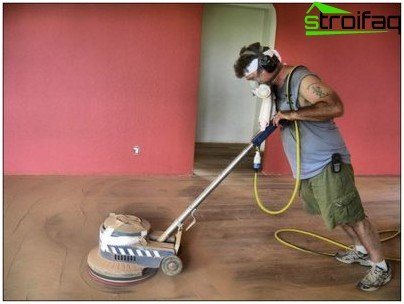
Using a grinder to level the wooden floor with slight differences
A faster result can be obtained using a grinder for scrapping a wooden floor. This method is also quite time-consuming, and also dirty, and before starting work, you must definitely recess the heads of nails and screws so as not to damage the tool. This method is used to level the floor with slight differences..
How can I even level the wooden floor? Modern science has created a technology that allows you to apply screed on the surface of the plank floor with special compounds. This way faster floor leveling is achieved..
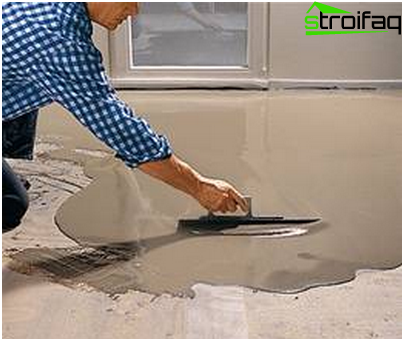
Screed wooden floor with a special composition
In this process, certain conditions must be met. For example, it is important to use materials from proven manufacturers. Such mixtures are easily leveled, reinforced with fiber and quickly harden. Recommended mixture layer thickness – not more than 10 mm.
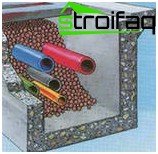
There are several other ways to level the floors. One of them consists in filling all the voids between the lags. Expanded clay is an excellent material for this. Styrofoam is laid on top, then drywall or plywood is attached with screws.
Another way – lining under the logs of pieces of roofing material, plywood or hardboard. At the same time, the costs will be minimal, because each owner will have such materials in stock. This method is cheap, but time-consuming and very long, since you will have to raise all the boards in places of bumps in order to fix the defects.
Sealing cracks in the floor
What are the causes of cracks in the floor? In fact, there are many, but the most common are:
– drying and divergence of boards over time;
– marriage when laying a wooden floor;
– high level of humidity;
– the appearance of rodents in the area
other. There are several methods for removing gaps..
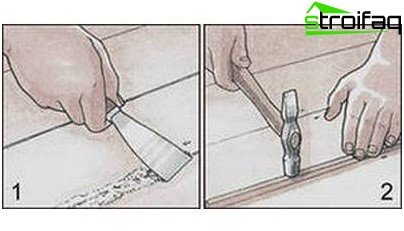
Sealing gaps between floorboards using putty, putty knife and hammer.
- Sealing with putty. You can not buy putty, but make a paste of paper and PVA glue. In the paste, you can add stain to match the color of the floor. Be sure to remove debris and dirt from the cracks so that everything is perfectly clean. We fill the gaps with paste (paper + PVA), smooth it, level it with the floor.
- Using a thin strip to seal gaps. This procedure is common among summer residents. It takes much less time to complete it. A little PVA is poured into the gap, after which a wooden plank is hammered into it. Hammer strokes must be applied carefully so as not to damage the floor..
- This technique is difficult and complex, but doable. The boards are laid one to the other so that there are no gaps between them. Of course, this will take more time, as some sections of the floor need to be torn off completely. But it is used in cases where there are too many gaps in the area.
Replacing damaged boards
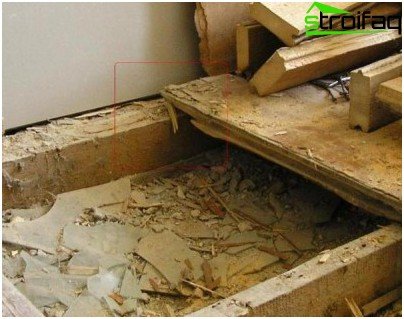
For partial replacement it is enough to dismantle only old and damaged elements
If the boards from which the floor is laid have straight edges, replacing the damaged fragment is not difficult. Such boards are stacked butt to butt. Consider replacing boards of just such a plank floor.
To do this, you must have the following tools and materials:
- nails, hammer;
- crowbar;
- saw;
- wood trimmings;
- pencil
The floor repair process by replacing boards is done in the following order:
- First of all, make sure that there are no communications under the damaged boards..
- It is necessary to decide: the entire long board will be replaced or only the damaged area. If the second option is chosen, you need to find out in which place the beams go under the floor and mark the cut line so that it falls exactly in the middle of the beam.
- The damaged beam must be raised with a crowbar. In order not to damage nearby boards, the crowbar must be supported on a wooden trim.
- The board needs to be raised high enough to place under it cubes-scraps for fixing in this position.
- The damaged area of the board is sawn along a marked line and removed.
- If you need to remove the entire board, gradually raise and saw off area after area until the entire board is completely removed.
- Changing only a small fragment, the replacement of the damaged area is cut out, using the old as a sample. Insert it into place and nail it with nails, drowning them in the board. If the new board turns out to be thinner, the supports from pieces of wood are adjusted to the beam, which compensate for the height.
- A fresh patch is painted to match the old boards.
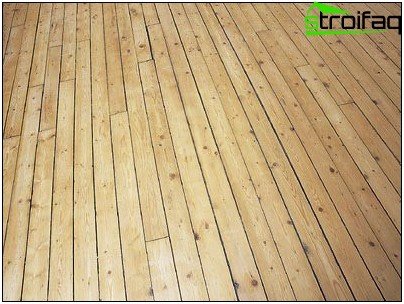
The technologically rather complicated replacement of tongue-and-groove boards further complicates the selection of material similar in structure and color to its predecessor.
Replacing tongue-and-groove boards, which are connected to the castle among themselves, the process is more complex and time-consuming.
Floor squeaking
Probably any person is familiar with such a situation when you wade in the dark through the apartment on tiptoe so as not to wake the household, and the wooden floor makes an unpleasant and sharp creak under your feet. This situation happens, unfortunately, when the aging of the wooden coating occurs. But wood is considered a durable and reliable coating, but, as you can see, there are “their” exceptions. Do not worry, however, about the unwanted squeak, as this problem is solved quite simply.
In most cases, this defect can be eliminated independently. Most often, creak is produced by boards unreliably attached to beams or to lags. In order for the “creaking floor” to shut up, a nail or wedge is hammered in the right place. There are three options for resolving this issue..
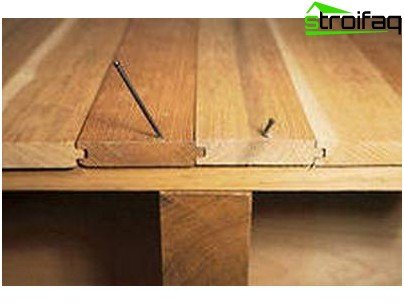
The “creaky” floor is eliminated by hammering a nail or wedge in the right place
Option one: wedge from below. If there is access from below to the floor boards (for example, when the floor is the ceiling for the basement), you need someone to walk on the floor, observing in the meantime in the basement the movement of the boards relative to the beams. Having determined which of the boards is the “culprit” of the squeak, you need to carefully hammer the wooden wedge into the space between the board and the beam. The board does not need to be raised so that it does not appear above the rest of the floor.
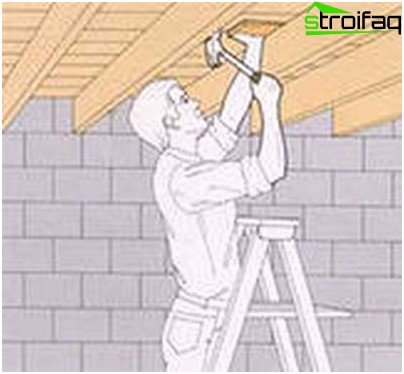
Driving a wedge from below
Second option: screw on top. If there is no access from below to the floor, the boards are fixed from above. In creaking boards, holes are drilled over each of the beams. The boards are fixed with screws 37 mm long (No. 8). So that the boards are securely attached to the beam, the holes are drilled at an angle. The heads of the screws are puttied and polished after drying.
Eliminating squeaking in the floor by driving a screw on top
Option three: graphite in the gap. The boards can also creak due to friction with each other. You need to go back and forth on the floor and determine exactly where the creaks. Talc or graphite is poured into the gap between the boards, or wooden wedges are driven in. If all this does not help, the boards are fastened with countersunk screws.
Carrying out these operations to eliminate the creaking of the floors will return you peace and quiet to the house!
Wood floor painting
Repair of a wooden floor in an apartment usually ends with updating the flooring. Most often, it is painting the wooden floor. But even this seemingly simple matter has its own characteristics, which should be taken into account..
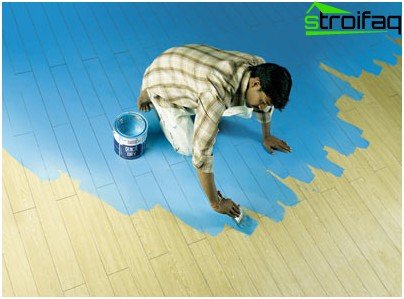
The wooden floor is usually painted twice
So, the floor is painted in the following sequence:
- Surface preparation. Wash the floor with warm, soapy water..
- Scraping off old peeling paint with a spatula.
- The loose boards are nailed. Knots plan, heads of nails are driven to a depth of 4 mm.
- Remove old paint, putty, debris from crevices. Places where old paint has worn off are primed with drying oil.
- Large gaps can be filled with sawdust putty (a 1: 1 mixture of oil putty with sifted dry sawdust). Small gaps can be filled with a putty mixture (glue putty – in dry rooms, half-oil – in wet).
- Putty is applied with a wide spatula. The spatula is moved parallel to the boards. Perhaps solid puttying. In this case, if, after drying, large irregularities are detected, the floor is putty again.
- After grinding and dusting, the floor is primed with drying oil. The primer dries in 2-3 days. Then they start painting the floor.
- Most often, floors are painted with oil paints, which are produced specifically for floors. Coloring starts with skirting boards. To avoid staining the walls, use a small brush.
- Floors are usually painted twice. The first time the paint may be thicker, the second time it is slightly thinner. For best results, re-painting is performed only after the first layer has dried. To get a decorative glossy effect, after drying the paint, you can also coat the floor with varnish. In the end, when the floor has dried well, it is washed with hot water..
Thus, the repair of the floor came to a logical conclusion. Carrying out the repair of a wooden floor with your own hands, you can significantly save the family budget and spend it for other purposes.
So that the wooden floor does not need repair as long as possible, it is necessary to properly care for it, protect it from scratches, and try to ensure that the temperature and humidity conditions are observed in the room. Experience has shown that it is much easier to prevent damage than to repair it later..


