How to make a floor with your own hands
Well, master craftsmen? How are things going with apartment renovation? Are you going to do something with the floors? But there is a good idea – to make flooded floors with your own hands. By the way, it’s not so difficult. It’s only worth it to do this together with an assistant, then the possibility of error is significantly reduced.
Content
- Why choose flooring?
- Getting ready for the upcoming work.
- Old floor preparation
- Primer prepared surface
Why choose flooring?
Every day the influence of modern technologies on our life is increasing. So the floor is one of the latest innovations. Of course, for industrial premises such floors have been used for quite some time. However, such an innovation did not come to the household, apartment level not so long ago. But these floors have enough advantages.
- Flood (bulk) floors are characterized by excellent strength, wear resistance and a significant service life – up to 40 years
- When properly poured, the floor is monolithic, without seams and crevices and represents an almost perfectly flat surface.
- After drying the filler floor, it does not emit toxic or harmful substances and is not afraid of the effects of chemically active drugs
- One of the fundamental properties of a jellied floor is excellent waterproofing.
- A properly poured floor is easy to clean, as it does not absorb dirt and dust.
- And finally, thanks to the latest advances in this area, the floodplains have significant decorative characteristics and retain their color even under the influence of intense ultraviolet radiation
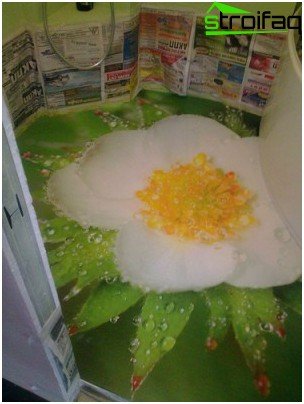
Flood Floors – 3D Design Photo
Since scientists have done a good job of increasing the variety, now you can choose different colors and textures of the jellied floors. Your new floor may be shiny or matte, plain or patterned, smooth or rough.
In addition, you can use the floor fill to level it before laying other flooring. Parquet, laminate, linoleum or carpet can be laid on the level of the floor..
Getting ready for the upcoming work.
Old floor preparation
The most difficult part in the technology of flooded floors is the correct conduct of preliminary events. And you need to start with preparing the foundation.
On which substrate can floors be poured? There are only three options:
- concrete screed
- wood floors
- ceramic tile
But in any case, the foundation for the floor should be strong enough and not prone to change, otherwise your floors will not be able to last as long as the manufacturer promises.
It is important to know: no matter what the basis for the jellied floor, its humidity should be minimal. If this condition is not met, the floor may become deformed due to swelling or even crack.

This is the sandwich and it turns into a jellied floor
So, concrete screed is the best option for the foundation. You only need to make sure that the concrete floor is sufficiently intact (without cracks), dry (concrete moisture before pouring – no more than 4%) and clean.
For wooden floors, there will be more basis for work – checking the strength of the boards themselves and their fastening to the logs, filling the cracks (the substrate must be airtight), humidity control (for wood – a maximum of 10%) and again cleanliness.
Ceramic tiles are also tested for integrity and tightness. If you hear a dull sound when tapping the tile base, you need to remove the poorly fixed tile and either putty this place or re-lay it more reliably.
It is important to know: any foundation under the underfloor should be clean – free of dust, debris, old paint, glue residue and grease stains, therefore it is best to vacuum and degrease the foundation before the primer
After making sure of the strength and tightness of the base, you should check it for evenness. Various flooring mixtures can be poured to a height of 2-3 mm to 2-5 cm. It would seem that this is quite enough not to think about leveling the surface of the base. On the one hand, this is indeed so, but dry mixes of the jellied floor are not cheap. Although, if you are so rich, you can fill the floors in several layers, achieving the perfect plane. However, more economical craftsmen prefer to walk along the base with a grinding machine, then to fill the floors with a layer of optimal thickness (no more than 5 mm).
Primer prepared surface
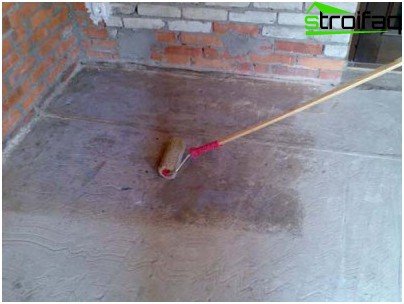
Application of primer on a dry and clean surface
For the most complete adhesion of the filler floor to the base, the prepared surface of the old floor must be primed. The primer should thoroughly fill all pores or even microcracks of the surface. Therefore, priming is best done in two stages. In general, do not spare the primer – for the price it is quite affordable. But if the surface is poorly primed, then you will have to put a lot more on the floor correction. Particularly expensive in this case are difficulties in removing the incorrectly filled area.
So, ground the surface using a roller. You can use both a brush and airless spray, but the roller gives an optimal result. Track the behavior of the primer. Foaming and discoloration may indicate increased moisture in the substrate. Then you have to dry everything thoroughly to remove excess moisture. The second coat of primer is applied only after the original has completely dried. As a result, we should get an even shiny surface.
The primer should dry at least 4-6 hours, but not more than a day. And only after that we begin to flood our new floor.
Jam floors – mixture application technology
Solution preparation
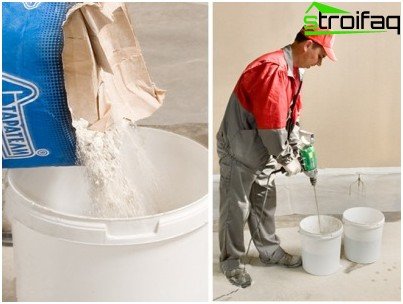
The preparation of the mortar for the floor is carried out according to the manufacturer’s instructions, it is recommended to mix the mixture with a drill in two steps
It is necessary to make a solution for a jellied floor, being guided by the instruction on packing of mix. Of the general recommendations, you should know the following:
- dry mix is always added to water
- the amount of water should clearly comply with the instructions, since with more water your floors will be of poor quality and will quickly become cracked, with a lesser amount, the solution will not spread normally, it may cause sagging and unevenness due to too quick setting of the solution
- the resulting solution must be thoroughly mixed, it is best to do with a mixer nozzle on a drill
- the solution should be completely homogeneous, without clots or lumps
It is important to know: you can check for the correct proportions of water and the mixture as follows: we cut off the bottom of a plastic cap with a diameter of 5 cm and a height of 4.5 cm (for example, caps from any aerosol). Having established the resulting ring on a smooth surface (glass will fit well), fill the prepared solution into it to the edges, after which the ring is removed. In the case of the correct consistency of the solution, the stain should spread 16-18 cm
The solution begins to harden after 40 minutes (more accurate time is indicated on the package), so during this time it must be applied to the base. The process should be continuous, therefore it is better to work together – one pours, the other prepares the next portion of the mixture.
Self-leveling floor
The procedure for filling floors with a prepared solution is quite simple. Photo: flooded floor – stages of correct pouring.
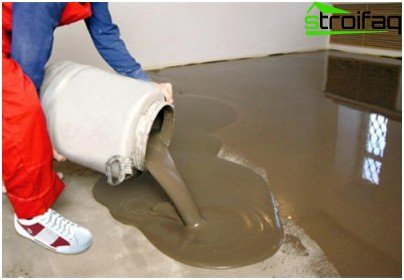
The finished solution is poured onto the surface of the base
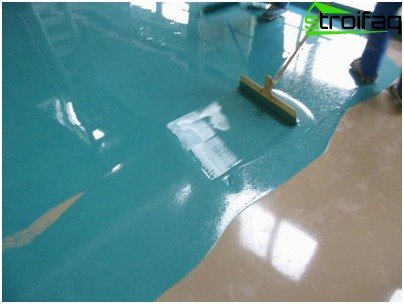
Using the squeegee, we maintain the desired coating thickness
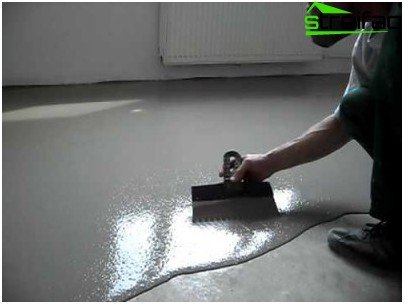
Even distribution of mortar with a spatula
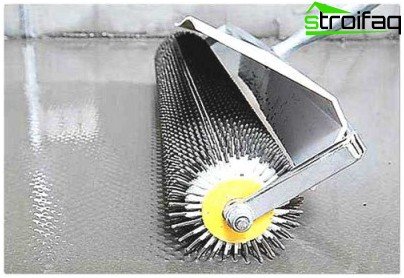
With such an aeration roller with long spikes, we expel air bubbles from the filler floor
Starting from the wall opposite the entrance, fill the areas with the prepared solution. We level it to the desired thickness with a squeegee or spatula. We remove air bubbles from the still liquid mixture with an aeration roller. In order not to damage the already flooded areas, on which additional work is carried out, you can use kraskostoy – special soles with spikes, attached to the shoes.
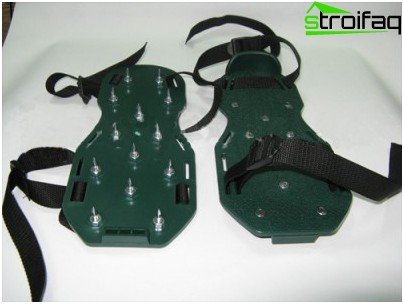
Using paintbrushes, you can walk on a liquid flooded floor
It is important to know that during the drying process of a freshly flooded floor, drafts and the influence of direct sunlight should be avoided, otherwise the drying will be uneven and various disturbances can occur – from the “caramel” effect (when the top layer is dry and the liquid remains inside) to the explosive separation of the area of the flooded floor from basis (with uneven heating by the sun)
To obtain a monolithic plane of the jellied floor, it is recommended to fill the entire room in one go. This ensures the absence of joints and seams. If the room is too large, then it is better to consult a specialist. Professionals will be able to dock areas flooded at different times, with the formation of a common flat surface.
That’s all – in a day (or how much is allotted for drying by the manufacturer) at the exit we get a beautiful flat floor. If you decide to stop there, then you can cover the filler floor with varnish. And if you want to put some more coating, then the next step will be its laying. But more on that in another article..
Have a good repair and strong floors!


