How to build a cellar in the country with your own hands
Having a private house, garden or agricultural land, you can’t do without a cellar. Indeed, rich harvests require a secluded reliable place in which they could be stored without rotting or rotting. It is better to think over the question of storing vegetables, food preparations and juicy fruits at the planning stage of a summer cottage or at home so that your head does not hurt about it later. You can build a good cellar with your own hands if you know a few tricks and secrets. Read in our article how to do it wisely and at a minimum cost..
Content
- Preparatory work
- Groundwater and soil: determine the humidity and remove the issue of location
- How to determine the proximity of groundwater
- How to fight for a dry cellar
- A few more words about waterproofing
Preparatory work
To build a cellar on your own, you need to provide for several points: features of the site relief, moisture, soil structure and the depth of groundwater, the depth of freezing of the soil in the cold months.
Groundwater and soil: determine the humidity and remove the issue of location
It is best to select the most dry place under the cellar, it is better if it is a terrain with a slope – so there will be less work with arrangement and digging. Before you make a cellar with your own hands, you need to determine how close to the surface in your area there are groundwater. If you deal with this issue, consider that half of the case is already ready. You should have at least a rough idea of how deep the water deposits are, and whether they exist at all, to know what kind of water.
Underground water layers are divided into two types:
- Groundwater (formed by condensation of atmospheric precipitation, filtered by soil).
- Vakhovodka (a direct consequence of melting snow, prolonged rains; they are seasonal in nature – such water is temporary, usually does not have constant recharge, rainfall has passed – the water has passed too).
What level of water is safe for building a cellar with your own hands? – One that will not provoke the decay of your stocks. The optimal level is at least half a meter below the level at which you plan to make the floor of your cellar. Thus, if the overhead or ground moisture is, for example, at a level of 2.5 meters from the surface of the earth, the cellar under the house can be buried no more than 2 meters.

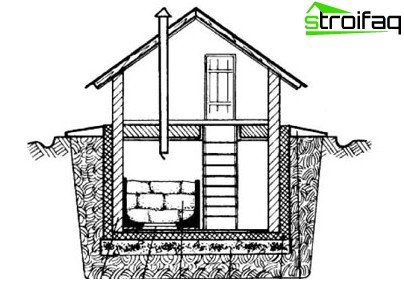
The basement of the cellar can be buried, semi-buried or ground
How to determine the proximity of groundwater
There are two ways to do this:
- To study the vegetation on the site – if the territory is dominated by water-loving marsh grasses (coltsfoot, sedge, reeds, sorrel), water is close.
- Test the soil on the egg and wool. This is done as follows: a ball of wool is degreased in soapy water and dried. Take a piece of land cleared of turf, put six on it, from above – just laid egg. We cover the whole thing with a frying pan or clay pot, cover it with the removed turf from above. The next day, the result will be visible – if the egg remains dry, and only the coat is moist, the water is deep, if both elements are dry, there is nothing to worry about. But if the condensate is left on both the wool and the egg, you cannot build a basement. Remember: this technique only works adequately in steady, dry weather..

The cellar can be located right by the house or stand apart
How to fight for a dry cellar
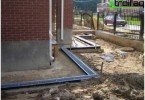
If there is no choice, and there is no dry territory on the site, but the cellar is still necessary, you can deceive nature by having won a place for storage of stocks: before digging a pit along the approximate perimeter, dig holes half a meter deep and 40 cm in diameter, they will serve to collect excess fluid. Remove draining water as the pits fill up..
Also remember: deepening the main foundation pit, it is necessary to proportionally remove the water collectors. Having reached the desired depth, level the bottom of the cellar, carefully tamp the surface, lay a solid layer of clay, always oily (2-3 cm is enough). Without waiting for the clay to dry, fill the surface with a 10-centimeter layer of concrete (grade not lower than m-300). After a week or two, lay a cement screed on top. Done – this floor can withstand increased moisture without difficulty.
A few more words about waterproofing
The external waterproofing of the cellar is simple – using heated bitumen on the walls, ceiling and floor of the room creates a waterproof film 2-3 mm thick, which will reliably protect your vegetables and workpieces from excess moisture.
To do this, pre-level and plaster all the surfaces to be treated with a cement mortar (sand and cement in a ratio of 1: 2), rub and cover with bitumen or resort to penetrating waterproofing – penetron or squid.
If the soil is too clay and watery, build a clay castle for water in the cellar with your own hands – a video on how to do this is enough on the Internet. For this event you will need sand, gravel and pipes. Drainage is installed under the floor of the underground room. It is better if you can make an exit for water drainage in a special drainage well or a ditch.
Be sure to control the humidity level in the cellar.
General principles of construction
Like any underground structures, the cellar is best to dig in the summer – at a time when groundwater goes as deep as possible. Also follow a few simple rules:
- for convenience in concreting and waterproofing works, make the foundation pit 50-60 cm wider and deeper than the area and depth of the proposed cellar;
- the best option for walls – monolithic walls made of dense concrete (for two parts of sand, take one fraction of cement grade m-500, not lower);
- the thickness of the walls should be from 20 to 30 cm, strengthen the structure with reinforcement or at least with steel wire – so your structure will be stronger;
- insulate the walls of the cellar from the inside with mineral wool, wood paneling; the ceiling is usually insulated with expanded clay layer of 10-20 cm (it is also advisable to build a covered gazebo on top of the cellar);
- for safe lighting, lay the wires in the corrugation, and choose a waterproof lampshade so that nothing is short;
- in order to avoid temperature differences, build a thermostat or get ready-made, this will help extend the shelf life of your products.
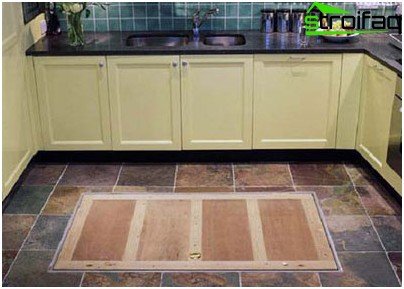
House cellar can exit directly into one of the rooms.
Ventilation
To avoid rotting vegetables and fruits, as well as the formation of mold on the walls and the products themselves, you need to take care of the supply and exhaust ventilation of the room. To do this, two pipes are installed in the cellar at different levels and in opposite places. High-quality ventilation of the cellar is a short exhaust pipe under the ceiling and a supply pipe at a height of half a meter from the floor. If the air still circulates poorly, you can use a conventional fan installed directly on the exhaust pipe.
Blow through from time to time
How to calculate the need for additional ventilation:
- There is static dampness in the cellar.
- The air is always stale, stale, breathing hard.
- Products spoil quickly, begin to rot and “smell”.
- The appearance of mold.
To reduce air humidity, occasionally blow through with quicklime.
Lighting
Wiring in the cellar is far from the last one, since in conditions of high humidity a conventional wire can pose a threat not only to health, but also to the life of the owner of the stocks stored in the cellar. Therefore, precautions should not be neglected in this matter. Be sure to use step-down transformers, use corrugation of the metal hose to protect the wires. The luminaires must be airtight, and the switch must be located outside your underground warehouse.
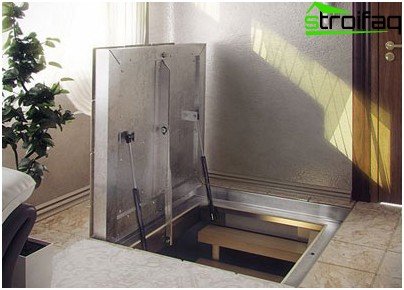
For your safety, do not make the stairs to the cellar too steep.
How to make a semi-buried cellar
There are three types of cellars: land, half-buried and buried. The most common and practical option is recognized as a semi-buried version. It is built quite simply:
- The basement of the cellar is deepened by a maximum of 1 meter, which makes it possible to build such a building even in conditions of high soil moisture.
- Walls are made of concrete slabs or ordinary brick.
- The ceiling is made of slab, protect it from moisture with clay grease, roofing material is laid on top.
- Next, you need to take care of ventilation, waterproofing and lighting. Also do not forget to make a drainage groove.
Cellar Ventilation Device
If you follow these common truths of the underground fruit and vegetable warehouse, your harvest will be safe and sound for a long time. Do not neglect the laws of physics and safety measures, and you will succeed.