How to make a cellar with your own hands
To ensure high-quality and long-term storage of products without compromising their taste, it is worth building a cellar. Do it yourself, depending on the level of groundwater and their freezing, build a surface, in-depth and semi-in-depth cellar. This building is a mandatory attribute of a country house or summer cottage. Many owners of cellar garages combine with inspection pits, achieving acceptable results in a small area. Often cellars are built for wines to collect their own set of these noble drinks..
Content
- Cellar: varieties and purpose
- Choosing a Cellar Location
- How to choose the material
- Do-it-yourself cellar? Easy
- Roy pit by the rules
- The specifics of walling
- Comfortable floor and steps
- We build a roof and a door
- Wiring in the cellar
- Cellar waterproofing features
- Methods of organizing ventilation
Cellar: varieties and purpose
Almost all products can be stored in the cellar. The main advantage of this building compared to a simple pantry is the fact that it can contain salty and fresh fruits and vegetables, as well as all kinds of preservation. Throughout the year, the temperature in the cellar is close to 5 – 7 degrees Celsius, which is comparable in general with the temperature inside the refrigerator.
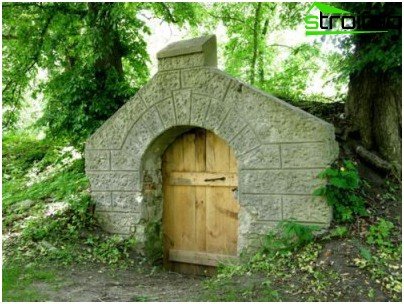
The land cellar can be perfectly “fit” into the overall landscape design
There are several types of cellars. The simplest construction is an earthen cellar. You can also build your own cellar in the garage on your own site, a cellar with a cellar, a ground cellar, a stone storage, a vegetable storehouse, a structure with a deboning, a storage under the summer kitchen, a semi-buried block, a locked cellar, a buried chamber on a slope, a wall sample.
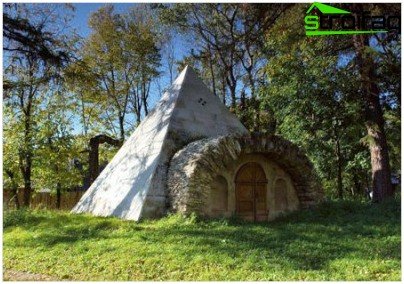
It looks like a half-buried cellar
The list goes on – a collar, a hut, a Finnish glacier, an underground cellar. To see how each of these cellars looks, type in the search engine the query “do-it-yourself cellar photos” and browse the proposed options.
Choosing a Cellar Location
The construction of the cellar should begin with the choice of location. The best option is a dry area, which is located on a hill. This place will be protected from moisture in advance, so waterproofing is not required..
Melted snow and rainwater will not accumulate near the walls of the storehouse, but will drain down the slope, leaving the cellar and its contents dry. Depth of construction may vary depending on the wishes of the owner. The standard is an indicator of 2.5 – 3 meters.
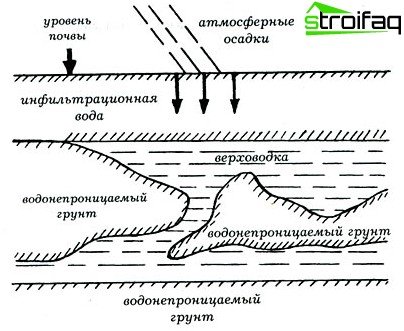
The future structure should be located above the level of the upper aquifer recorded in spring or autumn (during the period of maximum increase)
Along with this, it is necessary to decide which particular cellar is planned to be built: a cellar under a garage or a house, or a separate building. The construction of a cellar under any building is much better than the construction of a separate building, because such a building will not occupy excess territory. The cellar under the house has a convenient entrance, which is especially true in winter.
How to choose the material
When deciding how to make a cellar with your own hands, you should think about the materials. In order to choose the right material, it is worth considering several aspects: the type of soil, which is determined by eye, and the level of groundwater, which can be consulted in a garden partnership.
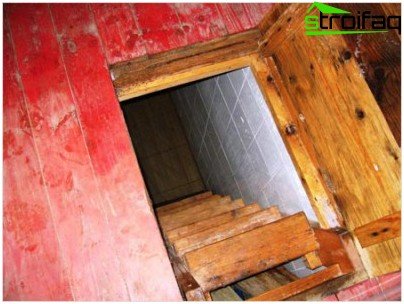
When using wood in the construction of a cellar, the material must be treated with antiseptic compounds
Walls can be made of different materials – red brick, rubble stone, wood, concrete or asbestos-cement sheets. The thickness of the vertical partitions made of concrete is about 15 centimeters, and that of brick, depending on the masonry technology, is 12 or 25 centimeters. Wall thickness of rubble stone reaches an average of 25 centimeters.
If land was chosen as the material for the construction of the cellar, then the structure is previously recommended to be lined with wood inside. It is highly undesirable to build a cellar out of metal because there may be a problem with maintaining the desired temperature.
Do-it-yourself cellar? Easy
Surely, after reading the article and studying the video materials, making sure of the usefulness of the construction of the cellar, you will catch on to the idea and realize it. Let’s get started.
Roy pit by the rules
It is recommended to build a cellar in the summer, because the groundwater at this time of year is at its lowest level. Choose the most favorable period without precipitation, since the foundation pit should not be flooded. You will have to dig a lot: the pit under the cellar should be deep enough so that you do not go bent in the store. The pit should be made oblong: no matter what the shape of the cellar is conceived, a place for gentle steps is required.
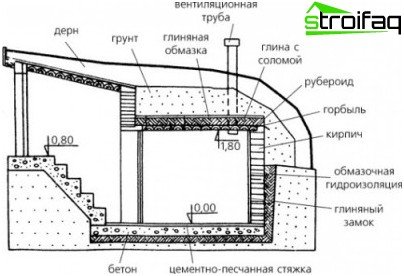
The traditional layout of the cellar
The pit for the cellar is dug half a meter more than the size of the structure itself. This is necessary for convenient work. It is better to dig a hole on your own so that the natural soil layer is not damaged. On top of the dug pit, lay the ceiling.
Thick boards, logs, floor slabs can be used for these purposes. If it was decided to get along with boards or logs, it is worth covering them with a putty made of shredded straw and clay. Overlap after drying of the putty must be covered with a layer of earth, after making a hole in it and inserting a pipe for ventilation.
The specifics of walling
So, now we are building a cellar with our own hands! If you want to make an inexpensive cellar yourself, then you should think about inexpensive wall cladding. The simplest option is adobe walls. Only clay, water and chopped straw are required. Mixing the solution is recommended so that it is plastic and viscous. Apply the solution in 3-4 layers, waiting each time to completely dry. The walls can be covered with a croaker board on top of the clay coating. There are other, more solid options: the walls can be covered with old bricks or the formwork can be made and the walls can be filled with concrete.
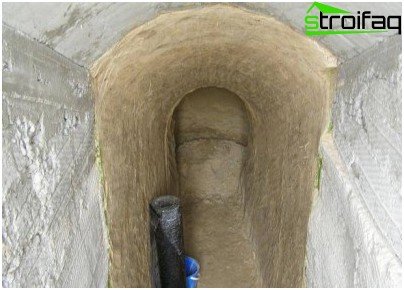
Adobe walls – the easiest, easiest option for the artist
Comfortable floor and steps
How to build a cellar with your own hands, so that the atmosphere in the repository is suitable for keeping vegetables? This is best facilitated by the earthen floor. Crushed stone should be poured onto the base of the pit, the layer of which must be properly compacted, poured with hot bitumen and allowed to congeal. An adobe floor should be arranged from above. A good option is a cement screed. Ironing is often practiced in flooring – a process when dry cement is strewn over concrete and smoothed..
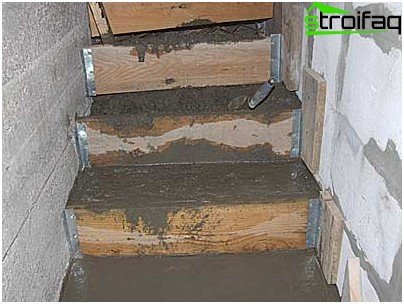
The steps and floor should be not only reliable, but also convenient: users in the cramped conditions of the basement need to be sure of their strength and safety
To make the cellar comfortable, you will have to spend time creating steps. First you need to dig a “ladder”, after which it is worth tamping the ground on the steps. After this, it is necessary to make the formwork from plywood or old boards. Formwork is done only for the steps – the side surfaces of the steps, above the horizontal plane so as to fill the slabs of the steps. For this purpose, prepare a solution of cement, sand and gravel in a ratio of 1: 3: 3. You can cover the little steps with brick, and on the tread place slabs made of artificial stone or concrete.
We build a roof and a door
Building a cellar with your own hands implies the protection of its upper part. Above the building, you can build a gable roof from the boards, which should be larger than the cellar, overlap the pit on each side by 40-50 centimeters – this will save the building from flowing into the water during rain. The cellar door must be insulated without fail, for example, with several layers of foam, after which it should be covered with dermatin or oilcloth.
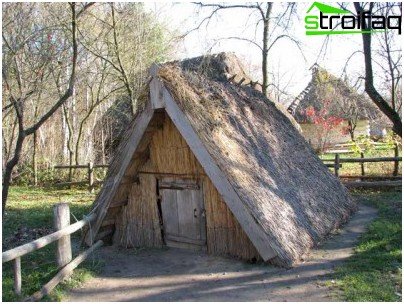
The roof should prevent the accumulation of rain, the door should be protected from frost and heat.
Wiring in the cellar
In the cellar, it is customary to make external insulated wiring. Double insulated wires with copper conductors must be used. It’s best to consult a consultant to find out which wire is suitable for use in a cellar..
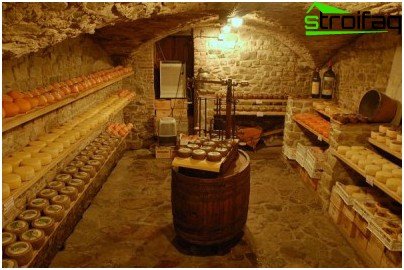
Electricity in the cellar is an important aspect that ensures the safety and comfort of using the “storage” room
Bulbs are recommended to be covered with protective caps. It is necessary to place the fixtures in a dry place and use only moisture-proof material. It is best to attach a light bulb in the vestibule, because this option is considered the safest. Switches should be placed at a height of 1.5 meters at the entrance. But the sockets in the cellar are forbidden to install.
Cellar waterproofing features
An important issue in the construction of the cellar is the waterproofing device. Materials for waterproofing are divided into 2 types: pressureless and anti-pressure. Pressure materials should be used if the water level reaches the floor level in the cellar on the pressure side of the water. Non-pressure materials are used if groundwater does not reach the floor..
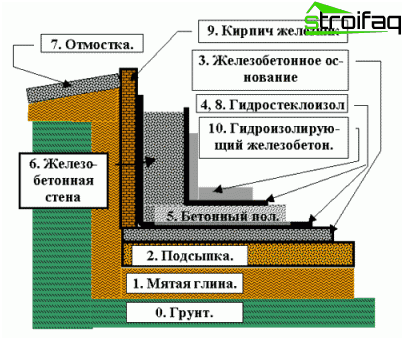
Cellar waterproofing
The floor and walls must be waterproof and strong so that the structure does not collapse due to groundwater. If red brick was chosen for construction, then it must be treated with cement mortar to increase the strength of the material. As an additional strengthening, you can use roofing material.
To protect the building from the harmful effects of water, you need to put a drainage layer around it, which is designed to discharge water. Drainage is usually combined with a special well dug near the cellar. Drainage can be bought at any hardware store, but you can also take the remains of bricks, chips and pebbles..
Drainage alternates in layers with excavated soil, it must be tamped. A more reliable option is to fill with clay, so the waterproofing will be more durable. To reduce the pressure of groundwater, it is necessary to build a blind area – a kind of tank with a slope for water drainage, the dimensions of which are close to 0.5 – 2 meters wide.
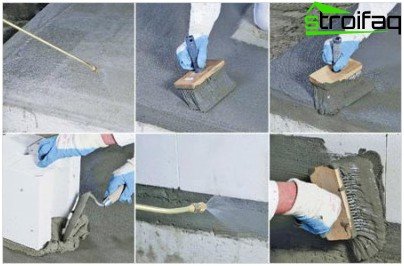
This is how the cellar waterproofing is carried out on the inside of the structure
If the building is protected from groundwater pressure, it is possible to carry out waterproofing with heated bitumen, which should be applied to the surface of the walls to create a protective film. Before applying bitumen, the walls must be treated with cement mortar. It is recommended to carry out bitumen insulation in two layers. Sanding the walls while drying the bitumen.
Methods of organizing ventilation
If you plan to build a cellar with your own hands, video and photo selection will help to correctly perform all the work! The hood is considered the key to the successful storage of “stocks for the winter.” Dampness and excess odors in this case will not stay in the room, there will always be an influx of fresh air. The hood in the cellar can traditionally be equipped in two ways. Natural ventilation is organized using two pipes – exhaust and supply. The hood is based on the temperature difference between the indoor and outdoor, therefore, a constant air circulation is formed.
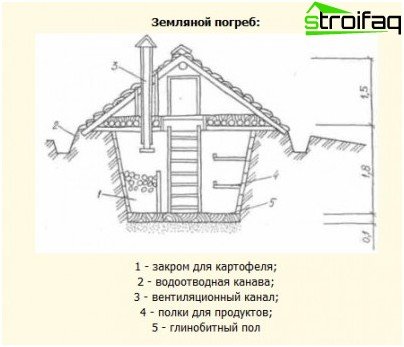
Where is the ventilation duct
An exhaust pipe is installed near the ceiling, its end is placed half a meter above the level of the cellar roof. Heated air flows through the exhaust pipe. The supply pipe is mounted at the bottom of the cellar (5 to 10 centimeters above the floor line). It is protected from pests and insects by a metal mesh, and the ends are covered with mini-roofs. Sashes are arranged inside to regulate the level of air circulation..
Forced ventilation of the cellar is created artificially – through special fans. The device remains the same. Also, air exchange can be carried out through one double-leaf pipe. An electric fan is created in its cavity, creating an air vortex. By expelling air from the room, an influx of fresh air is provided. Forced ventilation of the cellar is necessary in the summer, when air exchange does not occur due to high street temperature. That is why it is customary to combine the above methods.
Operation of the finished structure
Like any other food storage room, the cellar should be kept clean. In the summertime, the ventilation and drying procedure is mandatory. Flammable substances such as gasoline, kerosene and others cannot be stored in the building. And it’s not only the fire safety rules, but also that the pungent odor of gasoline or kerosene is well absorbed by the products that are in the cellar, which renders the products unusable.

In a well-equipped cellar, optimal conditions will be created for storing homemade blanks
Many gardeners in the middle of summer begin to prepare for the laying of the harvest, for which they air and dried cellars and other repositories. For good drying, it is not always enough to open the ventilation pipes and the hatch into the cellar, because the air is heavy and cold in the building, and because of this, natural draft is not created. Usually for drying it is customary to install a stove-potbelly stove and produce heating of the walls. You can create the cravings necessary for drying in a simpler way – using an ordinary candle.
A good owner is one who can not only harvest, but also properly organize its storage. That is why in our time the repositories of our ancestors are so popular: storehouses, cellars, glaciers, piles and earth pits.


