Wiring in a wooden house
Today, in the suburban development, there is an increase in the proportion of wooden buildings, because they have many advantages. However, in addition to positive qualities, there are also negative traits: fast flammability and combustibility. Therefore, high-quality wiring in a wooden house is of great importance, and installation work requires special skills.
Content
- Design is the basis of success
- External wiring, installation
- Installation of equipment in the shield
- Internal Network Layout
- Open installation method
- Hidden wiring features
- Marking of devices, shields, cable
- Installation of switches and sockets
- Passage through wooden surfaces
- How to choose an electric cable
- Wiring Resistance Measurement
Design is the basis of success
Wiring in a wooden building begins with the development of a document such as a wiring project. At this stage, the method of laying the power cable and the installation methods of switches, dimmers, sockets and fixtures are selected. It is necessary to approach this occupation with great responsibility, because further safe living in the cottage depends on the chosen method of wiring.

The location of wiring devices in a wooden structure should be laid at the design stage
To begin with, it is recommended to invite a specialist from an electrical installation company home, which will examine all the rooms in the house, indicate the installation locations of the switches, dimmers and sockets. The owners need to decide what method will be used to lay the wiring in the wooden house. In such buildings, it is allowed to lay internal wiring in baseboards with cable duct, PVC ducts, corrugated and rigid PVC pipes, metal pipes, metal hoses.
External wiring, installation
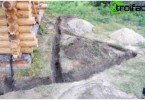
After approval of the design documentation, electrical work takes place. The task of primary importance is laying the cable from the power line to the shield installed in the house. Lay the cable by air or underground. To learn more, you need to type in Google “wiring in a wooden house photo” and view the proposed results.

The air way to lay external wiring is the most efficient and economical
The air way is fast and economical enough. In this case, a self-supporting insulated cable is used, which has a different cross section and number of cores. Cable selection depends on power and number of phases.
The underground technique is more laborious and expensive, but it has many advantages. The cable is located in the ground, so it does not spoil the appearance of the structure. The service life of the wire is quite large, since there is less chance of damage to it. For the underground device of the line, when conducting electricity to a wooden house, a power copper wire is used..
Installation of equipment in the shield
Having completed the external electrical installation of a wooden building, it is customary to lead the input cable through a metal sleeve into the room. To receive electricity and distribute it in the house, an input distribution panel is used, which must be installed in safe places to ensure free access.

The shield must not be installed in rooms with high humidity.
Protective shutdown devices and circuit breakers are installed in the shield. Particular attention is paid to the selection of automation. It is recommended to use products of only well-known and reliable manufacturers..
Internal Network Layout
Internal wiring in a wooden cottage is considered the key to the safety of residents. Unskilled wiring very often causes fires. There are two methods for installing wiring inside a wooden structure – open and hidden. By these names, the appearance of these transactions is understandable..
Open installation method
Of the two methods, it is safer to open wiring in a wooden house. In addition, the implementation of such electrical work will cost less. Wires are laid on the inner surface of the building, attached to ceilings, walls and other structural elements. You can hide the cable in various ways: using a retro cable or placing it in a PVC box.

Open wiring in a wooden house: the cable is placed in self-extinguishing channels
Wiring is laid in self-extinguishing channels. The modern assortment of such products allows you to choose the desired color of the box, which simulates a tree, for any design. Such boxes are usually used in houses made of clapboard and logs, where the walls have a flat surface..
Wiring in the cottage with a retro-braided cable is another way to lay the material outside. The cable looks like a twisted cord and is mounted on ceramic insulators. Such an installation technique is considered safe, because the cable has an external insulation made of natural silk and two of PVC plastic. The main advantage is the gap between the surface and the cable. In addition, this type of wire is able to decorate any log house.
Hidden wiring features
Hidden electrical wiring it is characterized by sufficient inaccessibility of wires in case of modernization and repair of housing, higher prices for services and much greater required time for work. However, the lion’s share of customers prefers this technique, citing aesthetic appeal. The owners of wooden cottages do not want to spoil the interior and the expensive look of decorating their homes with electrical panels and wires.
Hidden wiring in a wooden house is usually laid at the stage of assembly of the house. To comply with all safety standards, the cable must be enclosed in a painted metal or galvanized pipe. All lifts to lighting fixtures, switch and sockets are made in special holes.

Hidden wiring in a wooden house is a very complicated and expensive process, justified only by aesthetics
When installing electrical networks in wooden houses, it is recommended to comply with certain requirements and use special materials to ensure maximum safety and protection against fires. In the floors of a wooden building, the cable is placed in pipes made of non-combustible plastic, and make sure that there is no mechanical impact on the pipe and cable.
Concealed wiring can be located in grounded metal hoses and metal pipes. Log houses are subject to “shrinkage”, so it is recommended to take this into account, not allowing the logs to affect wiring in metal hoses. The wire passes through the wall through special metal sleeves. Both methods of wiring installation have advantages and disadvantages, therefore, a combined wiring technique is often practiced.
Marking of devices, shields, cable
After completing the power supply project, you need to mark the cable lines and places for the location of the switches, sockets, dimmers, switchboards and fixtures. Care must be taken in marking so that you do not have to redo the work performed in the future. Electrical wiring in a wooden house should be planned so that cable routes do not interfere with the installation of furniture.
The wire in the cable channels will look the most harmonious and aesthetic. You can pick up any picture of any shade of wood. To such channels, you immediately need to buy tees, plugs, adapters. And although the price of these parts is twice as high as the boxes themselves, it is not advisable to save money, since nobody perfectly matches the inconsistent places of the boxes.

Marking electrical wiring in a wooden house
When buying channels, you should pay attention to the wall thickness and box lock. Carrying out the installation of wires in miniature boxes, which have thin walls and double locks, electrical companies do not think that in most situations, maintenance of wiring in such boxes provokes a break in the locks if the channel cover is opened.
To add a cable to the box, you will have to buy new channels and re-perform electrical wiring and boxes. A double lock requires the use of a specialized tool that can open the lid, but absolutely not all electricians think about it. It is better to choose a box with technologically consistent profile geometry, large walls and a single lock.
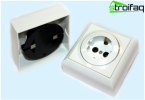
Installation of switches and sockets
When the wiring diagram in a wooden house is studied, and the marking of the cable lines is completed, you can take on the wiring of switches and sockets. All switches, dimmers and sockets, sconce bases and luminaires must have a platform made of metal for attaching to the ceiling or wall of an electrical installation product, because the electrical installation of electrical equipment on metal platforms is the most fireproof option.

Installation of switches and sockets in a wooden house
After installing all the sites should be engaged in the installation of cable boxes. No matter how accurate a specialist’s eye is, all electrical work must be performed using the level.
Passage through wooden surfaces
All wiring passes through wooden walls, partitions, foundations must be made through pipes made of metal, which are called bushings. Before proceeding with the electrical installation of the wire through the combustible walls, it is recommended to drill them, then insert a metal sleeve into the hole so that its edges extend no less than 1 centimeter from both sides of the combustible base.

Wire passage through wooden surfaces
It is recommended to pay special attention so that such sleeves at the edges are equipped with plastic sleeves that can protect the wire from cuts during installation and further operation of the power supply system, in other words, they will save cable insulation from damage. After this, the cable channel must be mounted in such a way that the end of the metal sleeve enters the box.
How to choose an electric cable
Installation of wiring in a wooden house needs a certain cable. A wire for powering a private house should be bought with the index “NG”, which means “cable that does not support combustion” and with the designation “LS”, which stands for “reduced smoke emission”. It is preferable for wiring in a wooden building to choose a wire that meets all existing fire safety requirements, and also has all the necessary quality certificates.

Choosing an electrical wire for a wooden house
The choice of the cross-section of the wiring depends directly on the power that the electrical equipment consumes. Designers usually lay 3 by 1.5 millimeters in lighting projects, and 3 by 2.5 millimeters on outlet groups. To organize the power supply of electric stoves, you need a wire whose cross section is at least 6 millimeters square. It’s better not to save on cable. Outlet lines must be calculated with a minimum number of outlets that are located on the same group. If a wire is laid from the shield to the unit, which consists of 4 outlets, then it is not recommended to connect anything else to it. Only then will the wiring last for many years. The link between the cable section and the power of electrical appliances can be found in the respective tables.
Wiring Resistance Measurement
After doing such work as a wiring device in a wooden house, you need to immediately measure the insulation resistance of the wiring.

Measurement of wiring resistance in a wooden house
This manipulation is done to make sure that the insulation of the conductor during installation is not damaged. Such electrical measurements are recommended once every 3 years to protect the wooden house and its easily combustible bases from short circuits in the wiring.
Thus, the problem of installing electrical wiring is as follows: often inexperienced craftsmen believe that the cable in a wooden structure should be the same as in a simple apartment. This is unacceptable, because the wiring of a building made of wood should be distinguished by increased fire safety characteristics. If you perform installation work according to the above instructions, the wiring in your cottage will last for many years.