How to connect a ground outlet
The growth in the power of household appliances dictates the use of effective electrical safety measures consisting in the installation of devices with a built-in protective earth element. This is an additional protection for users and for electric devices against the effects of leaks on the housing. All imported equipment and advanced domestic installations are equipped with plugs with grounding contacts. To use the valuable option, you need a special outlet. You can install it yourself if you know how to connect an outlet with grounding and how it differs from the usual domestic counterparts.
Content
- Features of grounding devices
- Specificity of installation of ground outlets
- Two options for grounding to an outlet
- General arrangement of phase and zero
- A reliable way to connect wires
- Choosing a place for mounting the outlet
- Mounting a built-in socket with grounding
- Install an open wiring outlet
- Testing grounding at a power outlet
Features of grounding devices
The advantage of an outlet with an additional grounding function is that it is the grounding contacts that enter the work first, and then the conductive elements. This sequence guarantees full protection. Externally, a socket with grounding elements can be distinguished by the presence of a third contact. On French products, this is an additional third pin, on American outlets – holes with side slots. We have a common German type. In the center of the German model there is a cylindrical recess with two holes for installing the plug pins, on the side there are protruding metal parts that provide grounding.
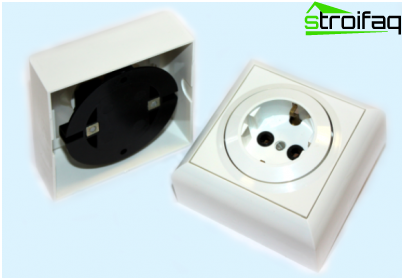
An outlet with grounding for open wiring differs from a conventional device in that grounding contacts are the first to start work
This is how a socket with grounding, already tested by a domestic user, intended for open type wiring, looks like. Built-in appliances are mainly mounted on the walls of urban apartments by means of gating holes for their installation and wiring.
In the assortment of Western manufacturers there are also overhead wiring accessories used for the installation of the electric network in country houses made of wood, the wiring of which is mainly laid in an open way. True, outside the city, housing made of foam concrete or brick is equipped mainly with built-in sockets.
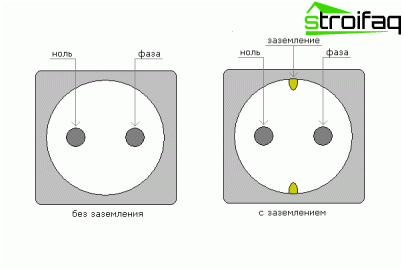
The difference between a simple outlet and a ground outlet
Specificity of installation of ground outlets
Owners of private buildings equipped with three-wire wiring have no difficulties: installing an outlet with grounding is quite simple. However, if a socket with grounding elements is used to replace an old device in a city apartment, a series of actions will be required first. Residents of the upper floor have fewer problems, they do not need to pull the protective earth bus too far. The remaining problems are many: it is necessary to ensure the transfer of grounding to the device.
Two options for grounding to an outlet
- Wiring the bus from the apartment to the grounded switchboard, available on the staircase. In such cases, a twisted copper wire is used to connect the grounding contact of the wiring device.
- Performing grounding instead of grounding the outlet, that is, attaching the grounding contact to the neutral wire. Electricians, believe that this method is preferable, since when the zero and earth contact is closed, RCDs and differential machines will work.
Note. Insulation of wires for convenience of determination is painted in different colors. The ground wires have yellow and yellow-green color, brown or white color at the phase, blue, black or blue at zero.
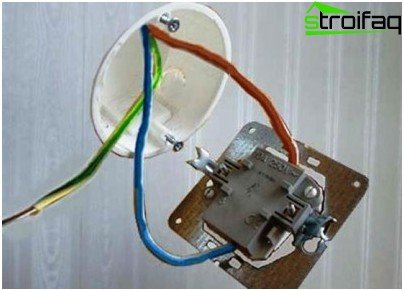
For the convenience of determining the neutral, phase and grounding, the insulation of the contacts is painted in different colors.
If the question “how to ground the outlet” arose for the owners of apartments with junction boxes inside the housing, the connection is made directly to them or to the panel, if available. The operating zero and phase must be connected to the protective connection device. From the output of the RCD, all wires are routed to the junction boxes and to the places where the sockets are installed in accordance with the planned layout of their location.
General arrangement of phase and zero
There are no strict guidelines for choosing the right or left side for phase or zero connection. Phase and neutral can be interchanged. According to European criteria, both of these wires are recognized as phase power conductors..
The configuration of the grounding element in the outlet resembles the letter “P”, made of a metal plate. The plate has a hole equipped with a thread and a bolt, with the help of which the protective contact is fixed. To the two remaining contacts attach phase and zero in any order. The neutral and phase can separately be brought under the lower part of each of the bolts or install them between special plates, which are then compressed by tightening the bolt.
A reliable way to connect wires
The wires wound and clamped in the terminals by bolts hold well, but once a year approximately you still have to “tighten” the fasteners, disassembling the socket. There is a method that provides:
- excellent mount;
- the largest contact area of conductive and protective contacts with wires (as a result, minimal contact heating).
It is necessary to bend the previously stripped wires into rings with a diameter of up to 5 mm and place them under the upper parts of the bolts.
Choosing a place for mounting the outlet
Before installing an outlet with grounding, you need to decide on a rational place for the location of the device. According to European stereotypes, switches are installed at a height of 90 cm from the floor level, sockets at a level of 30 cm from the lower horizontal. But neither in European standards, nor in domestic standards of regulated parameters for the height of installation of these devices are not.
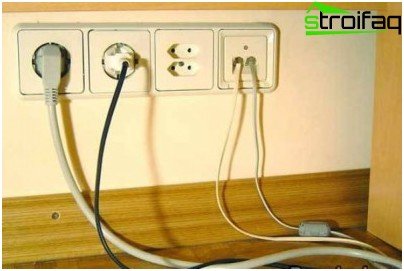
One of the options for installing sockets with grounding: the location of wiring devices 20-30 cm from the baseboard
Sometimes they are installed directly above the skirting board, especially if the skirting board has a niche for wiring. You will have to cautiously wash the floors at this location of the outlet, constantly “pulling out” the plug is also not very desirable, because it is too low. In order not to spoil the interior picture with an excess of wires, it is advised to install sockets with a grounding device in the installation area of electrical equipment. It is possible even under the ceiling, if the outlet is necessary to connect the “hanging” on the brackets of the TV.
Tip. The optimal number of outlets for arranging large rooms is considered to be four pieces (one device in the area of each of the corners), in small rooms there can be two. It is better to initially install an extra number of outlets so that you do not have to mount additional devices after changing the environment.
Mounting a built-in socket with grounding
If a socket for concealed wiring with grounding is installed, to select a niche in the wall and install a plastic socket, you will need a puncher and gypsum, with which you will need to fix the cable in the recess and a kind of plastic socket for the flange.
- In the place selected and marked for mounting the outlet, a hole is made using a hammer with a special nozzle.
- For wiring, the location of the gate is determined using a level. It can be made with a chaser.
- Before installing the socket, its position is determined by the level.
Important. Most outlets are now attached to the socket with self-tapping screws. On how carefully this device is installed, it depends on whether the socket will stand exactly.
- A small amount of gypsum is mixed, a plastic box for the device is fixed.
- The cable is laid in the gate, in some places the wiring is attached to the walls of the recess using gypsum.
Before directly connecting the outlet to ground, the power supply must be disconnected. Relieve tension from the connected device by turning off the automation or unscrewing the plugs.
Important. Be sure to check the absence of voltage with a standard indicator, multimeter or indicator.
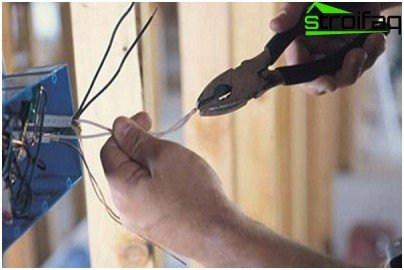
The ends of the cable must be prepared before making the connection.
- The ends of the cable must be cleaned from insulation, the ends of the multicore wiring should preferably be tinned with solder. Approximately 5 cm of a three-core wire is better divided into separate cores.
- Connection of wires with contacts. Work is performed according to the above rules..
The practical double outlet with grounding is most often equipped with contacts with clamps. The top and bottom of these devices often do not, since the pair of contacts required to connect is available above and below. Double sockets are connected, strictly observing the rule: the supply wires must be connected to various conductive plates.
Important. Neutral and phase supply wires must not be connected to the same conductive plate. The result will be a short circuit, which may cause damage to the wiring..
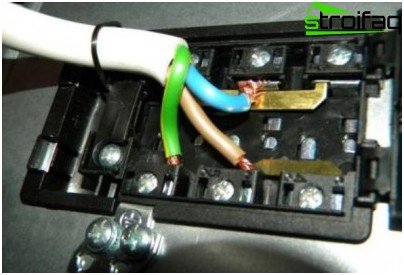
Phase and zero must be connected to different current-carrying plates
- The working part of the outlet without a top cover is fixed with screws to a plastic box installed in a niche after connecting all the wires. All supply wires should be carefully hidden in the socket..
The flanges of the old-style wiring accessories for fastening were equipped with tabs that can be moved apart after tightening the screws on the tabs. But with the active use of ground outlets, which quite rigidly pass the plug, the structures with paws loosened and “fell out”. The new products are equipped with reliable threaded screw sockets for the most secure fit..
- The finishing touch is screwing the cap. Before screwing the cover, make sure that the wires are securely connected and the working part is clearly fixed.
Those who prefer to place the sockets close to the skirting boards, it is advisable to buy protective plugs that protect the curious younger generation from dangerous research.
Install an open wiring outlet
The overhead device has a rear mounting plate with holes for fixing the device. In order for the socket of the open wiring with grounding to stand smoothly, you first need to attach the device with the cover removed to the mounting location and mark with a pencil the points for the dowels under the screws. Then holes are drilled, dowels are inserted. Usually use two screws with a length of 2.5 cm and two five-millimeter plugs.
Testing grounding at a power outlet
A socket with grounding contacts firmly attached to the selected location does not guarantee the correct operation of the device. If grounding was performed, a traditional, quite common mistake could be made: the connection of the protective contact with the phase. In such situations, the questions “how to check the grounding in the outlet”, there is only one answer: you need to make sure that there is no phase voltage on the protective contact. This study is carried out with an indicator screwdriver. Having positioned the screwdriver in the phase socket, the probe of the insulated wire is pressed to the sensor. The bright light of the neon lamp indicates the presence of ground.
Attention. Do not touch any metal parts while testing the protective earth..
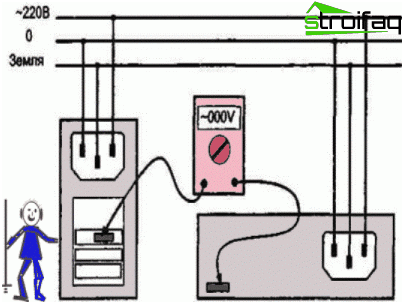
Scheme of the correct connection of devices with grounding
Fully check the operation of grounding is possible only with the help of specialized devices. With a check, it is advisable to turn to electricians for complete confidence. Measurements with a voltmeter between the phase and the neutral conductor, as well as between ground and phase, should indicate 220 V.
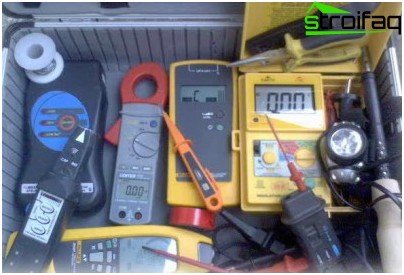
Electrician’s tools for checking and installing electrical appliances
The outlet mounting contractor will need two slotted screwdrivers (with a blade width of 2 and 4 mm), two Phillips screwdrivers (2 and 3 mm in size), an indicator screwdriver, an assembly knife, side cutting pliers, a hammer, and pliers. Instrumental set of future electrician must have handles made of insulating material. For lack of insulation on the handles it will be necessary to make rubber nozzles.
Anyone who knows how to hold tools in their hands will be able to handle the process of installing a wall outlet with a protective grounding function on their own. Only with a complete lack of understanding of the electrician is it not worth the risk. A description of the installation process will certainly help to do everything correctly, safely and reliably..


