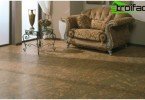
Ground flooring
If it comes to a method floor devices the first floor of a private house, and you do not have the necessary knowledge to form your own opinion, we bring to your attention a kind of “educational program” on the arrangement of floors. So, there are two options: the first – the device of the floor on the ground, the second – on the plates or beams. If there is a construction of a house where they will periodically reside (a summer residence, a hunting lodge), and also if the soil is damp and the house is in a cold climatic zone, the best constructive solution would be the installation of the floor on the beams, in other cases, it is preferable to install the floor directly by soil. Flooring on the ground is really cheaper than floors arranged on beams (significant savings on building and heat-insulating materials). Let us consider in more detail the features of the device of floors on the ground.
Content
- Types of floors on the ground
- Ground concrete device
- Underground floor
- The order of work
Types of floors on the ground
Depending on the purpose of the room and the climate, either monolithic (concrete) floors or underground floors are arranged. The structural features of a monolithic floor are ideal for a terrace, porch, garage or basement, and underground floors are better for residential premises. The device of a monolithic floor is multilayer. Consider the sequence of layers (bottom to top).
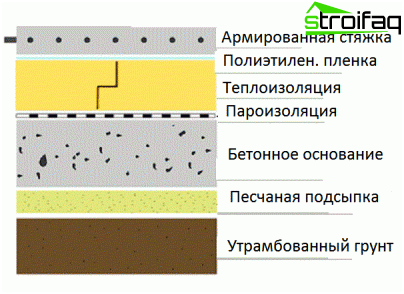
Concrete floor layout
Ground concrete device
- Well-packed layer of clean river sand (bedding).
- Layer of crushed stone or expanded clay.
- Rough concrete screed.
- Hydro vapor barrier.
- Thermal insulation layer.
- Fine cement screed.
- Finish flooring.
Each layer has its own functional purpose. A layer of river sand, as well as a layer of expanded clay or crushed stone, are used to prevent the penetration of moisture into the floor from the soil by capillary means. The thickness of the sand bed should be at least 5 cm. The thickness of the crushed stone layer is 10 cm. For more effective protection against moisture, it is recommended to impregnate the crushed stone layer with bitumen. On wet soils, the second layer should be only of rubble, expanded clay in this case is not used because of its ability to absorb water and swell. Each layer is carefully stamped when laying.
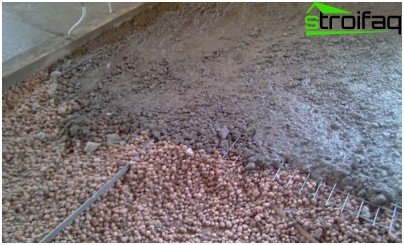
Expanded clay screed laying: reinforcement made with mesh netting
A rough concrete screed serves as the basis for waterproofing, it should be 6-8 cm thick, it is applied to a layer of crushed stone, previously coated with a plastic film. The polyethylene film in this case is not waterproofing, but is used only for technological purposes. Fine crushed stone is taken for concrete, and sand is necessarily river. Instead of a rough screed, you can use crushed stone pouring with a liquid cement-sand mortar, in which case polyethylene is not used.
To create a hydro-vapor barrier layer, a double layer of plastic film or roofing felt is glued to the rough cement screed, or a bitumen layer is applied. The hydro-vapor barrier layer must be airtight over the entire surface, it is a barrier to the penetration of moisture from the soil into the upper layers of the cake. Damage to the vapor barrier is unacceptable, since it leads to saturation of the floor with moisture, the appearance of an unpleasant odor, fungi, mold and premature failure of the finish floor covering.
To insulate the floor, a layer of thermal insulation is laid (the thickness of the layer depends on the climatic zone). Expanded polystyrene, mineral wool, foam glass, etc. can be used as a heater. Extruded polystyrene foam is most often used as a heater. It is a durable material with a low coefficient of water saturation. When compared with other types of insulation, extruded polystyrene foam has significantly higher crushing strength.
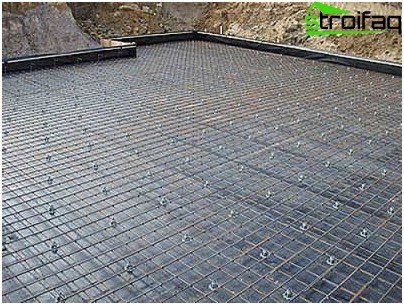
Screed reinforcement
The heat-insulating layer is covered with a fine cement screed, which is necessarily reinforced with a welded metal mesh. For residential premises, the reinforcing mesh is made of wire with a diameter of 3 mm and a mesh size of 10×10 cm. For floors where increased loads are expected, for example, in a garage, the wire for the mesh should be 4 mm in diameter, and the cell should be 5×5 cm, the screed is made of concrete with a crushed stone fraction of 10-20 mm. The thickness of the final screed in residential premises should be at least 5 cm, in the garage – 10 cm.
If a floor heating device (electric or water) is assumed, then a layer of foamed polyurethane or polyethylene (1-2cm) is laid between the walls and the screed. This is done in order to create a thermal gap between the floor and walls (if this is not done, then when the floor is heated, the floor expands and cracks can form in the screed). Since the final screed is the basis of the flooring, it must be even and applied over pre-installed beacons.
A finished floor screed is laid on the prepared final screed. Since the screed is well protected from moisture, the coating can be absolutely anything: parquet, parquet board, laminate flooring, floor board, linoleum, tile, etc..
The device of such a pie is reliable, the floor is well protected from moisture and freezing, but at the same time it is expensive. Under milder climates and on dry soils, a simplified ground floor construction may be used..
The thickness and feasibility of the device of each layer depends on:
- from the groundwater level at the construction site,
- from mechanical loads on the floor,
- whether the floor will be heated.
If the groundwater level is below 2 m, then the bedding can not be used, and instead of a rough screed, use crushed stone pouring with a solution. At the expected significant loads (more than 200 kg per m2), the wire of the reinforcing mesh should be 4 mm, in other cases – 3 mm.
It should be remembered that the cheapening of the pie should not lead to a deterioration in its reliability, especially should not be saved if it is assumed to use an expensive finish flooring made of wood, such as parquet or laminate.
Concrete flooring on the ground has undeniable advantages: it is durable, durable and relatively easy to manufacture. Thermal insulation is required, because it is through the floor that 20% of the heat of the room is lost, and concrete does not protect the floor from the cold coming from below. Warming is also necessary for non-residential premises (garages, hangars, sheds).
The height of the floor level relative to the foundation level depends on how it was basement insulated. If you insulate only the walls, and place the floor below the upper part of the basement, then in this place the wall will freeze. If the base is properly insulated, then the floor level can be lower and higher than the top of the foundation.
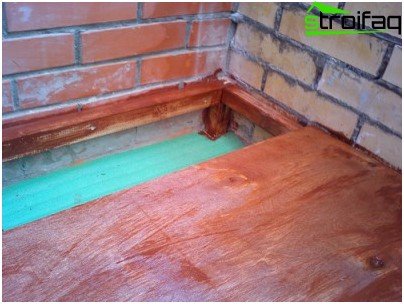
Underfloor flooring will reduce heat loss, which will be prevented by air cushion
Underground floor
The device of the floor with the underground provides for the presence of an air gap between the floor and the soil surface (to prevent direct contact of the soil with the floor). This design is appropriate in areas with high soil moisture (if the groundwater depth is less than 2 meters), as well as when the house is located in a cold climate zone, or when installing the floor in a house where heating will be periodic (cottages, hunting lodges).
When installing such floors, the ground level should be 10-15 cm below the floor level, which is very important. An increase in the size of the air space between the foundation and the floor leads to heat loss, and with a decrease in size (if the height of the underground is less than the indicated indicators), ventilation will significantly deteriorate.
Soil is prepared as follows:
- The upper plant layer is removed, a soil layer is put in its place, which is rammed when spilled with water so that a layer of 15-20 cm high is obtained.
- Sprinkle gravel or crushed stone on top and carefully ram it.
- A calcareous-crushed stone composition is applied to the obtained base (it can be replaced with construction waste, slag, brick battle).
The design of the ground floor may vary depending on the characteristics of the ground. Between bulk soil and crushed stone substrate, when the soil is of high humidity, additional waterproofing is required, consisting of two layers of roofing material, a plastic film or a layer of clay.
The order of work
First of all, brick columns are installed. The laying of brick columns for logs is made taking into account the exposure to the required distance – 0.7-1m between them. For the construction of supports, burnt red brick is used (silicate brick or artificial stone cannot be used). The columns are installed around the perimeter and covered with roofing material for waterproofing, on top of the insulation, wooden blocks 3 cm thick treated with an antiseptic should be attached.
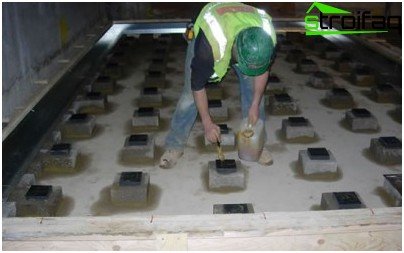
The device of concrete columns for logs: the surface in contact with wood is treated with bitumen mastic
The next stage is laying lags. Logs are made from halves of logs, it is also desirable to treat them with an antiseptic. Joints of lags should be above the posts. The correct location of the extreme lags is at a distance of 2-3cm from the walls. The horizontalness of the lags is checked by the level, for lining using bars of various thicknesses treated with an antiseptic. When laying logs, horizontal roughness of up to 3mm is allowed.
The floor on the logs may differ structurally from the written version: it is possible to use metal pipes instead of columns of fired bricks, or the draft floor may have a frame made of antiseptic boards placed on the edge.
A floorboard is laid on the logs, which is fastened with nails. The boards must be pressed tightly against each other. If necessary, you can make a double wooden floor, first lay a draft layer of unedged boards, then a waterproofing layer and a finishing layer from the floorboard.
Good ventilation is needed for the underground, for which 10×10 cm ventilation windows are made in opposite corners of the floor, which are covered with grilles, and in the basement there are special ventilation products, at least two for each room in the house.


