Clinker tile laying procedure
Clinker tile is a popular building material, its installation is quite simple, but still there are some nuances. Often, it begins with the installation of thermal insulation, but sometimes you can do without it. This applies to cases when this tile is laid just for beauty. The scope of this facing material is very wide: decoration of facades, interior spaces, paving garden paths, driveways to garages.
Content
- Clinker – quality and durability
- Styling recommendations
- Front thermal panels with clinker
- Laying brick tiles on the floor
Clinker – quality and durability
Clinker tiles can be safely called an environmentally friendly product, since in its manufacture no artificial dyes, plasticizers are used. The main raw materials are specific varieties of highly plastic clays. The production process consists in the fact that the clay is subjected to extreme pressing and firing at a temperature of 1200 degrees. For this reason, the material is extremely strong, and a shade is formed during firing. But these are not all the benefits:
- high quality;
- low water absorption;
- excellent frost resistance;
- durability;
- unpretentiousness in leaving;
- resistance to changes in temperature, humidity, fungi and bacteria;
- dense structure provides resistance to mechanical stress.
In all respects, clinker tiles exceed the requirements of European standards, but the functional characteristics of its advantages are not limited. As for decorative expressiveness, it occupies leading positions here too..
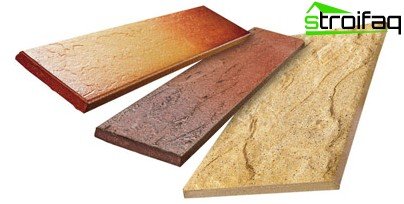
One of the advantages of clinker tiles is the uniformity of color, due to which chips, scratches, minor damage are almost invisible
Clinker tiles are available in a wide range of colors, which has more than 100 options, from rich red to neutral white. Moreover, such a variety is achieved not only by color solutions, the surface of the tile can be rough, unprocessed, glazed. And the extrusion method allows the manufacture of products of various sizes and shapes.
Styling recommendations
Clinker tile laying technology requires strict observance of certain principles, being guided by them, even a beginner tiler will be able to cope with this process remarkably.
Concrete, reinforced concrete, brick walls, cement screed, metal, old surfaces can serve as the basis for laying such tiles. The main thing is that it is durable and, of course, even, as well as pre-cleaned of dirt, lime, grease, dust, rust, and the remains of paint coatings. Do not forget about alignment to verticality.
Important: all poorly adhering plaster elements must be removed..
Before laying clinker tiles, you need to determine the size and position of the expansion joints. This indicator depends on the rigidity of the suture aggregate, the operating conditions of the room.
Important: the distance between the expansion joints varies between – 4-10 mm.
If the base is dusty or highly absorbent, it is advisable to treat the surface with a special primer emulsion. Priming stabilizes and strengthens the base, and the adhesion of the mortar and base increases. As for irregularities, they are sealed with a putty mixture, a leveling solution.
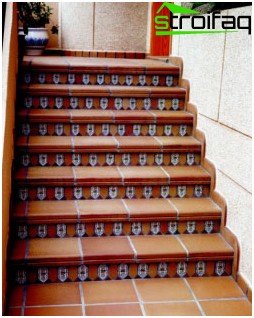
Clinker tile steps blend perfectly with any finish, do not slip
Before you start laying clinker facade tiles, you need to consider the location of the tiles, because the surface size is not always a multiple of the size of the tile, taking into account the width of the seam. In such cases, you have to cut the tile.
Laying of facade tiles starts from the bottom, and even better – from the second row. The basement row (first) should be glued after laying the terrace tiles. This trick is used to hide the uneven edges of the terrace tiles, because it is cut worse due to hardness.
The choice of spatula number directly depends on the size of the tile, of course, the larger it is, the more teeth should be. In order for the seams to be the same, it is necessary to use distance crosses.
To prepare the glue, the mixture is poured into water and stirred either manually or mechanically. After stirring, the resulting solution is left for 10 minutes for the final dissolution of all chemical components.
Important: strict adherence to the standards specified in the instructions is mandatory.
The adhesive mixture is applied to the surface of not more than one square meter, because the solution stores its adhesive characteristics only 10-30 minutes. The specific time depends on the humidity, temperature, type of substrate. If the solution has already dried up on the wall, remove it and apply a new layer..
Joint sealing can be started if the clinker tile is firmly and reliably connected to the surface (after about 24 hours). This process is carried out using special grouts: the solution is deeply introduced into the seam using a grater with glued rubber or a rubber spatula. After the matte film appeared on the tile, you can remove the excess putty mass (with a hard sponge, a grater that is pasted over with an abrasive sponge).
Places in which brick facade tiles come in contact with fittings, door and window frames are filled with silicone or polyurethane sealant (this also applies to temperature joints). To carry out this process correctly, you need to moisten the silicone mass and the adjacent surface of the tile with water using a hand sprayer. Such wetting prevents the adhesive from sticking to the clinker tile.
Important: you can also stick the tiles with special tape, which should be torn off after hardening the sealant.
Sealant residues must be removed with a special tool, which in addition gives the seam a shape.
Front thermal panels with clinker
Cladding facade thermal panels are resistant to chemical, thermal, and biological influences. This is a kind of expanded polystyrene plate, clad with clinker tiles. This material has found application relatively recently and has not yet gained wide distribution. But its advantages speak for themselves: the facing of the facades of residential buildings has an impeccable appearance, as well as durability, high efficiency of insulation and reduced heat loss.
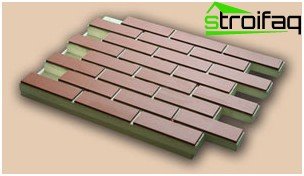
Facade thermal panels include two layers: decorative clinker cladding and a layer of thermal insulation material
The installation of thermal panels does not require the use of complex mechanisms, plus everything is reduced cost of decoration, facade repair, ventilation problems, the formation of cold bridges are solved.
Laying brick tiles on the floor
In order to save money, it is quite possible to refuse the services of professional masters, but high-quality laying of clinker tiles is possible only if the correct specifications are observed.
It all starts with the preparation of the foundation – the creation of optimal conditions. This means that the surface must be perfect: this indicator is checked by the level. When preparing the base, it is necessary to take into account the bearing capacity of the surface and check for cracks, empty pockets. This is very important, since moisture entering the hole will destroy and swell the tiles..
Clinker tile preparation – this step involves mixing the tiles from different packages, because slight color differences are possible. For this reason, it is advisable to mix the tiles and carry out a test layout before performing the laying.
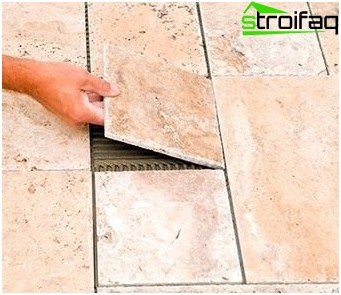
Clinker tiles are laid on the floor according to building standards equivalent for the installation of any floor tiles
If the cement component is used as glue, then first the mortar is laid on the base (4 cm thick), leveled, cement powder is applied, tiles are laid out, moistened and covered with polyethylene.
With glue mixtures, everything is much simpler, the main thing is to follow the instructions on the packaging and use only glue specifically designed for clinker tiles.
Formation, filling of seams – the first is carried out using a reference seam: parallelism is observed or plastic crosses are used for this. As for the filling, sand, cement or grout are useful here. Suture aggregates must be protected from chemical attack and contamination – for this they are covered with a protective emulsion.
Surface cleaning takes place exclusively after the seams have completely dried. The clinker coating is washed with ordinary water, the use of special tools is allowed.
Installation of clinker tiles is a delicate matter, but it is feasible, observing the building codes and laying rules, the coating will be durable.


