Floor Tile Guide
No matter how we strive to look up and far ahead, our eyes stubbornly fix our attention on what is right in front of our eyes and below. Perhaps that is why, entering an unfamiliar room, we first notice how beautiful the parquet is on the living room floor and whether the floor tiles are neatly laid in the hallway or kitchen. Our tips on how to lay tiles on the floor correctly will help you create the perfect interior for any room in your house or apartment..
Content
- Rules for choosing a tile for the floor
- Preparation of the basis for laying tiles
- How to prepare a wooden base
- Rules for preparing a concrete base
- Preparation of the “warm floor”
Rules for choosing a tile for the floor
When choosing a tile for the floor, be sure to consider the purpose of the room – this will help not to overpay for the operational properties of the material, which will not be in demand. The maximum necessary information can be extracted from the markings on the packaging..
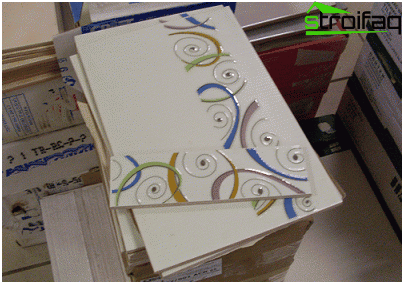
The maximum necessary information on the operational characteristics of the tile can be removed from the markings on the packaging.
For example, if the entrance hall has the highest traffic density, the floor covering for it should correspond to III-IV wear resistance class.
Resistance to moisture and aggressive chemicals is especially important for the bathroom and kitchen, and for these rooms it is better to choose a tile with an AA icon of II-III wear resistance class.
For the living room or bedroom, it is unlikely that you need a tile for the kitchen on the floor: the humidity in these rooms is always normal, and therefore the choice of class B tiles II-III for them is quite optimal.
The thickness of the floor tiles should be at least 8-12 mm. The geometric dimensions can be chosen at your discretion, but with tiles 30×30 cm, 33.3×33.3 cm or 45×45 cm, the work will advance faster and possible stacking defects will not be so noticeable.
Preparation of the basis for laying tiles
The foundation on which the finish coating is laid, including ceramic tiles, has the same requirements:
- reliability and durability;
- perfect geometry and flat surface;
- good adhesion.
Tiles can be laid on almost any basis: bulk, concrete, wooden floors and the “warm floor” system. If everything is clear with the bulk floor, then other bases, depending on the type, are prepared for laying the tiled finish in different ways.
How to prepare a wooden base
It is safe to lay tiles on a wooden floor only if its condition is not in doubt: the boards are durable, not rotten from damp, not damaged by insects, fungus or mold.
Secure the shaky swaying floorboards with self-tapping screws, and drill as many ventilation holes as possible in the floor. Place a layer of plastic film or foamed polyurethane on the lap base for waterproofing. Lay a layer of gypsum-fiber sheets on top of the film so that each sheet of the next row is offset by half from the sheet of the previous row: that is, start laying the first row with a whole sheet, and the next with half-cut. Glue the joints of sheets with waterproofing mastic or PVA glue, and apply a primer layer to the surface to improve adhesion.
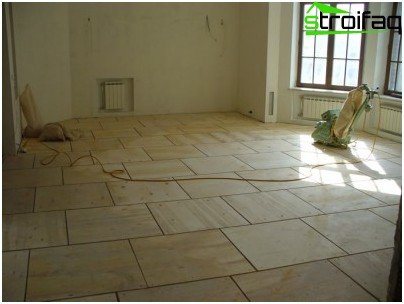
The wooden base is most often lined with plywood sheets.
If the wooden floor is in very good condition, then it is entirely possible to limit it to “cosmetic” alignment, by strengthening the metal mesh over the waterproofing layer, which will provide strong adhesion to the tile.
Rules for preparing a concrete base
First of all, remove the old linoleum, paint, etc., from the concrete floor, if there are any, and check the horizontal level using the level. If necessary, smooth the surface with a layer of a new sand-cement screed or, if concrete defects are insignificant, using a metal mesh. Having cleaned the surface of the screed from dust, apply a layer of universal primer of deep penetration on it.
It’s important to know!
On a fresh sand-cement screed, tiles can be laid only after 30 days or later. The readiness of the sand-cement screed for laying ceramic tiles is checked by making several deep scratches in different places of its surface. If their edges are strong and do not spill, concrete is ready for the next stage of work.
Preparation of the “warm floor”
In cases with concrete or wooden substrates for a water or electric underfloor heating system, the methods for preparing the base are similar to preparing ordinary wooden or concrete substrates, only all work can be done with the heating system turned off.
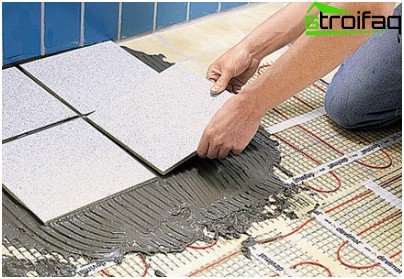
Immediately after laying and checking the thermal mats on the cable “warm floor” you can stick on the tiles
If the tile is used as the finish coating of the cable “warm floor” on thermal mats, then such a floor is ready for tile laying as soon as the thermal mats are laid, checked and disconnected from the power supply. Tiles can be laid directly on the thermal mats, choosing the appropriate tile adhesive.
Schemes and methods of laying tiles on the floor
Depending on whether you plan to create a multi-color panel or if you are satisfied with a simple monochrome floor covering, laying of tiles on the floor is performed according to one of the traditional schemes. If you use only plain tiles, they are usually laid according to one of three options:
- Basic “seam to seam” – each next row of tiles repeats the previous one exactly. This is the most economical and common styling scheme..
- Diagonal “seam to seam” diagonally. Rows of tiles are laid at an angle of 45 °. This tile layout looks very interesting, but its implementation is associated with too much material consumption.
- “In the run” – the seams of each next row are shifted relative to the previous one. This scheme was widely used in medieval architecture, and is popular today in creating interiors in the style of different eras..
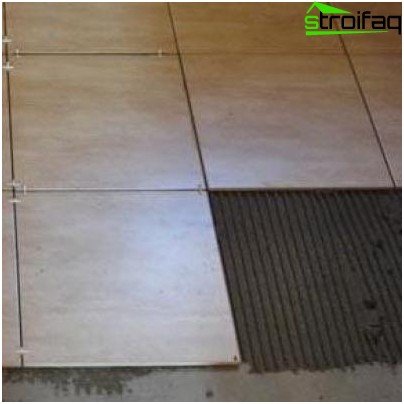
The basic pattern for laying tile “seam in seam”, plastic crosses are used to form beautiful smooth seams
The tile of two colors can be laid according to the basic or diagonal patterns of “seam to seam” in a checkerboard pattern or “strip”. These simple linear patterns can be used to create all kinds of multi-color panels on the floor, or by combining traditional patterns, create your own custom version of laying ceramic tiles of different colors and sizes.
There are many ways to start laying tiles, but three of them are the most popular..
Beginning from the most visible corner
The method is most often used when laying tiles according to the basic scheme, since it allows you to use the maximum number of whole tiles in visible places. You can lay the tiles to be cut where the furniture or other interior details will stand. Having chosen this method, especially carefully lay the first three tiles and align them well: the quality of laying the entire surface largely depends on them.
We start from the middle of the wall
The method is suitable when using the layout scheme of tiles “in the run.” Determine the middle of the wall from which you plan to lay the floor tile – this is the “zero” point of laying the first tile. Lay each next row on the right and left relative to the center line of the first tile, not forgetting to follow the horizontal: the edges of two adjacent tiles should be at the same level.
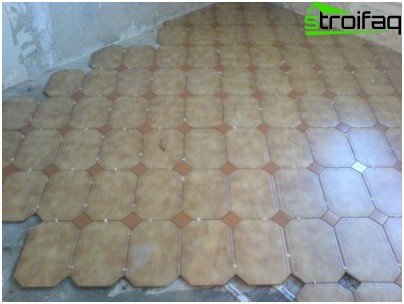
The way of laying ceramic tiles “from the middle” diagonally visually increases the area of the room
Tiling from the center of the room
The method is ideal for laying ceramic tiles in rooms with complex geometry, bay windows, columns, complex niches, as well as when creating multi-color panels and ornaments on the floor in the center of the room. To implement it on the floor, draw two lines perpendicular to each other and lay the first tile at the point of intersection, and lay the rest from it in the direction of the walls in accordance with the diagram of the panel or ornament.
Marking the floor before laying
Before laying the tiles on the floor, carefully mark the area in accordance with the chosen scheme and method of laying.
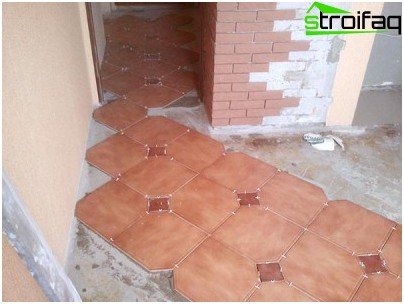
Before laying the tiles, mark the area and lay several rows “dry” without glue
If it will be laying from the corner, select the most visible and free level and draw a regular triangle on the floor, at the top of which lay the first tile, and direct all subsequent ones along its legs.
When laying the floor tiles diagonally, mark the starting point of the installation against the wall with the window so that the rows of the laid tiles are parallel to the window line. Non-observance of this rule is too striking, and the reference to the walls is unreliable, because the angle between them is not always perfectly straight, and the wall itself may not be too smooth.
When marking the floor, think out in detail all the possible little things. Keep in mind that near the fireplace, columns or other stationary interior element, most likely the tile will have to be cut, but its fragments should lie symmetrically.
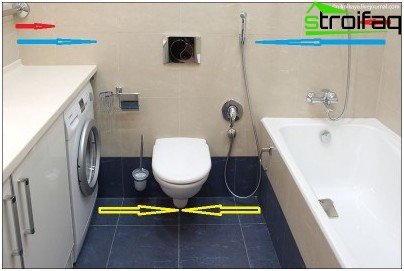
Near stationary devices and elements, fragments of cropped tiles must be laid symmetrically
After completing the markup, lay out several rows of tiles “dry” without glue and see if you are satisfied with the drawing and if you made a mistake with the layout or method of installation. If you don’t like everything, consider other options to prevent incorrigible marriage..
Floor tile adhesive
For laying ceramic tiles, cement-sand mortar is traditionally used, which is prepared in the ratio of parts of cement and sand 1: 3. The thickness of the solution layer can be 5-20 mm, depending on the condition and unevenness of the base.
The modern market offers a variety of polymer-cement adhesives for ceramic tiles, which have better adhesion and provide tiled floor coverings with very high strength with an adhesive layer thickness of only 3-8 mm.
Modern tiled polymer-cement adhesives are sold in the form of dry mixes, which before use is sufficient to dilute with water to the required consistency. For particularly difficult cases, for example, increased room humidity, permanent paint on the base, etc., special cementless adhesive compositions have been developed. When laying a tile floor in an unheated room, you can choose frost-resistant tile adhesive.
It’s important to know!
When laying tiles on a wooden floor, mix cement-sand or polymer-cement glue with PVA glue and bring water to the desired consistency. Before laying, apply the prepared glue both on the tile and on the base so that the lines from the notched trowel are located at different angles – this will ensure maximum adhesion of the tile and floor.
Recommendations for future tilers
Considering that the cement-sand mortar and polymer-cement mixes for tile are set within 20-30 minutes, they should be prepared in small portions. In half an hour, only an experienced professional manages to lay no more than three rows of tile. Before laying, soak the tile for 20-30 minutes in warm water or in a 1% solution of calcium chloride or aluminum chloride – this will improve tile adhesion.
Start laying the tiles on the diagram previously drawn on the floor by applying and evening a layer of glue with a spatula and pressing the tile into it with the touch of a hand or gently tapping with a rubber mallet.
If there are tile beacons, align the first tile on them, and equal each following on the previous one, observing with the help of restrictive crosses the same width of the seams and periodically checking the horizontal.
After laying several tiles, immediately remove the excess solution between them with a damp cloth. To remove excess polymer cement or other glue, moisten a rag in a solvent. If the tile lay down unsuccessfully or “fell out” of the horizontal, it should be removed from the adhesive layer, lay out and level a new adhesive pad with a spatula and re-lay the tile.
Each time, put a layer of adhesive with an area slightly larger than the perimeter of the tile and touch to check the horizontal alignment along the edge and in the crosshairs of every four tiles.
It’s important to know!
It is impossible to lay the adhesive solution in the corners of the tile, if voids have formed there – this will worsen the strength of the tiled floor during operation. Try to push the tile with your hand or a mallet hammer into the solution until you hear a loud, but a dull sound when tapping.
Trimming and grouting
When laying the extreme rows and designing the flooring for stationary interior elements and devices, you can not do without trimming tiles. This operation can be performed qualitatively using a portable tile-cutting machine: it ensures the accuracy of the required size up to 1 mm. Curved surfaces can be cut on a tile grinder.
If you don’t have such technological devices at your fingertips, you can use an ordinary glass cutter, but when working with a thick tile in this case, get ready for problems: you will have to “bite off” a small or narrow strip of tile with nippers or ticks.
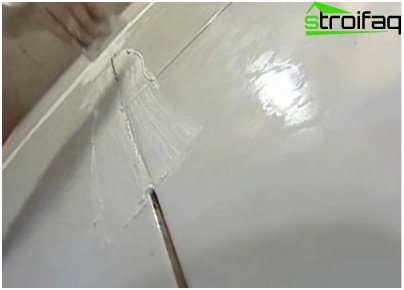
Grouting – the final stage of laying floor tiles
A day after the completion of the installation of the tiled floor, you can start grouting the joints with a special grout mixture corresponding to the color of the tile. It is not recommended to perform this operation before: tile adhesive tends to shrink when hardening, and this can lead to cracking of prematurely jammed joints.
Prepare the grout mixture, bringing its consistency to the density of sour cream. Fill the mixture between the tiles, moving the herringbone with a spatula and slightly squeezing the composition into the seams. Remove excess grout by running a trowel along the seam. The thickness of the trowel can be trimmed with a piece of soft cable. After an hour, the remainder of the grout can be washed off with a damp sponge..
Your new tile floor will be ready for use in 4-5 days. It takes so much time for the tile adhesive to completely dry..


