How to lay tiles on the floor
Ceramic tiles occupy a strong position among the wide variety of flooring. It is laid on the floor in the bathroom, kitchen, bathroom, sauna, hallway or even on the porch. The tile coating is strong, durable and resistant to external influences. Laying tiles on the floor is a responsible and troublesome task, it will require considerable skill and patience. Despite technical difficulties, due to the variety of tile shapes, textures, colors, the floor can be turned into a real miracle of design thought..
Content
- How to level a floor under a tile
- How to lay tiles on the floor
- Tile and glue selection
- Marking the floor before installation
- Technology for laying tiles on the floor
- Grouting between tiles
How to level a floor under a tile
One of the most important tasks before laying tiles is surface preparation. The quality of the work will depend on how smoothly the tiles are laid, and how firmly they hold..
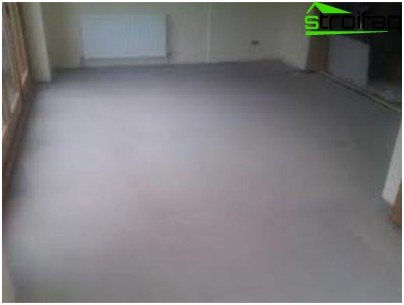
Self-leveling floor screed – the fastest and best leveling option for ceramic tiles
Laying ceramic tiles on the floor requires an almost perfectly flat surface.
Concrete base must be leveled with a screed. To do this, first clean the surface of the old flooring, dust and dirt. If the base has significant defects in the form of flows of cement or cracks, they must be disposed of. We remove the influxes with a grinder. We expand the cracks, remove the crumbled concrete and seal it with repair mortar.
In the case of laying tiles in rooms with a high level of humidity, it is necessary to waterproof the base. To do this, first primer the concrete base, then apply a waterproofing material. You can use bitumen mastic. After complete drying, fill the leveling screed. It can be a traditional cement – sand mortar or a self-leveling mixture. When the screed is dry, apply another primer layer for better adhesion of the tile adhesive with the base.
Wood base It can be leveled under the tile, both by the dry method and by a traditional screed based on building mixtures. First of all, the wooden floor must be checked for strength. Do not leave loose boards, they must be replaced with new ones. If the floor is in a more or less normal state, then we cycle it, close up all cracks and cracks with putty based on PVA. After the putty dries, we waterproof the surface. Now you can pour cement – sand screed or lay sheets of moisture-proof plywood with a thickness of at least 12 mm to level the floor.
Before laying the tile on the floor, the foundation must be made dry, clean, smooth and as even as possible. After we have achieved such indicators, we proceed to laying.
How to lay tiles on the floor
Tile and glue selection
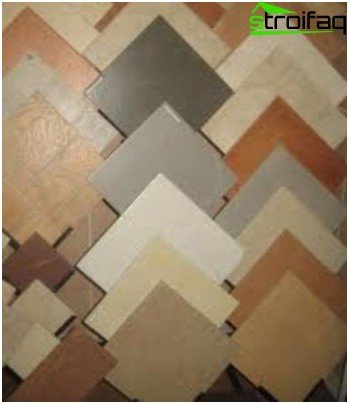
Among the whole variety of ceramic tiles must be selected based on the conditions of its operation
The choice and purchase of tile is made taking into account the operating conditions and the place where we are going to lay it.
Floor tiles in the bathroom should have low rates of water absorption. In order not to slip on the wet floor, it is advisable to buy not a smooth tile, but slightly rough or with a relief surface.
To the kitchen Ceramic tiles with high resistance to detergents should be selected. During cooking, grease and oils will often drip onto the floor, and often have to be washed with alkaline products. In addition, the kitchen floor is subject to frequent mechanical stresses, so the tile must have a wear resistance class of at least third.
For the floor in the hallway the wear resistance class of the tile is also very important. He must be above the third. Plus, it’s worth picking up a not too soiled color, because it will often be walked on in dirty shoes.
For arranging outdoor terraces, verandas, porch, steps and other objects in the open air Porcelain tile, which resembles natural granite with its appearance and performance characteristics, is suitable. The degree of its durability is fifth grade. So you don’t have to worry if it can withstand heavy mechanical stress.
Before buying ceramic tiles, be sure to measure the area that we want to cover with its help. It is also worth immediately thinking over the layout option and drawing. Having decided on the choice of tiles, we get with a margin of 15% a minimum, and preferably more. This is necessary for safety, if during the installation the tile breaks. Indeed, in a week this tile may no longer be on sale: it will end or there will be a new batch in which the shade is slightly different from the old. So it’s better to ensure the availability of spare material.
Immediately we get all the decor elements: borders, tiles with a pattern, framing elements and more.
The brand of glue directly depends on the brand of ceramic tiles. The general rule is only one: if we put it in a room with a high level of humidity, then we get glue for wet rooms, and if we put it in the open air, then – glue for outdoor work.
Marking the floor before installation
Before laying the tile on the floor, be sure to mark the floor.
The best option would be to draw a layout diagram on a piece of paper or use special computer programs to see the final result. So it will be clear what tile you need to trim, how many tiles in a row, how the pattern looks and much more.
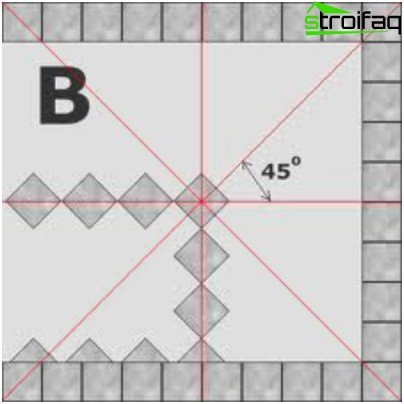
To mark the floor, we outline axial and diagonal lines. We lay the tiles “dry” on them and mark the places
- To transfer the markings to the surface of the floor, remove all skirting boards, platbands and door frames.
- We measure the length of the walls and outline the middle of each.
- Then we take a marking cord, rub it with chalk, pull between marks on opposite walls and let go. On the floor you should get an axial line connecting the walls.
- With the help of a marking cord, we outline the longitudinal and transverse axial lines.
Important! If you plan to lay the tiles on the floor diagonally, then you must also outline the diagonal lines. We connect the opposite corners of the room with a cord and draw lines. The intersection point of the axial and diagonal lines should be one, which means that we did everything right.
Focusing on the drawn lines, lay out the tile “Dry” to visually see the location of the picture. At this stage, you can adjust the initial version of the installation: hide the trimmed tiles under the furniture, surround the central elements of the decor with whole tiles. If we are satisfied with the result, remove the tile and proceed with its laying.
Technology for laying tiles on the floor
- First of all, we prepare the adhesive mixture according to the instructions on the package. To do this, pour the dry component into the water and knead with a drill with a mixer nozzle. We don’t do much solution at once, as it quickly begins to “set”.
- We always start laying with a whole tile. It’s better to start from an angle that is clearly visible and move towards the door.
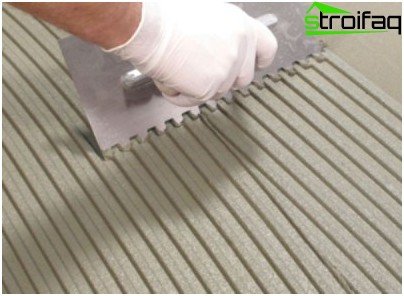
Apply glue for the tile to the base and stretch with a notched trowel
- Apply glue to the area where we will lay the tiles. We use a notched trowel for this, level the solution.
Important! Do not immediately cover a large area with glue. It is enough to apply to the area where one tile will be located. If the installation is done by an experienced craftsman, then you can immediately glue 1 m2.
- We put the tile on the glue. We level it, we tap it with a rubber mallet, starting from the middle of the tile and moving to its edges. Check the leveling horizontally and adjust by clicking in the right places.
- Remove excess glue around the edges with a spatula and apply a new portion of glue for the next tile.
- We lay the second tile. Align again, tap, check horizontal. In addition, we must control the location of the tiles on the same level. If the second tile is higher than the first, tap and press on it until excess glue comes out at the edges. If the second tile is lower than the first, remove it and add a little glue.
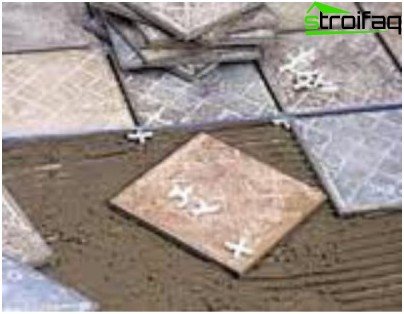
To fix the joints between the tiles we use plastic dividing crosses
- Between the tiles we insert special plastic dividing crosses.
- We lay all the tiles according to this algorithm: put the glue, put the tile, pressed it down with your hand, checked the level, finished it with a rubber mallet, removed the excess glue from the front side of the tile, installed dividing crosses, removed the excess glue along the edges with a spatula.
- We cut the trimmed tiles last. If necessary, we cut them again, taking into account the exact size of the site.
- After a day, we take out the dividing crosses, when the glue has already partially polymerized.
- Only after the adhesive has completely dried, can you start grouting.
Grouting between tiles
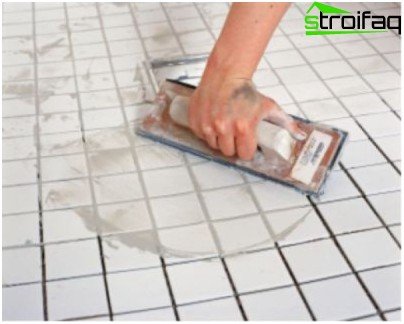
You can overwrite the seams only after the tile adhesive has completely dried
We prepare the composition for grouting, knead it to a thick paste.
Using a rubber spatula, fill the seams between the tiles with a trowel. Then we collect the excess composition using the same spatula. Repeat the procedure.
We wait until the trowel partially cures, it will take about half an hour.
Important! Do not tighten the tiles with a preliminary wash. Since later dried grout cannot be removed from the surface without damaging the front of the tile.
Wet a large-pore sponge in warm water and remove the remaining adhesive and grout from the tile surface..
An hour after that, we clean the tile with a hard sponge and a dry flannel rag.
How much does the tile dry on the floor
The drying time for ceramic tiles ranges from 24 hours to 7 days and depends on the characteristics of the adhesive and the circumstances of installation.
The most optimal temperature for laying tiles is + 20 ° C and humidity 60%. Under these conditions, the glue dries in 24 hours. Although, even in such ideal conditions, it is better to start grouting no earlier than after 36 hours.
If during the laying of the tile the base temperature was +5 ° C or lower, the glue may harden for more than 7 days. To speed up this process, it is necessary to equip additional heating of the base. Because until the tile adhesive dries, grouting cannot be started..
In conditions of high humidity, the glue also dries for a rather long time. This must be taken into account. For example, even if the laying took place in the summer heat in an open sunny area, but after 4 hours it started to rain, the tile was flooded with water, the drying time of the glue will last.
After the glue for the tile and grout for the joints have completely dried, the floor can be used. Before that, it is not worth bringing in and arranging heavy furniture.
Laying ceramic tiles on the floor, from surface preparation to grouting, will take at least a month and a half. But the result will please you for many years.


