Many of us live in private houses, have summer cottages, and therefore everyone knows the feeling when you want to sit, it seems, in the room, but for the fresh air, the aromas of flowers and the song of the birds, there are no drafts for you, but it’s also not stuffy. Therefore, very often in these very private and country houses you can see the veranda. To prevent overcooling of a family peacefully resting in the fresh air, we learn how to cover the floor on the veranda so that a pleasant pastime does not turn into a disease.
Content
- Room Features
- Options for laying the floor on the veranda
- There are plenty to choose from (typology and technology)
- Green wood
- Modern decking
- Everlasting Porcelain Tiles and Tiles
- New Fashioned PVC
- Good old linoleum
Room Features
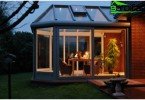
The veranda is a closed extension to the house, which is usually built under the attic. The veranda is often not heated, which is why the question of what to floor in it is relevant. After all, it’s stupid to close this room during the winter months only because of the cold – it’s better to equip it wisely and enjoy the pleasant atmosphere all year round. In connection with our rather cool and, moreover, changeable climate, the veranda is often glazed on three or at least two sides.
This room is built either from wood, or from the same material as the main part of the house (brick, concrete slabs, sibit, etc.). Since the weights of the massive house and the walls of the veranda vary significantly, these structures are not connected tightly. Which, in turn, threatens with drafts and a truly icy floor, and this is another reason to seriously think about what your floor will be made on the veranda.
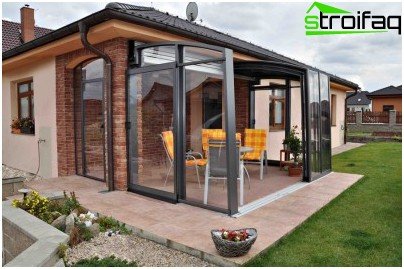
The verandas are different: what is the floor covering – that’s the question
Options for laying the floor on the veranda
As a rule, the floor on the veranda is 3-6 cm lower than in the house itself. The resulting cracks and gaps are covered with a plinth. But this is only a cosmetic solution to the problem, this move will not protect from the cold. In fact, the floors on the veranda are made according to the same algorithm as in any other room, but there are still differences:
Since the foundation will be different, a platform under the floor requires special attention – it needs to be prepared before laying the flooring itself. We remove the top layer of the soil, we smooth out the dirt well (so that the grass does not grow under the floor).
- It is sometimes recommended to cover the site after leveling it with a herbicidal film, and then fix it with a dense layer of gravel or gravel.
- However, your site under the future veranda should not just be flat, but have a slight slope towards the drain hole or drainage ditch.
What your floor covering on the veranda will be and what it will be made of depends on your preferences, the estimated budget that you are ready to invest in your extension, and, of course, on your imagination. Fortunately, today manufacturers offer a huge selection of materials with varying density, etc. Consider the most popular and cost-effective design options..
There are plenty to choose from (typology and technology)
Green wood
Wood is the undisputed winner among flooring materials in various extensions, it is found in almost every second country house, in almost every country house, even in the private sector within the city. On the verandas of the platform, dried and well-planed boards with a smooth surface cover (at least their front side should be smooth – it looks decent).
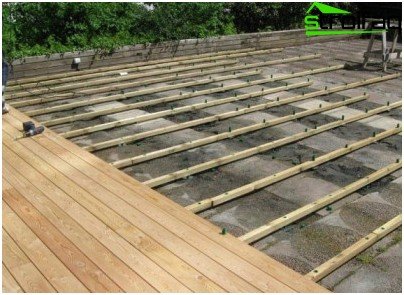
Wooden floor – option number 1 for the veranda
The thickness and width of the boards can vary significantly depending on the area, the presence or absence of voids under them (between the soil and the coating itself) and some other factors.
How does this happen in practice:
- logs are cut between the crowns of the lower basement of the veranda foundation, on which the boards of the “rough” floor are laid – the first layer (so that the tree does not suffer from the omnipresent bug spiders, hungry to the planks, it is advisable to pre-impregnate your building material with an antiseptic and paint it);
- there are two ways to fasten the boards to the logs – screw them down or nail them (in the second case, choose the length of the studs so that their length exceeds the thickness of the boards at least twice – it will be more reliable);
- first hammer the nails into the side logs, moving towards the center;
- make sure that the gaps between the boards do not exceed 1 mm;
- soak your wooden floor with bioprotective agents or with a special varnish-based compound, you can pre-coat with tinting agents – this way the floor will last longer.
Useful advice: try to lay out the boards so that the annual layers on the wood “look” in different directions relative to the floor plane. So your coating, from time to time accumulating moisture due to rain, it will not be so obvious to deform and bend.
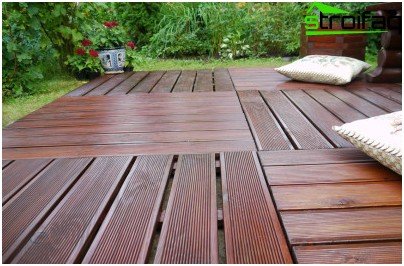
Wood looks expensive, lasts a long time
Modern decking
Decking is the same wood (this material is also called a terrace board), but processed in a special way. Such a floor is more resistant to decay processes, does not slip, and is durable. They make it from a wide range of breeds: from ordinary larch to an exotic tiger tree. Another advantage – this floor does not need regular treatments with reducing emulsions..
There are two types of such coating used in the design of annexes, including:
- smooth decking;
- with embossed surface.
The second option is preferable – it is more convenient to use, it is more convenient to move around and slip on it, even if such a floor is wet.
Installation is carried out in an open and hidden way. In the first case, the coating is drilled elementarily to the logs with self-tapping screws (in the boards themselves, before starting the installation, you need to make holes so that the coating does not crack during operation). The second option – laying decking on special hardware. At the place of fastenings, they are sawn into boards and connected with metal plates, it is desirable that these are plates with a corrosion-resistant coating.
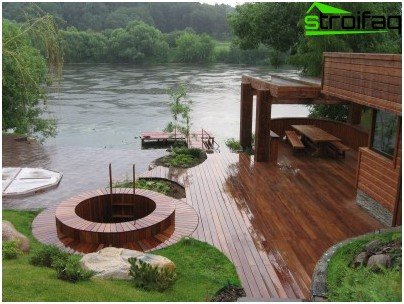
Decking – advanced wood for your porch
Important: decking needs ventilation, take care of the gaps between the boards so that air circulates freely between them. After laying, open your floor with a protective varnish to prevent burnout and damage to appearance.
Everlasting Porcelain Tiles and Tiles
Ceramic tiles and porcelain tiles are also a very popular choice for flooring on verandas. If you choose a frost-resistant variety of this material, the floor will be durable, attractive, plus it will be extremely easy to care for..
How it’s done:
- The extension area is poured with sand or cement mortar.
- The solution is leveled by the width corresponding to the number of rows in which you will place the tiles (its value directly depends on the width of the tiles themselves).
- Smooth surface strewn with cement.
- We spread the plates, tapping and pushing it into the base.
- After a couple of days, it would be nice to process the seams with the jointing mixture for fidelity..
Voila – the effective solution for decorating the veranda is ready.
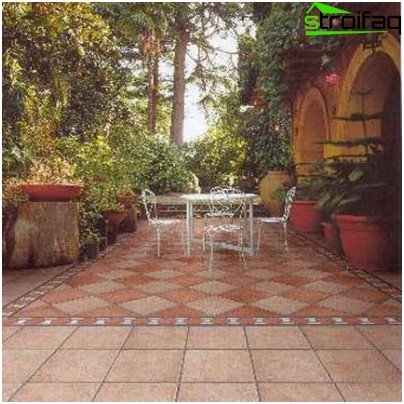
Porcelain tiles will ennoble your interior
Tip: make a cement-sand base at least 20 mm wide, but the seams between the tiles should not be too large.
New Fashioned PVC
To decorate the base of the veranda with PVC means to get a modern durable floor without unnecessary gestures. Nice and pretty fast. The choice of textures, colors and manufacturing techniques pleases the eye, the wallet and at the same time gives room for the flight of thought of the sleeping designer in you. Here you have an imitation of stone and laminates with parquet, they make PVC and “under the tile” – you can distinguish what’s under your feet, only to the touch. The beauty of this gender is that it does not need to be specially prepared.
How to mount:
- We level and soil the soil.
- Mark the transverse and longitudinal axes of the future veranda.
- From the point of intersection of certain axes “on dry” we lay out PVC.
- We glue the coating from the transverse axis to the edges, moving from the central part of the future room to the walls (you can glue on special mastics, synthetic glue).
Recommendation: the tiles will hold better if after the sticker they are properly walked by a special skating rink or a heavy object at worst. Also make sure that all the tiles are on the same level, the quality of your results and the comfort of your household when using the veranda depends on this..
Good old linoleum
Linoleum is usually laid on a fabric base..
Linoleum – a budget and quick way to adequately arrange the floor on the veranda
It is very simple to lay linoleum on fabric:
- After 2-3 days, the non-glued parts of linoleum are cut off, under the joints, gaskets are made from scraps of plywood or fiberboard (for strength, so that the coating does not bulge when walking and lie smoother).
- Make a lap in 1-2 cm, leaving at the same time around the perimeter of the cloth panel not glued to 8-10 cm.
- We glue it by carefully pressing linoleum to the surface so that no air bubbles creep in, otherwise the coating will subsequently swell and become tubercles – it’s ugly.
- Smear the floor with cold bituminous mastic, wait half an hour – and you can start gluing.
- Linoleum canvases are laid from windows – in the direction of light.
- Then – cleaning from dirt and dust.
- The site is being leveled – we already remember that, right?
- We roll the rolls 24 hours before the start of the work so that they are aligned and it is easier to work with them.
- We choose the material we like and afford.
- After trimming, the gaps between the walls and the panel are covered with a plinth.
Here is the entire list of the most common floor solutions on the veranda in our climatic conditions. Choose what you like best, but do not forget that using most of these coatings, you need to take extra care of floor insulation. Let it be comfortable on your verandas.


