Technology for applying bulk floor
Among the many ways to arrange the surface of the floor, a special place is occupied by Self-leveling floors. The popularity is due to its many beneficial properties – the coating is durable, resistant to abrasion, smooth, resistant to changes in temperature and humidity. If you decide to radically change the design of the room, then the most valuable find will undoubtedly be bulk floors – the application technology allows you to realize any design ideas for decorating the floor – from simulating a wooden, marble, stone coating to reconstructing any colorful and even voluminous images.
Content
- Starting standard: preparation
- Flooring Technology
- Why priming is required
- Base layer fill
- A lot of variations of decor
- Fill the finish layer.
- Helpful hints and tips
One of the most important characteristics of polymer coatings is its thickness. Resistance to abrasion depends on the nature of the film-forming substance and on the thickness of the floor. It is possible to conditionally classify polymer coatings according to their service life as follows: minimum service life for thin-layer coatings, average for bulk floors, maximum service life for highly filled floors.
The most important and painstaking stage of the installation of bulk floors is the preparation of the foundation, which must be carefully leveled. If the surface will have at least a slight slope, then the entire bulk mass will simply drain into the lower corner.
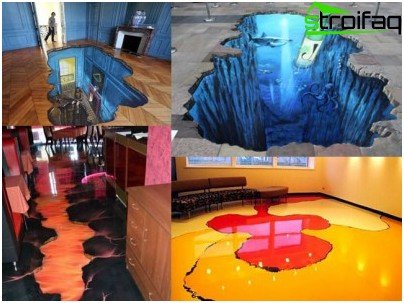
One of the great advantages of bulk floors is the ability to create a surface with a 3D effect.
Starting standard: preparation
For additional thermal insulation of the floor, it is recommended to pour an even layer of expanded clay on the floor slabs. A cement-sand screed (you can make it yourself from water, sand and cement, or use one of the purchased mixes for screed) should be poured over expanded clay, carefully leveling the screed surface. After the screed has completely dried, you can pour the floor.
The consistency of the mixture for bulk floors resembles liquid sour cream. The mixture for bulk floors consists of resins and polymers with various additives and fillers. The durability of the bulk floor, as well as the quality of the coating itself (the absence of defects on the surface) depends on the proper preparation of the surface. The most practical basis for a bulk floor is a concrete screed. Some experts say that the base can be wooden. Nevertheless, we advise you to refrain from applying self-leveling floors on wooden substrates, due to the sensitivity of wood to changes in temperature and humidity.
The main requirements for a concrete surface are the absence of excess moisture when applying a primer (residual humidity not higher than 4%). After pouring the screed, the time required to remove residual moisture from the concrete should pass, if the time is running out and there is no time to dry the screed, it is possible to use a two-component epoxy primer on a water basis.
In the presence of irregularities, the screed must be sanded first. Grinding screeds also opens up the pores in the concrete, which contributes to better adhesion of the primer..
If the floor is faced with ceramic tiles, you can use it as a base for the bulk floor. To do this, you will need to wash and degrease the tile, then treat it with soil (for better adhesion with the subsequent layer). If there are lagging tiles, they are removed, and the resulting empty attachment points are filled with cement mortar..
Flooring Technology
In order for the work to bring the expected result, it is necessary to strictly observe the technological sequence and follow the recommendations of the manufacturer of the mixture or solution.
Why priming is required
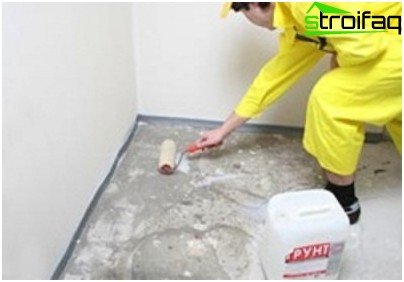
Priming the surface will provide maximum adhesion between the rough surface and the grout.
The primer prevents air from entering the bulk floor, thereby preventing the formation of bubbles. The primer is applied to a clean prepared surface using a roller. To improve adhesion to the self-leveling floor, the still-not-dried soil is sprinkled with fine clean sand. The primer is used for priming for concrete, it is recommended not to save on the primer and if the soil is quickly absorbed, apply it again.
Base layer fill
For the rational use of materials, as well as to ensure that the surface of the poured floor is smooth, without bloating and clots, careful leveling of the surface of the base of the floor is required. The bulk floor consists of two layers: base and finish.
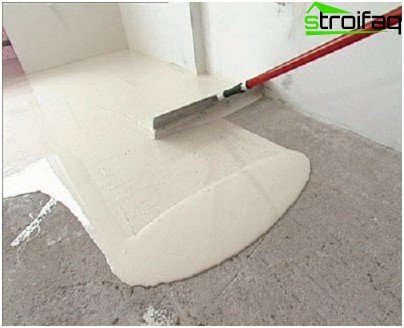
Base coat application
The base layer (2-3 mm thick) is applied after 6-12 hours after priming, if the polyurethane floor is to be applied, and after 12-17 hours if the epoxy floor is to be applied. The base layer is a continuous coating, applied by pouring. The polymer composition is poured onto the floor, evenly distributed over the surface. If a large area is covered, then the polymer mass is poured in alternating strips. The mass spontaneously spreads and is leveled. For applying a bulk floor, a special tool with an adjustable gap (squeegee) is used, which allows applying a polymer layer of the desired thickness.
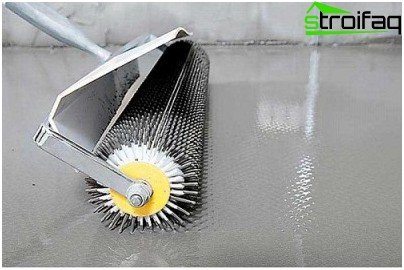
Roller rolling
To remove air bubbles from the material, it is recommended to roll a special roller with long spikes on the surface before the base mixture dries. Rolling should be done in different directions, without removing the tool from the material, for 10-15 minutes, the process should be completed until the viscosity of the composition increases. If a two-component composition was used for floor production, knead only the amount of the mixture that can be used before it hardens. During the rolling of the surface with an aeration roller, “paint strollers” are put on the shoes, they have special metal spikes that do not violate the bulk coating. Before a long break in work, it is imperative that the entire tool be washed in a solvent.
A lot of variations of decor
You can decorate a freshly poured floor with polymer “chips” of a contrasting color, or add another filler to give the floor an additional effect. Glitter, color stains, multi-colored blotches, peculiar applications from leaves, pieces of wood, coins, shells will help create a unique floor design. This technique will also allow you to visually hide small surface defects. The next step is to apply a thin layer of polyurethane varnish. The varnish can be color, colorless, matte or glossy..
Bulk 3d floors look especially interesting – their manufacturing technology is characterized by the use of high-quality prints and transparent bulk materials. If you are interested in the possibility of embodying the most daring ideas for decoration, consider how 3D bulk floors are made – the video technology is presented below.
Fill the finish layer.
24 hours after applying the base, but no later than 48 hours, you can apply the finish layer (1-2 mm thick). To improve the chemical properties of the coating and maintain a characteristic shine, it is recommended to complete the filling of the floors with a thin layer of polyurethane varnish. The resulting seamless coating is monolithic, practically does not cause temperature shrinkage, but the temperature seams in the doors and along the walls must be cut through, then fill them with special sealant.
Before applying the top coat, the base should be properly prepared: clean the surface for painting or varnishing. It is possible to apply the floor in one layer or in several. If the floor is represented by several layers, then before applying the next layer, each previous layer is ground.
Helpful hints and tips
It is important to follow the instructions for applying the mixture for the bulk floor, the temperature indicator is especially important. If the composition is applied at a temperature significantly lower than that indicated in the instructions, the mixture will harden for a long time, spread poorly, much more mixture will be needed, and the appearance of the coating may not meet expectations. An elevated temperature accelerates the hardening of the mixture, but negatively affects the quality of the composition (the appearance and durability of the coating suffer). When pouring floors in the room, a constant temperature must be maintained until the mixture solidifies completely. An increase in temperature during solidification leads to the formation of bubbles. Priming of the surface should also take place at a constant temperature and air temperature, in order to avoid the appearance of defects. A sharp decrease in air temperature will lead to the formation of condensate on the surface. In such conditions, work is unacceptable. The uncured coating should be protected for 24 hours from any moisture entering the surface. In case of moisture, the hardening process will be disrupted, the coating will turn white, bubbles and pores will appear on the surface. Keeping the surface clean and ensuring adequate ventilation is important..
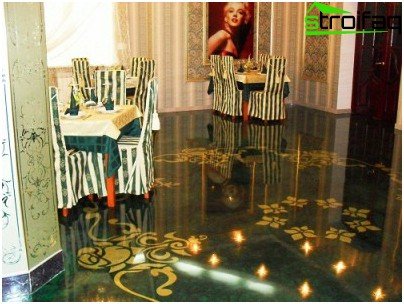
Bulk floors for the embodiment of bold design solutions
Based on the presented photos, you can add up only a general impression of this method of flooring, but, despite some difficulties in execution, the result exceeds all expectations.


