Installation technology of suspended plasterboard ceiling
Plasterboard suspended ceilings are not news for a long time, plasterboard finishing constructions suspended from the main ceiling have been used for many years, and this arrangement method does not lose its relevance. Apparently, the possibility of various designs is important: you can make a perfectly smooth surface or build a multi-level structure of complex shape, with built-in lamps and decorative lighting. With the help of a false ceiling, you can hide communications, electrical wiring, unevenly laid floor slabs, and even any flaws in the base ceiling in the simplest way! And if we take into account the ease of installation of decorative lighting and a pleasant “bonus” in the form of additional noise isolation, it turns out that there can be no better option than installing a suspended ceiling made of drywall!
Content
- Installation procedure for drywall construction
- Consumables: full list
- Ceiling Mount Tools
Installation procedure for drywall construction
The installation of a suspended plasterboard ceiling begins with measurements of the premises, on the basis of which a diagram of the frame structure and the layout of the sheets is designed. First of all, you need to decide on the design of the ceiling, think over the options for lighting device.
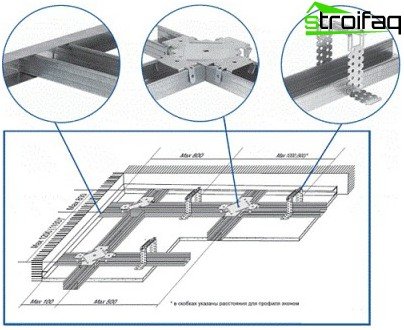
The frame fastening scheme of the profiles
The distance between the drywall and the base ceiling depends on the height of the recessed fixtures. If the built-in backlight is not provided in the suspended ceiling, then it is installed at a distance of 5 cm from the main one. Guided by the previously drawn up scheme, we make the calculation of the necessary materials. The length of the profiles and sheets of drywall should be selected according to the size of the room, in order to avoid unnecessary costs.
Consumables: full list
- Drywall Sheets.
- Guiding and bearing profiles.
- Suspensions and connectors.
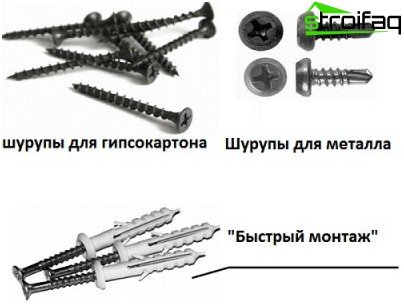
- “Quick installation” – (expansion bolt shield screw).
- Screws for metal (“bugs”).
- Drywall Screws.
- “Serpyanka” (tape for seams).
- Finishing putty.
- Primer.
 Plasterboard fasteners
 Plasterboard fasteners
Ceiling Mount Tools
- Roulette.
- Water level.
- Beat cord.
- Drill with drill.
- Screwdriver.
- Angle grinder (“grinder”).
- Scissors for metal.
- Profile cutter.
- A hammer.
- Drywall Knife.
- Putty knife.
- The rule.
- Grinding grater.
- Drill (with crown).
Work sequence
We will consider the principle of arranging a false ceiling using an example of installation of the most simple single-level design. On the walls around the perimeter of the room, a guide profile must be fixed. In order for it to be placed strictly horizontally, it is important to make the markup properly, for which you need a pencil, a water level (a transparent flexible tube filled with water) and a chopping cord (a special cord with powder dye).
In all corners of the room, marks are made using the water level, and the necessary distance from the base ceiling is measured, focusing on the lower corner of the room. Even marking on all walls is “carried out” using a beating cord: the cord tightly stretched between the marks is slightly pulled from the wall and released, when it hits the surface, the dye contained in the cord leaves an even mark on the surface.

The position of the guide profile is determined by the level, the installation location is indicated with the coated cord
The guide profile is established strictly along the received line. It should be attached to the wall using a “quick mount”. The holes in the wall are made with a perforator, with an interval of 30-40 cm. Bearing profiles will be installed in the fixed profile guides, the places of their installation should be marked with a marker. Drywall sheets should be joined in the center of the supporting profiles, this is necessary for reliable fastening of the structure. The centers of the load-bearing profiles must be located strictly with an interval of 60 cm from each other, because the width of the drywall sheet is 120 cm.

The first supporting profile is installed 60 cm from the wall
Suspensions must be fixed on the ceiling in the center of the bearing profiles: they are fastened at intervals of 50–80 cm using the same “quick installation”. For each suspension, you must drill two holes in the ceiling with a puncher.
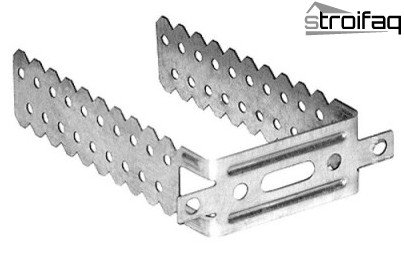
Suspension for supporting profiles
The first supporting profile is installed at a distance of 60cm from the wall. With a grinder we cut off the profile of the desired length, mount it on the marked spot and fasten it with screws (“bugs”) to the guide profiles and suspensions. To facilitate your work when screwing in the screws, you must use the notch, having previously punched holes in the metal profiles.

Slotting through metal profiles makes mounting easier
A thread stretched in the center of the room perpendicular to the installed profiles will help eliminate sagging load-bearing profiles. All carrier profiles are fixed in the same way..
The place where the chandelier is supposed to be mounted must be “strengthened” by installing jumpers from the supporting profiles. If it is planned to install a ceiling cornice for curtains, then the places for future fixing of cornices also need additional reinforcement by bearing profiles. In the event that the length of the drywall sheets does not cover the entire width of the room, in the joints of the sheets it is necessary to install jumpers from the supporting profile, which are fixed with self-tapping screws using single-level connectors (“crabs”).

A single-level profile connector (“crab”) is used if the length of drywall sheets does not overlap the width of the room
It is important to remember about the need to place sheets of drywall “in reverse” or in other words in a checkerboard pattern. The installation of recessed fixtures requires wiring, do not forget about it before installing drywall. The frame is ready.
The next step is the installation of drywall sheets. The sheet is fastened to the profile using self-tapping screws for drywall. Often on the drywall, marked marks of the location of the screws are applied on one side. So that the self-tapping screw does not break drywall when screwing in, but only slightly immerses in it, you must correctly set up a screwdriver or use a special nozzle with a limiter.
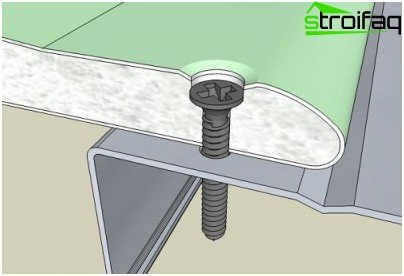
Drawing the correct position of the self-tapping screw when fastening drywall to the profile
It is necessary to cut drywall with a knife and an aluminum rule. A knife cuts a layer of cardboard on one side with a knife, with a light blow from the opposite side of the cut, a layer of gypsum breaks, the sheet bends slightly, then a second layer of cardboard cuts through bending.
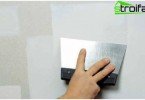
After assembling all the sheets, joints where there are special chamfers are glued with a “sickle” using putty and putty knife. Each well from the self-tapping screw also needs to be putty. After hardening putty at the seams, you can putty the entire surface. The ceiling is putty, after the putty has completely dried, it is sanded with a special grater. If necessary, putty is applied in several layers to obtain a perfectly smooth surface. After the last finishing grind, the surface is primed, having previously removed the dust with a dry brush. After the soil has dried, the ceiling is ready for finishing (painting, wallpapering).
Installation of lighting
The layout of the lighting devices is designed simultaneously with the general layout of the ceiling. To connect the built-in fixtures, wiring is laid in advance, in the places of their installation, drill holes of the required diameter (for the size of the fixture) with a drill with a crown. A previously laid wire is taken through the hole, a lamp is connected to it using connecting contacts. If 12V lamps are used, a step-down transformer must be installed.
The chandelier mounting plate is fixed with self-tapping screws through drywall to pre-installed profiles.
Installation of a multi-level construction is more complicated, but it is based on the same principles, therefore we will not consider it in detail, we only note that the height of the levels is regulated by suspensions of various lengths.
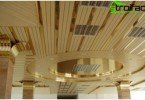
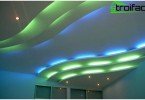
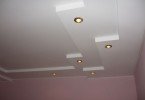
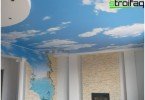
Suspended ceilings made of drywall can be surprisingly varied and spectacular – a photo selection is another confirmation of this. A valuable opportunity for the implementation of creative ideas, this method of arranging the ceiling is also valuable from a practical point of view: installation does not require laborious preparatory work. It is quite possible to make a gypsum plasterboard ceiling on your own, as you see, there is nothing super complicated or difficult to do in its arrangement. But certain skills are still required.