How to make a ceiling “Starry sky” with your own hands
Longing for summer holidays and a warm deep sky strewn with stars makes you think about the embodiment of the starry sky above your head in the urban jungle. After all, one wants to plunge into the abyss of shining stars, planets, galaxies and gas clouds in the evening or at night, pacified and filled with strength and energy for the fulfillment of tomorrow. You can try to bring this tale to life by creating a ceiling Starry sky with your own hands. By the way, such a ceiling can be made not only in the bedroom, but also in any other room of the apartment or house: living room, bathroom and even kitchen. There are several ways to equip star ceilings, we will talk about them in the framework of this article.
Content
- Draw with fluorescent paint
- “Starry sky” with the help of oracle and varnish
- We organize the starry sky from fiber optic
- LED ceiling design
Draw with fluorescent paint
The use of fluorescent paint is one of the simplest and most time-consuming ways to make a star ceiling. The technology involves the installation of a stretch ceiling, on the surface of which a drawing of the arrangement of stars and other objects is applied using paint.
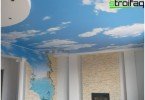
Canvas stretch ceiling can be ordered in specialized companies. Moreover, it can be perfectly white or have a picture made using photo printing. The image can be absolutely anything, for example, a blue sky or a seascape.
To draw the starry sky on the ceiling with fluorescent paints, you will need artistic skills and dexterity
To install such a ceiling, you will need to make a frame for suspended ceilings:
- First of all, with the help of the level, we find the lower corner of the room and deviate from it 2 cm. We put zero level marks on the walls around the entire perimeter of the room.
Important! To frame profiles docked in the corners exactly, measure the corners of the room with a protractor.
- We fix the profile to the wall at the marked level using self-tapping screws and dowels.
- We cut the profile slats to the size of the room at an angle equal to half the angle of the room and we fit exactly together.
- Using a heat gun, we warm the room to 40 ° C.
- Only after the room has warmed up, we begin to unwind the film.
- At the time of attachment, the film must be warmed up to 60 ° C. If we purchased a PVC film, then we begin to fix it from the corners. Pull the diagonally opposite corners and fix. Then the remaining two corners. Next, we gradually fix the sides of the canvas, starting from the corners and moving towards the middle. If the canvas is made of fabric, then the fixing technology is somewhat different: first the sides are attached, only then the corners.
- After the ceiling canvas is stretched over the frame, you can apply a picture of the starry sky to its surface. To do this, you can put dots and blots with fluorescent paint in a chaotic manner. Or you can prepare a drawing template that depicts stars, planets, constellations and galaxies, attach it to the ceiling and apply paint according to the template.
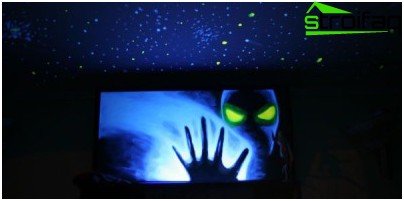
During the day, fluorescent paint is not visible, so the ceiling will have the same pattern as that depicted on the canvas stretch ceiling. And only with dusk and darkness the ceiling will shine with stars.
“Starry sky” with the help of oracle and varnish
The starry sky drawn with fluorescent varnish is no worse than fiber optic or LED
This method is perhaps the easiest and cheapest. Its only drawback is that it is necessary to level the surface of the ceiling almost perfectly with the help of plasters and putties. In the meantime, its surface will dry, you can do the image of the starry sky.
As a basis, you can take absolutely any picture that you like. And not only the space theme, but it can also be an image of the sunset sky, in which stars glimpse through the clouds. The drawing you like must be applied to the Oracal self-adhesive film, which is used in advertising. It will cost quite inexpensively. The main thing is to coordinate the color palette and brightness with printers in order to remain satisfied with the result. Such a film is usually produced in a length of 2 m, so for pasting the ceiling the pattern will have to be broken into fragments.
When the film is ready, it is carefully glued to the ceiling. To do this, you need two helpers to hold the canvas. Removing the protective film from the adhesive layer, apply the film to the ceiling and carefully level it so that there are no air bubbles. Upon completion of all work, stars can be applied to the surface of the pasted ceiling. To do this, you can use luminescent paint, or you can use regular nail polish that glows in the dark. You can plot the locations of stars in a chaotic manner or according to a previously prepared picture.
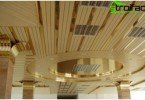
We organize the starry sky from fiber optic
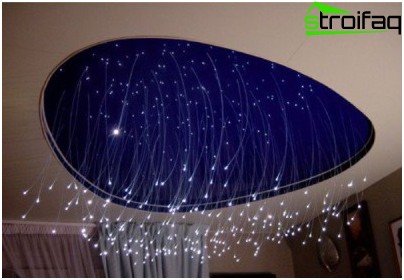
To create a starry sky from fiber optic threads, you will have to work hard
This method is now widely used. To implement it, you will need a stretch ceiling, a light generator and fiber optic threads.
A light generator is a box in which a light source is installed – a halogen or LED lamp. Inside, various light filters can be installed, allowing you to change the color of future stars, the intensity of their glow and even create motion or flight effects. The light box is quite compact, so it can be installed in a cabinet or hidden in a suspended structure.
Light-conducting threads – optical fiber, which have a flexible structure and different diameters, are connected to the light generator.
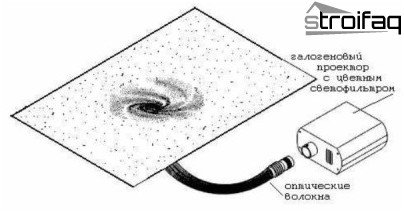
The diagram shows the visual arrangement of all ceiling objects
Fiber Optic Starry Sky
To install the Starry Sky ceiling, you will first need to find a place to install the light generator (ceiling niche, design of a suspended or suspended ceiling, mezzanine or other).
Before starting the installation of the design of the stretch ceiling to a level higher, it is necessary to pull the fishing net or equip another frame of sheet material. The network will be needed in order to stretch fiber optic threads on it – so they will not exert pressure on the stretch ceiling with their weight.
After the network is stretched, from the light generator we stretch light-conducting threads under the ceiling, distributing them over the surface according to the future saturation of the pattern with stars.
Then we install the suspended ceiling using the same technology as described above.
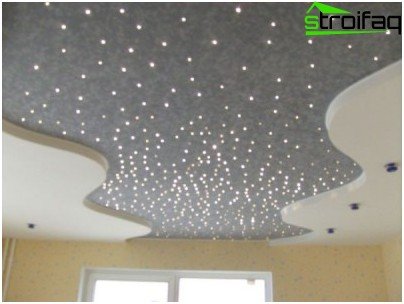
We warm the canvas and make holes in such quantity and with such intensity as it was planned. On average, they should be about 80 pieces per 1 m2. The diameter may be different. Large (2 mm each) – one or two, medium (1 mm each) – about 10, and all the rest are small (0.75 mm each).
We pull through the holes fiber optic threads of the appropriate diameter and fix them with glue. Then we bite off the excess from the bottom with pliers so that nothing protrudes on the surface of the ceiling. During the day, protruding threads may not look very aesthetically pleasing, so you should take care of a neutral or intricate pattern on the ceiling so that they are not noticeable.
It is also possible not to bring the optical fiber out through the web. This method is somewhat more complicated, since they will have to be fixed to the surface of the canvas, which is very inconvenient. At the end of the thread, LEDs are mounted, which abut against the canvas of the stretch ceiling and shine through it with a dim and “distant” light.
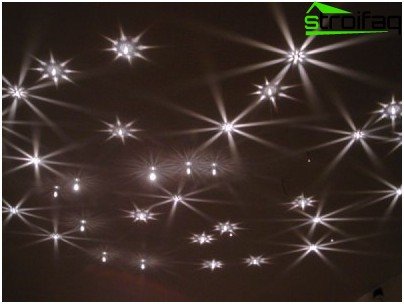
Swarovski crystals will make the stars shine with a bright flame
Another way is to use Swarovski crystals. The method is costly, but very effective. Crystals are attached to the ends of the fiber-optic strands brought out, which scatter the light and create an atmosphere that even more resembles a real starry sky. During the day, crystals are visible on the surface of the ceiling, but they look very beautiful, playing with the glare of the sun.
Such a ceiling is controlled using a remote control or switch.
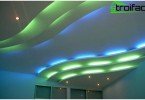
LED ceiling design
LED Ceiling Stars – Bright and Rich
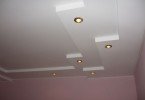
This method is similar to the previous one, but more expensive. You will need a suspended ceiling made of drywall, LED lamps of different capacities, a controller and wires.
Using this method will not work many small stars in the sky. It is mainly used to make the moon and several large brightly shining stars, as well as to provide light music.
Even before the installation of the suspended ceiling in plasterboard sheets, it is necessary to make holes and fix LED lamps connected to the wires in them. After all the holes are completed, the resulting design with hanging wires and inserted LEDs is attached to the frame of the profiles. Wires are connected to the controller and power supply, which is hidden in the ceiling structure.
This method has one significant drawback – without diffusers, LEDs blind eyes. Therefore for ceilings in bedrooms fiber optic is preferred.
In making the ceiling “Starry Sky” with your own hands, there are no tricks. The method must be chosen from the calculation of the budget and personal preferences, and for installation invite a couple of friends, since working with ceiling paintings is always a big deal, requiring a lot of free hands.