How to fix drywall to the wall
Depending on the nature of the surface, the curvature of the walls and functional purpose, different methods of fixing drywall are used. After reading this article, you will learn how to fasten drywall to the wall, get acquainted with the methods of fastening. Armed with knowledge, you can choose the most suitable option.
Content
- Frameless mounting method
- Wireframe mounting method
There are two main ways of attaching drywall: frameless and frame. Frameless way is the easiest. It does not require the construction of a frame. Drywall is fixed to the wall using gypsum glue.
Frameless mounting method
Necessary conditions for fixing drywall in a frameless way:
- a solid base that does not have crumbling areas and lesions with a fungus;
- the wall does not freeze, is protected from moisture;
- the surface is cleaned of dust, paints, oils.
This method is preferable to apply with a slight curvature of the walls..
Materials and tools:
- wall drywall (12.5 mm);
- dry gypsum mixture;
- container for breeding gypsum mixture;
- paint knife;
- jigsaw;
- the rule is 1.5-2m;
- rubber mallet;
- spatulas;
- roulette;
- fishing line;
- level.

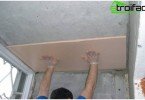
Plaster glue application on drywall with frameless mounting method
Work execution order:
- We measure the walls. We plan the placement of drywall sheets, while it is important to avoid cruciform joints (the sheets should be offset).
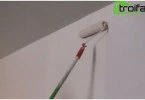
- Prepare the surface. We clear of dust, exfoliation and shedding. Porous and highly absorbent surfaces must be primed..
- Cutting sheets of drywall. In addition to whole sheets, inserts may be needed, they must first be cut. If the ceilings are higher than 2.5 m (standard sheet length), you will need to join them with inserts that are cut in advance. It is convenient to make straight cuts with a paint knife, cutting cardboard on one side and breaking off the sheet along the cut line. After cutting cardboard on the other hand. Curved radius cuts are made with a jigsaw.
- Next, prepare the adhesive gypsum mass. As glue, gypsum mixtures of slow hardening can be used. For example, starting putty. You can also use building gypsum, but to extend the time it hardens in water for mixing, add PVA glue or wallpaper glue.
- Gluing drywall sheets. The thickness of the adhesive layer depends on the curvature of the surface. If the surface is relatively flat, then you can glue directly on the wall. The glue is applied with a notched trowel over the entire surface of the drywall sheet or in large drops with a trowel. To equalize the large curvature of the walls, you should first install “beacons”, which are made of drywall strips about 10 cm wide. “Lighthouses” are glued around the perimeter and vertically with an interval of 40-50cm. First, with the help of a plumb line, the left and right extreme “beacons” are exposed, then with the help of a fishing line stretched between them, the remaining vertical stripes are attached. The upper and lower horizontal “beacons” are aligned using the rule. Drywall sheets are pressed by the rule, installing it in different directions, tapping on it with a rubber hammer. It is important to leave 5-7mm joints and gaps between the sheets: 7-10mm from the floor, 3-5mm from the ceiling. For this, it is convenient to use pre-prepared wooden wedges. After the glue dries, the seams are sealed with putty, the gap near the floor is closed with a plinth, and the gap from the ceiling is putty.
Wireframe mounting method
The wireframe method is more complex and expensive, but has several advantages..
The advantages of attaching drywall to the wall in a frame way:
- improved heat and sound insulation;
- the ability to align the large curvature of the walls;
- does not require thorough surface preparation;
- can be used on freezing walls to insulate them.

The mounted frame made of galvanized profile allows you to place a cable and an additional layer of insulation under the plasterboard plates
It is necessary to construct a frame to which drywall sheets will be attached. The frame can be made of wooden bars (30 to 50 mm) or galvanized profiles. The timber frame slats are fixed with screws and dowels and are exposed with wooden lining.
A wooden frame will cost less than a galvanized profile, but working with a galvanized profile is easier and more convenient. In addition, the galvanized profile is more reliable, and wooden bars can simply rot over time. Let us dwell in more detail on the method of attaching drywall to a galvanized profile.
Tools and materials:
- wall drywall;
- galvanized profiles;
- metal suspensions (fasteners for profiles);
- screws and dowels;
- hammer drill;
- drill;
- self-tapping screws;
- putty knife, putty;
- plumb, roulette;
- grinder, scissors for metal;
- screwdriver.

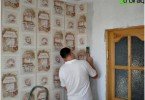
Fixing drywall to the wall, frame method
The order of work during installation in a frame way
First of all, we measure the walls and mark out the attachment points of profiles and suspensions. Guiding profiles are fastened along the perimeter: top to the ceiling, bottom to the floor, side to the walls. Vertical support profiles are inserted into the guide profiles with an interval of 40 cm in the center of the profile, which are attached to the wall by suspensions. Suspensions should be placed at a distance of 80cm (one below the other). Next, we carry out the installation of the frame. First, we fix the upper guide profile to the ceiling with a punch, dowels and screws. Relative to the upper, a lower guide profile is set and fixed to the floor with a plumb line. Next, the lateral guide profiles are attached, then the suspensions are attached, after which the bearing profiles are inserted into the guides, they should be fixed to the suspensions with four-millimeter self-tapping screws. The frame is ready, you can begin to fasten the sheets of drywall.
To improve sound and thermal insulation, the space between the wall and drywall should be filled with mineral wool. We fix the drywall with self-tapping screws 25 mm long, twisting them with a screwdriver so that the heads of the screws go into the drywall to a depth of 1-2 mm. If there are inserts and horizontal joints, it is important to remember: under each joint, a supporting profile must also be installed, fixed with the help of so-called “crabs” (single-level connectors). It is also important to remember the displacement of drywall sheets. Seams and holes from the screws are sealed with putty.
Often the fastening of drywall to the walls is carried out with the aim of operational economical “clean” alignment.
The result is a flat wall – an ideal basis for further finishing, which, in fact, was required.