How to achieve the effect of decorative plaster with your own hands
One of the most practical and at the same time exquisite materials for interior and exterior decoration of rooms and facades of buildings is decorative plaster. With its help, you can imitate natural stone, aged walls, paper, leather, etc. And always it will look exclusive and original, since it is impossible to repeat the drawing, even with a great desire. The fact that this material is natural and environmentally friendly, with high mechanical strength, resistance to abrasion, and therefore durability, also speaks in her favor. Despite the fact that there are a lot of finishing materials on the market, this type of finish does not lose ground, but on the contrary is gaining more and more popularity. Moreover, decorative stucco with one’s own hands is a very real idea, which even lay people can realize.
Content
- Types of plaster, purpose
- The benefits are not only decorative
- Methods and technology of application
- How to prepare the surface
- Operating procedure
Most often, decorative plaster on the market is presented in the form of ready-made dry mixes based on synthetic binders; various fibers, sand, crumbs, pebbles are fillers, and various additives – antiseptics, thickeners, dyes, etc. – give mixtures additional useful properties. As fillers use marble, quartz or granite chips. The grain size can vary greatly from 0.5 mm in diameter to 5 mm. Particle size affects not only the final appearance of the surface and the degree of its relief, but also the consumption of material: the larger it is, the more material is consumed. The same type of decorative plaster can be produced in different variations..
Types of plaster, purpose
To consider all types of plaster that are found on the market, you need to devote a separate article to this topic. Conventionally, it is divided into front and interior. Facade plaster is characterized by excellent moisture resistance and frost resistance, in addition, it does not suffer from aggressive environmental influences, does not fade, and retains an aesthetic appearance for a long time. There are several large groups of decorative plasters: mineral, silicate and based on synthetic latexes.
For internal work use all of these types. There is a classification depending on the technology of applying the material and the type of surface that is ultimately obtained. Sometimes in the store you can find a description: “under the fur coat”, “roller”, “rust” and others – they talk about what type of surface you get in the end, and require knowledge of certain application techniques and work technology in general.
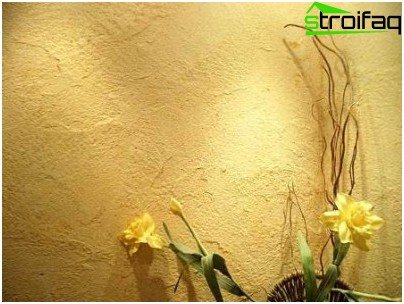
Textured plaster – one of the most practical and at the same time refined materials for interior and exterior decoration
The benefits are not only decorative
The use of decorative plaster as a finish has several advantages:
- when using coarse-grained plaster, it takes less time to prepare the surface, since putty and careful leveling are not required;
- the surface has a finished look, which means that you can do without additional finishing;
- the surface is rather strong, resistant to moisture and mechanical stress, practical and durable;
- if you wish, you can change the appearance of the room in a matter of hours: just paint the walls in any color you like. In this case, the texture will be preserved, and the decorative effect will only intensify.
Methods and technology of application
How to apply decorative plaster? The technology depends on which option you prefer. It can be either simple or rather complex, requiring certain skills. This can be attributed to the Venetian plaster, for example: it is applied in several layers, in a special way and coated on top with special wax. Each stage requires accuracy and strict adherence to technology. Silicone materials are also difficult to work with, which allow you to get beautiful relief images, but require good artistic taste, well-developed, clear movements and ambitious patience..
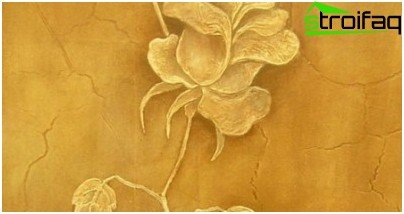
Artistic textured plaster will make your interior exclusive
If you definitely want to do decorative plaster with your own hands, then it is better to opt for structural bark beetle plaster. It is easy to apply and allows you to create a beautiful decorative surface without much effort. Even a person far from construction will master the work with it: an ordinary spatula, a grater and basic skills will be enough to apply it – it is almost impossible to spoil such a coating. The application technology is simple and makes it possible to obtain various terrain options. The depth of the relief grooves depends on the size of the particles that make up the mixture. It is important to take into account one more nuance: the “texture” the material, the greater its consumption. But there is a plus – there is no need for perfect alignment of the walls – he himself perfectly conceals small defects and uneven walls.
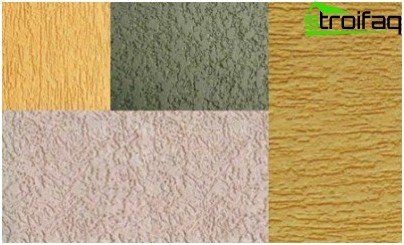
Textured plaster of the Bark beetle type gives scope for imagination and provides a good decorative effect
How to prepare the surface
Due attention must be paid to preparing the surface on which the plaster will be applied. Everything is simple here, but patience is required. It is necessary to clean the wall of the remnants of wallpaper, peeling plaster, paint and chalk coating. All these manipulations must be performed very carefully, if you do not want to mess with the repair again in a year or two. If there are cracks, then they must be expanded and repaired (putty). Under the Venetian and some other types of decorative plasters it is necessary to level the walls to perfect condition. In other cases, the wall should simply be more or less even, but without deep holes, of course. It is primed and waiting to dry completely..
If combined wall decoration is supposed: part is painted, and part is textured, then technologies are prepared for painting the walls: cleaning, puttying, sanding, priming. The most clearly separated surfaces with different textures can be done using masking tape (for straight dividing lines) or (in the case where the dividing lines are arbitrary) a self-adhesive sealant for windows.
As in every business, there is a minimal set of tools, without which it is impossible to achieve the desired result. It is necessary to prepare: a container for the mixture, spatulas of different sizes, a wooden or plastic grater, a metal ironer, a sponge, a container with water, a special roller for textured plaster. The list may vary depending on the choice of material..
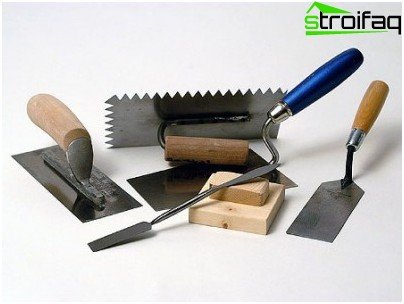
Simple plastering is required to make textured plaster.
Operating procedure
• Choose the required consistency of the solution, following the instructions on the package. Important: prepare such an amount of solution that you can develop without interruption in work, since when setting, it will not work out again. And one more thing: tune in to do the job at a time, because the places where the dried layer is joined and the “fresh” one are very visible and look pretty ugly.
• In skillful hands, a regular spatula and grater become universal tools. Practice on a small section of the wall evenly, apply a thin layer of the solution and achieve the desired texture. As soon as the plaster is slightly thickened, you need to easily walk on it with a grater, creating a picture. There are several techniques available for a beginner that will allow you to get a good decorative effect..
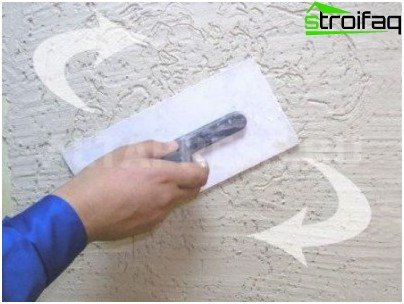
Performing circular motions with a grater, you can get an interesting decorative effect
Traditional patterns: various circles, oblique or straight “rain”, wave, “crossed” pattern.
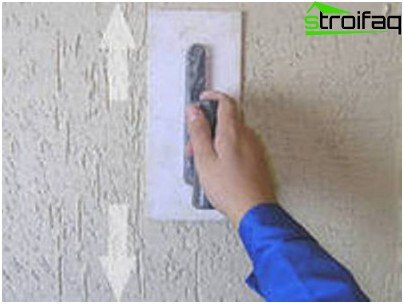
A simpler, but no less interesting option: horizontal relief
It is important that the movements are confident and soft, it is not necessary to apply excessive force and process a certain area for too long, the effect of plaster will be lost. To obtain the desired texture successfully used and improvised tools that are available in every home: oilcloth, washcloths, hard brushes and others.
An interesting effect can be achieved without any adaptations, using your own hands. But the simplest way is to apply decorative plaster with a special roller, although it does not give such scope for creativity, however, it guarantees a good result.
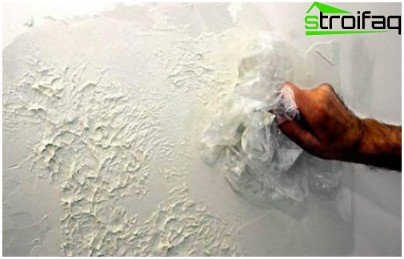
Using improvised tools to create a relief allows you to get new interesting options for textures
• The drawing needs to be applied as quickly as possible, since the coating dries out pretty soon, and this can lead to the fact that the texture can turn out to be heterogeneous. Particular attention should be paid to the joints of the plaster sections: it is important to avoid overlap and sharp boundaries.
• After a certain time after application (usually 15-20 minutes), the surface loses its shine and begins to dry. At this point, you need to smooth the relief ledges with the help of a smoothing machine moistened with water. The pressure should be light so that the resulting relief does not deform. During the procedure, the ironer should be cleaned as it becomes dirty and moistened liberally..
• If adhesive tape was used to separate sections of the wall with different finishes, then you need to remove it before the treated surface dries, otherwise the contours may be chipped and the border will not be clear.
• As a rule, complete drying of the surface lasts about 24 hours. In each case, it is worth clarifying separately. Then the surface is finished with a fine sandpaper: loose particles are removed.
Painting plastered walls
Since the walls, for the decoration of which decorative plaster was used, have a completely finished look, many stop at this. But not all. Fans of bright colors and those who want to quickly and without extra costs to update the interior of the premises can resort to painting plastered surfaces. Apply for these purposes better quality paints resistant to abrasion and exposure to sunlight.
First, the textured sections of the wall are painted so that small particles of hardened plaster do not fall on a smooth surface. Then, after about two hours, they paint the rest of the wall. When the first coat dries, a second coat of paint is applied. The decorative effect, which is achieved at the same time, is impressive, but, you must admit, these are extra troubles.
Many people prefer to tint the mixture directly in the store. Usually, customers are offered a huge number of various shades. It remains only to choose. After that, a test painting is done: the plaster is applied on the plywood according to your choice and allowed to dry. It is imperative to wait until the surface has completely dried, since the shade changes depending on the humidity of the sample. If the shade did not quite suit you, it is possible to choose a different color. The advantages of this method are obvious: the color is uniform, and if you do not have enough material, it is easy to order the same shade. But, nevertheless, some experiment lovers can tint the plaster on their own. There is nothing complicated about this: the pigment needs to be added a little, stir well and be sure to make colorings.
Observing these simple recommendations, it is quite possible to perform decorative plastering yourself and achieve good results. With a little effort, you can make your interior unique and very cozy, and most importantly, forget about the repair for many years, unless, of course, you are a fan of this troublesome business.


