How to align the walls with your own hands
A beautiful apartment and quality repairs, tastefully selected modern furniture and a comfortable interior are the dream of every person. But all this magnificence fades in rooms with uneven walls. Very often people try to hide a small blockage and cover it with furniture or resort to other tricks. In vain, as uneven walls must be leveled, not masked. For example, furniture only emphasizes this drawback. Therefore, this article will discuss how to align walls and achieve the desired result..
Content
- The nature of the curvature of the walls
- Vertical deviation detection
- Start – surface preparation
- Wall alignment methods
- Plaster leveling with beacons
- Beacon Installation Process
- Better align the wall?
- Wet alignment
The nature of the curvature of the walls
The reasons for uneven walls can be different. Ceilings and walls in old houses often leave much to be desired, but in many new buildings they are also not ideal. Most prefabricated houses have curved walls due to the fact that the panels are slightly uneven. But only not to the extent that the house cannot be put into operation – this aspect does not affect its reliability. With the installation itself, the stove could turn around a little. For a more visual representation of the situation, you need to find an album sheet of paper and put it on the table. The sheet is flat, but if you take it at the ends diagonally, and then pull one end up and the other down, you can observe an interesting picture. What happens to the sheet? Here, according to the same principle, a concrete slab can also bend. This deviation is insignificant, but it is enough for blocking walls and violating the geometry of the corners of the room.
Vertical deviation detection
It is possible to level the walls with your own hands, but first you need to determine where there is a blockage. To do this, you should pay attention to the corners, if there is an assumption that some wall is uneven, then you need to check the correctness of your thoughts. This is done in an elementary way: a heavy object is tied to one end of a thin but strong rope, and the opposite end must be attached to the corner of the joint of the upper floor and the wall. Well, are the lines of the wall and the ropes parallel? So the walls are flat, and if deviations are observed, that is, there is a blockage and it needs to be removed.
Important: it is advisable to carry out such a test together – one person holds the cord, and the second from a distance of several meters evaluates the parallelism of the lines.
There is another option for assessing the condition of surfaces. For this process, you will also need a homemade plumb line with a weight that does not rotate. In each corner, you need to perform the so-called hanging. To do this, the plumb line is fixed on a nail driven into the wall.
Important: the nail is hammered near the ceiling, so that the plumb line is located near the wall, but does not touch its surface.
Next, the plumb line must be moved along the nail to determine its optimal position, then another nail is hammered at the bottom of the wall before touching the plumb line.
A similar operation must be carried out with the other edge of the wall. The next step is pulling the cords at four lighthouse points, in the end you can get an accurate picture of the state of the wall surface.

Determination of the verticality of the walls
With a small deviation of 10 mm during repair, it will be necessary to carry out puttying using plaster and cement mixtures for leveling. And with more significant vertical deviations, you will need to resort to drywall walls.
Start – surface preparation
How to properly align the walls, that is, what order should be followed? First, the surface is prepared: a solid foundation and the absence of crumbling areas are important. It is also necessary to remove the remnants of old wallpaper and shabby stucco. Next, the prepared wall is carefully primed with a roller, brush or spray. The primed substrate should dry for about 12 hours, so this work is best done closer to the night so as not to waste time waiting.
Wall alignment methods
Depending on the materials used, there are 2 ways to align the curvature of the walls. The first is raw (using building mixtures) and the second is dry (installation of structures). Both methods are good, but only with strict adherence to all processes. And also each has its own characteristics, advantages and disadvantages. Basically, leveling with plaster finds its application in small differences (30-50 mm). Of course, their use is also possible for surfaces with greater curvature. But this is an additional financial cost for both work and materials. Therefore, a more optimal option in such cases is the installation of the frame and plating it with drywall.
Plaster leveling with beacons
So, if the bumps are already determined, and the surface of the walls is prepared, you can proceed to direct alignment.
Important: do not forget about electricity – you must first turn it off. And when cleaning the walls, proceed carefully so as not to damage the elements of the electrical wiring that is hidden in the wall.
To firmly fix the plaster, the walls must be primed. This process prevents extremely undesirable delamination of materials, and also increases moisture resistance. For cement mixtures, cement milk is used, consisting of cement, water and sand..

Installation of beacons before “wet” plaster leveling
When wet leveling with plaster, it is best to use the technology of “beacons”. This is a special metal element made of flexible aluminum. The lighthouse is embedded in a curved wall, it is along it that the subsequent alignment takes place. For clarity, we can give an example: if the wall is littered at the top, then we can understand that the lighthouse needs to be pushed against the wall from below, and some material, for example, rotant, will be placed between the wall and the lighthouse – it eliminates the roughness.
Beacon Installation Process
Installation of lighthouse rails begins with the installation of profiles on opposite walls. The verticality of each lighthouse is checked by a plumb line, and on the wall such profiles are mounted with building plaster. Gypsum is applied to the rail at several points, observing a distance of 50 cm. Then a cord is pulled through the lower, middle and upper profiles. The following slats are also mounted on the wall, but so that their cord barely touches.
Important: the distance between the beacons is selected based on the size of the tool with which the plaster will be applied.
It is also possible to attach lighthouses with screws. This slightly slows down the progress of the work, but then it greatly simplifies it. Even a layman can easily adjust the verticality of the lines by twisting or unscrewing the screws.
Better align the wall?
The leveling composition depends on the maximum thickness of the leveling layer, as well as on the type of binder component – cement or gypsum. The cement mixture is most suitable for a wet room (bathroom, kitchen), and it is advisable to use the gypsum composition in living rooms, because it perfectly supports the indoor climate.
Wet alignment
When the lighthouse is over, it remains to be done. Now you need to dilute 10-15 liters of plaster and apply it between the beacons. The mixture should have a certain consistency, it should not be too liquid (will slip) and excessively thick (it will be difficult to apply). If gypsum compounds are used in the work, then their quantity should be such that the mixture is developed within an hour.
After applying the mixture, a rule of the required length is taken and pressed against the beacons, and then the surface is leveled by movements from the bottom up, or vice versa, to whom it is more convenient. If in some places there was little mixture, then you need to add it and again draw the rule. These steps are repeated until the wall becomes perfectly flat..
When the applied layer of plaster dries, you can notice the roughness of the wall. For this reason, there is a need for its processing with finishing putty and sanding with fine sandpaper..
The advantages of this leveling method are that the useful area of the room is not taken, and the disadvantages are that the walls need preliminary cleaning and this is a rather time-consuming process, after which there is a lot of debris and dust.

Plaster corner – a tool for forming ideal angles
A separate point in the alignment process is angles. How to align the corners of the walls, because these are the most problematic areas? It is advisable in this work to use the angular trowel, level and other auxiliary tools. Aligning the angles is a painstaking task that requires experience and knowledge. For faster setting of the solution in the corners, you need to add a small amount of gypsum to the mixture.
How to eliminate significant bumps?
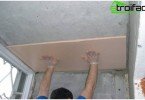
How to align the walls in an apartment with large differences and the terrible curvature of the walls? In this case, it is rational to resort to the installation of specific structures, followed by lining them with drywall. This method has the main drawback – “eating up” the usable area, but is also characterized by positive aspects: there is no need for preliminary work, as well as communications and the installation of sound and heat insulation materials inside the constructed frame.
This method has the right to life. First, a frame is mounted, which is subsequently sheathed with drywall. It is possible to level the blockage, but still the blockage does not disappear anywhere, but simply hides under the skin. If the apartment is small, then such fraud will make the living space even smaller.
Cooking the walls under the wallpaper
If the apartment has begun repair, then the question will surely arise, how to align the walls with the wallpaper? Wallpaper and other decorative coatings require a smooth surface that needs to be prepared.
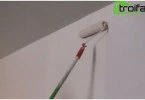
If the irregularities are insignificant, you can safely treat the wall with ordinary putty. For this purpose, it is necessary to use a spatula, which is designed to grind cracks and their subsequent putty. The most convenient option – the use of two medium-sized spatulas.

Perfectly even walls – beautiful room
With a large amount of work, you can spread the putty in the basin so as not to jump constantly up and down. And for small holes and crevices a small bowl is used.
Important: if the volumes are still large, it is better to breed the mixture with a drill with a special nozzle.
And if the layer is thick, then the surface must first be treated with starting putty. With the right technology, the putty is applied in several steps, but only when the previous coat dries. Usually three layers are used, the last – finishing putty to finish the job. Then the entire surface is cleaned with sandpaper.
Bathroom is not an exception to the rule
The most common reason for leveling the walls of the bathroom is the type of future finish. If it is a tile, then you need to know how to align the walls with tiles. It should be noted that working with tiles is a responsible and serious process that requires a competent approach, and uneven walls are no exception. So, before you start the main process, you need to think about how to align the walls in the bathroom, adhering to technology.
Laying ceramic tiles is possible only on smooth walls, because if you ignore this issue, the result may be disastrous: bulging masonry with mounds and spoiled appearance of the room. The most common way to align – all the same beacons.

Alignment scheme for beacons
Walls with lighthouses are more durable, because after completion of work they are not removed from the wall, but continue to support the plaster. When working with plaster corners, you can get excellent angles at 90 degrees.
Plaster is applied on the principle of “casting” the wall. For this purpose, it is advisable to use a trowel. A small area is covered at a time, and not the entire surface of the wall. After the mixture is applied, you need to give it time to dry, and then you can cut off the excess protruding parts of the solution that go beyond the beacons. Water is added to the cut solution and the following intervals are rubbed over again..

Plaster beacons installation
After the plaster dries, the walls are primed and then the tiles are laid. Primer promotes better adhesion of the adhesive to the base.
There are options for leveling the walls, knowing all the subtleties and tricks of this laborious process, you can achieve a good result. The work of the plasterer, the master of his craft, is based on a high-quality surface, the composition of the plaster and the accurate beacons.
The main thing is to strive for something better, and not to live by the principle of “this will do.” No, it doesn’t do, a person’s housing should be properly designed: with smooth walls, beautiful decor and suitable furniture. Living in a room with such conditions is much more comfortable than contemplating crooked corners and heaped walls every day. Perfectly even walls are the norm that you need to strive for, since neither high-quality wallpaper nor compositionally installed furniture will hide the curvature.