Drywall seams close up
Drywall is the most popular material for decorating ceilings and walls in residential and non-residential premises. Demand for it in recent years has increased significantly. It is not difficult to work with drywall – and this is undoubtedly the main trump card of the material. It is easy to cut and easily mounted on a given position. Sheets have absolute environmental cleanliness, are able to create excellent sound, thermal insulation – it is by no means surprising that their sales are growing.
But just by installing it from the drywall you won’t “get rid of”. In order for the erected structures to serve you faithfully, you should carry out a high-quality seal of the seams. After all, the slots left will simply negate all the claimed advantages of the material. Yes, this procedure is responsible not only for the appearance of the structure, but also for the terms of its operation. If you do not pay maximum attention to the repair of GKL seams, then an unscheduled facing of surfaces in your house is just around the corner.
Content
- Proper preparation is a guarantee of success
- Selection and preparation of the mixture
- Joint repair process
- Why seams burst?
Proper preparation is a guarantee of success
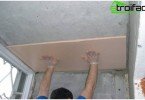
First of all, you need to make sure that all the connecting places of the drywall sheets are tightly attached to the frame. Each of the screws should be “screwed” into the drywall to a depth of about a millimeter, without breaking through the cardboard itself.

Correctly prepared surface for sealing is the key to successful work
This is followed by a complete cleaning of the surface from dirt and dust – without this it is impossible. Indeed, the durability of the entire drywall construction depends on the quality of the joints. A clean work surface is one of the fundamental “quality” of the process.
Do not think that the repair of drywall seams is work from the category of difficult and impossible to do with your own hands. This is a “everyday” thing, you just have to be careful and consistent..
The next step on the way to putty is the direct preparation of the sheets. The opinion of the masters regarding their ends diverges radically. Some experts believe that the ends should be subjected to an angular cut without fail. They explain their opinion by the fact that this maneuver contributes to an increase in the strength of the seam, and also makes it convenient to seal.
Others do not recommend doing this, because they are firmly convinced that narrowing the edges of the sheet provided by the manufacturer is quite enough to fulfill the task.
What exactly to do at this stage is up to you.
Selection and preparation of the mixture
The choice of putty should be given maximum attention. The sealing of GKL joints will be as productive as possible with a special gypsum mixture, which has the property of quickly drying and easy to grind. She is also able to firmly “hold” the joints of the sheets – a high adhesive effect is evident, which is important when using drywall for wall decoration, especially the ceiling.
Important! For any of the putties, there is a “recipe for cooking.” Do not be lazy to read the labels on the packages!
An improperly diluted mixture is a poor-quality mixture, which can damage the seams, and therefore the entire surface of the finish.
Pour a certain amount of “powder” into the bucket, fill it with water – use a construction mixer to make the mixture homogeneous; make sure that there are no lumps in it. In a word, you should get the consistency of thick sour cream.
Important! The mass must never drain off the spatula.!
Joint repair process
Necessary materials and tools:
- ready putty;
- primer;
- putty knife;
- serpyanka;
- wide brush.

Primer joints enhance adhesion, reduce material consumption
Once again, make sure that no dust or burrs remain on the seams. If necessary, sweep their remains with a wide brush. Coat the seams with protective primer (primer) and wait for it to dry completely. Now you can proceed directly to the seal.
Hook a little putty on the spatula and carefully press the mass into the joints, spread it along them. Place a sickle on the seam, smooth it with a spatula. The tape must be completely recessed in freshly applied mass..

The serpentine sticker is necessary to form a perfectly flat monolithic surface
Important! The length of the sickle should slightly exceed the length of the seam itself.
Sanding should only be started after the putty has completely dried. “Polishing” the seams is necessary using a special grout mesh or a simple “sandpaper”.
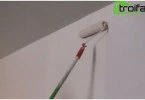
The surface should be approximately flat. Lubricate the seams again with a primer and let it dry. Voila: the ceiling and walls are ready for further processing – painting, wallpapering.
Why seams burst?
The main causes of cracking of the seams are structural errors, as well as errors during termination, which can be qualified as follows:
- negligence in the preparation of putty;
- the stickiness of the GKL fastener;
- lack of reinforcing tape.
But this is not all aspects that can provoke a defect. For example, the seismic activity of rough walls can also cause cracking of fillet welds. This usually happens when the walls are made of wood. This material lends itself to natural expansion, which is why problems arise.

Now you can start finishing
For all other “standard” cases, the ideal way to permanently forget about the existence of any seams is to not neglect the need to use a sickle and fill with high-quality putty.