Entering the bathroom, you find an old tile, cracked or faded in some places? It seems it’s time to think about the repair. The first thought that visits you, for sure, is to learn in detail how to lay the tile on the wall. The installation process is quite complicated, it requires certain skills. But having the desire to make repairs in the apartment with your own hands, you will certainly cope with such a difficult task. The main thing is to do everything consistently and extremely carefully, do not rush.
The process of laying tiles, as well as other repair work, can be divided into several stages. We will consider in detail how to correctly and efficiently lay a tile so that it pleases you with its appearance for more than one year.
Content
- Surface preparation for cladding
- How to choose a tile?
- Adhesive preparation
- Tile Laying Technology
- How to cut tiles
- The final stage: grout
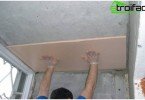
Surface preparation for cladding
High-quality laying of tiles on the wall will turn out only if there is a flat surface. This is the basis of your success at work..
First, examine the old plaster. If it is strong, without cracks and swellings, then we proceed to determine the verticality of the walls. Using a plumb line, we check for deviations from the level. All irregularities, amounting to several millimeters per meter, are subject to obligatory alignment with plaster or special mortar. Do not think that small deviations are not able to affect the quality of your work. Tile is an inflexible material, so any unevenness can lead to serious consequences that cannot be corrected..

On walls with significant defects, it is recommended to apply several layers of plaster, each layer should completely dry before applying the next
After checking the verticality of the walls, we proceed to determine their perpendicularity. The corners of the room should be 90 degrees, otherwise we will plaster the surface. What is the reason for this? First of all, with the future location of plumbing and household appliances. For example, if you need to put a bath in a corner other than a straight line, you will get a gap between its edge and the wall. Therefore, all work on surface preparation is carried out in full.
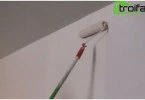
If necessary, plastering the surface is carried out in several layers, waiting for the complete drying of each of them. When laying tile, special tile glue is used, to prevent its absorption, a primer is applied to the surface. For the complete drying of the soil it will take about 5 days, during which it is wetted with water. The next stage of tile laying is directly facing.
How to choose a tile?
The choice of tiles is fully dependent on personal preferences. But there are a number of important points that require attention. The tile must be resistant to mechanical and chemical influences to which it will be exposed during its service life. In addition, when choosing, we take into account the resistance of the material to temperature extremes, the resistance of the pattern to abrasion, resistance to bending, the ability to maintain its original appearance under the influence of acids and alkalis.
Tiles should be purchased only in the first grade. This is directly related to the fact that the second grade is characterized by the presence of marriage, and there may also be a difference in the shades of the picture and the size of the tile.
Be sure to purchase material with a small margin, for example, in case of sudden breakdown of the tile when it is cut. Of course, you can buy the missing amount of tiles at any time, but no one can give you guarantees that it will match the color of the original batch. Therefore, go to the determination of the required number of tiles with all responsibility.
Adhesive preparation
Before starting laying the tiles, we prepare the adhesive composition. Pour the mixture in small portions into the water, mixing thoroughly with a mixer. As a result of such manipulation, we obtain the composition of the necessary consistency (not too liquid or thick). The mixture should be plastic, stretch well on the surface and not drain from the walls. After preparing the adhesive, we proceed to the installation process.

Adhesive preparation
It is important! If during the execution of work there is a need to leave, then before resuming the laying process, stir the solution.
Tile Laying Technology
Work on laying tiles is carried out sequentially, moving towards the upper edge. First of all, we lay out the bottom row. It serves as a starting point that has a direct impact on the end result. To ensure the evenness of the masonry, it is necessary to put a rail on the floor, which must be leveled. The entire first row is laid on this rail..
Next, you should nail vertical slats in the corners of the wall. This is done to achieve the horizontalness of the laid surface. Reiki is mandatory to align with a plumb line, and not out of habit – “by eye”. At the level of the second row and the rows following it, we nail into the vertical slats on a nail on each side, and between them we pull the thread. Using such a simple device it is very convenient to monitor the horizontal laying of tiles.

Checking the horizontal laying of tiles should be carried out regularly
Important! If the tile has not yet been laid on the floor, then tile is laid on the wall from the second row. First, of course, we determine the exact location of the basement of the tile. This is mainly due to the fact that the first row of tiles on the wall should overlap the floor tiles.
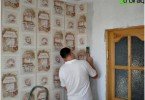
To apply glue, a notched trowel is usually used. We put glue on the lower edge of the tile, and, slightly pressing it to the surface of the base, we monitor the uniform distribution of glue on the tile. We carry out similar manipulations with the neighboring tiles. Between the tiles we leave the distance – the seam into which we insert special crosses. The required thickness of the seam is 2-4 mm.
It should be noted that such a gap performs not only a decorative function. At the time of thermal expansion, the likelihood of cracking of the tile or its peeling from the base is very high, if you do not leave a seam of the required thickness.

The process of laying tiles on the wall: crosses are needed to form beautiful even seams
In the process of laying, carefully check the level of each tile horizontally and vertically, controlling the quality of work.
How to cut tiles
Ideally, your wall surface will contain a certain number of whole rows of tiles. But, unfortunately, this situation is extremely rare in practice. So, having reached the corner of the wall, we determine the possibility of placing a whole tile. If it does not fit, then you should cut off the excess part. Here you can’t avoid the question: “How to cut tiles to get the right size and shape with even edges?”
To perform this manipulation, it is better to use a special tool – a tile cutter with a diamond or victory cutter. We place the tile on a flat and smooth surface, and then make an incision along the previously outlined line. Tile cut towards you. After you make an incision, you need to break the tile. We take it by the edges and hit the edge of the board with the back. It is very important that the blow falls exactly along the notch line. As a result of the correctly performed work, we get a part of the tile with smooth edges.

Cut the tile with a tile cutter
Of course, in the absence of proper experience, it is difficult to cut off part of the tile, which has a width of several centimeters. In this case, it is better to use pliers or ticks. Take a large part of the tile in one hand, and the second, using the existing tool, break off the smaller part.
It is better to lay the trimmed tiles in the corners so that the seams do not catch the eye or you can close them with cabinets or appliances.
The final stage: grout

We remove the remains of the fugue from the tile with a sponge
Having completed the bulk of the work of laying tiles on the wall, we proceed to the final stage. We wait for the adhesive composition to completely dry and carefully clean the surface of the glue that has fallen on it. Next, using the puffer of the desired color, fill the seams with a rubber spatula. To get rid of traces of the fugue remaining on the tile, wipe the surface with a damp cloth or sponge.

Laying tiles in the bathroom: you can combine tiles of different colors, different structures, elements with and without a pattern
The choice of fugue should be approached with great responsibility. You should not trust doubtful manufacturers, since poor-quality products can lead to cracking of joints in the future. Proper grouting enhances the aesthetic effect of styling as a whole, helping to smooth out minor flaws made during work.
In conclusion, we polish the wall surface with a soft flannel cloth. If you strive for ideal, then you can treat the tiles with a special composition that will provide protection and additional shine. On this, the process of laying tiles on the wall is completed. You coped with this difficult task.!