How and what is better to plaster walls
Today, the situation when an apartment in a new building meets bare walls without any decoration and plaster is the norm. Faced with this, the owners are deploying large-scale repairs of the entire apartment. And one of the top priority is wall plastering. To perform this type of work, you must know how to plaster the walls, and be able to use the tool.
Content
- Rules for applying plaster
- Preparation: ensure adhesion
- Mortar application technique
First of all, you need to stock up on the required tools..
- A steel brush is useful to us for cleaning the surface. Brushes can vary in size and stiffness.
- Buchard, trojans, cogs will be used for notching. Buchard – a heavy hammer at the ends with cloves.
- Stucco scraper.
- The falcon is used for convenience, a single portion of a plaster mortar is applied to it, which will then be applied to the walls.
- A plaster spatula mixes the solution, is applied to the surface of the wall and is rubbed.
- It is convenient to level the solution with a surface using a grout.
- Grater is needed for grouting plaster.
- The rule is to control surface evenness..
- Level or plumb line required for horizontal control.
- Plaster mix. We will talk about the better to plaster the walls later..
Rules for applying plaster

Correctly plastering the walls is necessary in three layers, the excess solution is removed with a wide trapezoid spatula
Preparation: ensure adhesion
1. The surface is cleaned of dust, dirt, sag.
2. Wet the surface with water. It is very convenient to do this from a garden sprayer, but if this is not possible, then you can use a broom.
3. If the wall is brick, we deepen the joints between the bricks by about 1 cm. This is necessary for better adhesion of the mortar to the surface.
4. If the wall is concrete and is a smooth surface, we make notches on it with a gear and a hammer 15 mm long, 3 mm deep. There should be approximately 250 notches per m2. Then we clean the wall with a brush and wet it with water.
5. If the wall is wooden, we push the boards and fill the shingles from above. You can use plywood scraps with a width of 15 mm, and a thickness of 4 mm and stuff diagonally. The result should be a diagonal crate on the wall.
Important! Instead of shingles, you can use a net – netting. It is necessary to fill it on plywood slats, and not directly on the wall, the gap between the wall and the stack should be about 3 mm.
Mortar application technique
1. We collect a portion of the plaster mortar into the falcon.
2. Using a plastering blade, we take the solution from the falcon and throw it on the wall. It is most convenient to take the solution at the angle of the scapula, moving from itself to the middle of the falcon. The throwing movement is carried out only by the hand, and not with the whole hand. We do not wave too much, otherwise the solution may splatter.
Important! There is another way of applying – spreading. We put the falcon against the wall, take a portion of the solution with a spatula and spread it on the wall. But keep in mind that spraying mortar provides better adhesion to the surface.!
Spray – the first layer of plaster is the consistency of liquid sour cream. It is necessary for wooden walls and is 10 mm. For concrete and brick walls, this layer is not needed..
Priming – the second layer of pasty consistency – evens out bumps. Thickness 20 mm and no more, even if the layer is applied in several steps, this limit is maximum.
Nakryvka – the third layer is again from a solution of creamy consistency. Only this time it is necessary to approach its preparation more carefully. The thickness is 2-5 mm. The nakryvka smooths out “on the finish” all remaining blemishes of the soil.
Important! For concrete and brick walls, stucco with a thickness of 5 mm is sufficient; for wood, the layer should be 25 mm or more to completely cover the shingles or mesh.
3. Level the plaster mortar with a trowel. We drive it both horizontally and vertically. This must be done with each layer separately. The better the soil is leveled, the easier and more correctly we apply the coating. Spray is leveled only if drops of solution hang from it.
Important! Do not forget the rule to control the evenness of the surface. And after leveling the coverings, we wait until the solution dries.
4. Overwrite the surface with a grater.
To begin with, we do a round grout. Press the grater tightly against the wall and make circular movements counterclockwise. All irregularities are cut by grater ribs..
Then we perform grouting overclocking. It is necessary to remove circular traces left after grouting circularly. We clean the grater from the remnants of the solution, press it to the surface and make sudden movements-swings, erasing traces.
How to plaster beacons
If the walls have significant irregularities, protrusions or other defects, then it is necessary to perform plastering on the beacons, if, of course, you want to get a perfectly smooth surface horizontally and vertically.
If the walls are made of wood, brick or other material, which easily includes nails, then wooden beams or metal beacons can be used as beacons: aluminum or steel.
If the walls are made of more durable material, then plaster mortar or gypsum is used as beacons.

Lighthouses set strictly according to the level
Stages of work:
1. At a distance of about 15-20 cm from the corner of the room or the beginning of the wall we make a plumb line. Drive a nail at the top of the wall, hang a plumb line on it with a rope.
2. We prepare a cement mortar or alabaster and strictly along the line of a plumb line we throw small heaps of mortar onto the wall. It is on them that we will attach lighthouses. In the vertical position of such heaps, three pieces are enough.
3. We take a beacon, for example, aluminum. We apply it to the heaps of the solution and gently squeeze it so that the outer edge of the beacon protrudes from the wall by 15-20 mm. Be sure to check the level of the lighthouse.
4. Install the second lighthouse at the other edge of the wall. And one more in the middle between them. The technology is the same, only now it is necessary to check the level of their relative position so that it is the same. To do this, in addition to a vertical plumb line, you can pull the twine horizontally.
Important! If the wall is very long, there should be more beacons. About 1 m apart. We check the level of the location of the beacons.
5. Finally we fix the beacons on the wall, covering their edges with concrete mix. We wait until the solution has hardened, and the beacons will firmly “sit” in places.
6. Apply the plaster in the same way as already described above. Fill all the gaps and potholes.
Important! The layer of plaster should protrude 2-3 mm beyond the edges of the beacons.
7. Level the plaster with the rule. We apply it to the beacons, press down and, moving from bottom to top along the beacons, remove the excess layer of plaster.
8. If the mixture is not enough, we prove it, filling the voids. We continue to level and dock until the wall becomes level. Then we wait until the solution dries. It will take 10-12 days.
After that you can carry out “finishing” plastering of the walls or immediately putty.
How to plaster slopes
The most difficult stage in plastering is slopes, window openings and corners.
Husk – internal corner formed by the connection of two walls or wall and ceiling.
A whisker – outer corner formed by two walls.

Plastering slopes – the most difficult stage
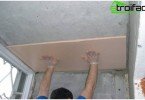
Lighthouses are a good help in plastering slopes. In the places where the walls are connected to the ceiling, we establish a rule and we throw the space under it with a solution.
Overwrite with a half-trick. We fix all defects and check the evenness of the layer with the rule.
To plaster a vertical husk, we attach a rule to the lighthouse below the floor and fill the empty space with a solution. After a while we remove the rule, under it should be a perfectly flat strip of solution. We are waiting for it to dry. We make the same strip at the top of the wall. These stripes will serve us as horizontal beacons. Then we put the plaster on an empty space and level it with respect to our beacons from the solution. We overwrite all small defects and irregularities.
In the case of oysters, it’s convenient to nail a perfectly even wooden plank onto the adjacent plastered wall and fix it near the edge so that it is convenient to level the mortar over it. We apply the plaster mixture to the slope. Level the solution with the rule if the wall is flat. If we are plastering the slope of the window opening, then for leveling we use an angular tool to maintain the correct angle near the window frame.
After the solution has dried, overwrite it with a grater. Check the level of evenness of the plaster. Then remove the auxiliary strips.
The better to plaster the walls
For plastering internal surfaces, it is best to choose such mixtures: lime mortar, lime-clay, lime-clay-gypsum mortar, lime-gypsum or cement-lime mortar. If the walls are wooden, you can use a solution with the addition of gypsum. The main thing to remember is that gypsum dries quickly.
For plastering the external walls, use mortar, cement-lime or cement-clay mortar.
Cement mortars are used to repair old plaster and finish bulges..

Different mixtures are used for internal and external surfaces.
Mortar It is prepared from 1 part of lime dough and 1-5 parts of sand. Sand is added gradually until the solution becomes homogeneous. The solution should stick slightly to the trowel and resemble dough.
Lime and clay solution It is a mixture of 1 part liquid clay dough, 1/3 part lime dough and 3-6 parts sand. Mix clay and lime dough, then gradually begin to add sand, continuing to stir.
Cement-lime mortar Knead from 1 part of cement, 1-3 parts of lime dough and 6-8 parts of sand. Add sand to the dry cement and mix, add the milk of lime and mix. If the dough is too thick, add a little water and mix.
Gypsum-gypsum mortar prepare from 1 part gypsum and 3-4 parts lime. We take a container, pour water, pour a thin layer of gypsum and quickly knead. It should get a not very thick homogeneous mass. Add lime solution to it and mix.
Cement mortar It is most often used for thick layers of plaster or on external walls. Mix 1 part of cement and 2-5 parts of sand and, pouring water, knead, like dough.
If you choose the right solution for wall plastering, follow all the recommendations on the application technology, this will greatly facilitate further work on finishing.
foam plaster
The facade, insulated with polystyrene foam, can not be sheathed with lining or siding, but plastered corny.