Drywall putty
The evenness of drywall sheets sometimes allows a person who has started repairs in the house to doubt the need for their puttying. However, the professional master does not even have such a question, since the plasterboard putty allows avoiding problems in the subsequent finishing of the room. After all, subsequent painting of the walls or gluing them with wallpaper, especially light ones, may show existing bumps and roughness. Therefore, all doubts need to be swept away, and carefully examine the question of the correct conduct of such work. By the way, the puttying procedure is not at all complicated, and any person can handle it if desired. It is only necessary to break the entire front of work into several separate stages.
Content
- Drywall putty rules: hide screws
- How to putty seams
- Putty putty on internal corners
- Plaster ceiling putty
Drywall putty rules: hide screws
All sheets of drywall are attached to the metal frame using self-tapping screws. Therefore, all attachment points must be masked, but before proceeding with the putty application, it is necessary to make sure that the self-tapping screws are sufficiently recessed into the drywall sheet. To do this, you need to take an ordinary spatula and draw it quickly along the wall. If this tool does not stop anywhere, it means that all fasteners are screwed to a sufficient depth. Otherwise, a screwdriver or screwdriver is taken and “work on errors” is carried out. Repeated unhindered trowel running along the sheet allows you to go to the next step.

Putty is sold in bags and jars.
Prior to puttying, it does not hurt to treat the surface of drywall with a primer. After the applied layer has dried, the primers begin to putty each self-tapping screw separately, which will then quickly and efficiently putty the whole wall right away making it perfectly smooth.
After completion of work, it is necessary to withstand sufficient time for the putty to dry out. Typically, the label contains information about the size of this time interval. Processing of the fastening points of the screws ends with sanding of the putty areas. When revealing irregularities allowed during the work, they are additionally puttyed.
How to putty seams
Very often, in practice, the question arises of how to properly put drywall in the joints of sheets. The technology for the execution of work requires the use of additional material in the form of a reinforcing fiberglass mesh, referred to in the construction environment as “serpyanka”. When sealing a seam, follow the sequence of the following steps:
- application of the first layer prepared putty throughout the seam;
- applying a sickle to a fresh layer and its “indentation” with a spatula;
- applying a repeated layer of putty, covering completely the speck;
- drying and grinding of the filler layer.

Serpyanka – reinforcing tape for seams

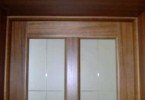
Putty putty on internal corners
It is also necessary to know how to putty drywall walls in the inner and outer corners correctly. First, consider the situation with internal corners. Putty is applied to the edge of drywall sheets located on both sides of the corner. After this, it is necessary to press the serpentine tape gently, making sure that it does not go far into the space of the corner. After even distribution of the reinforcing tape, another layer of putty is applied on top of it.
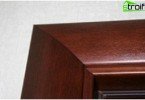
After a day, they begin processing the dried layer. In this case, with the sharp side of the spatula, all formed irregularities are removed, and perfect evenness is achieved during sanding. External corners require the use of a galvanized metal corner, which is also pressed into the putty putty layer, and then re-coated with it. All other work is carried out by analogy with the previous cases..
Plaster ceiling putty
The various forms of ceilings made of drywall also require careful puttying of the joints. Since the surface of the ceiling attracts increased attention, it is necessary to ensure its perfect evenness when performing work. Therefore, professionals have a little secret, which consists in the special processing of drywall seams. Before plastering the ceiling from drywall, a layer of cardboard is removed along the seams to the width of the reinforcing tape.

Drywall putty: seams and screws
Progress:
- Using a knife, a layer of cardboard is cut along the seam to the width of a sickle.
- This strip is wetted with water, which facilitates its removal..
- The surface is primed and drying time is given..
- After applying a layer of putty, a sickle is attached and once again smeared.
- After some time, the process of filling the seam is repeated using a spatula trowel.
- After drying, the surface is ground with a wooden block, to which a fine sanding mesh or fine-grained sandpaper is attached. In this case, it is necessary to achieve a smooth, imperceptible transition from the surface of the seam to the plane of the drywall sheet.
In the same way, the fastening areas of the screws are also processed. After finishing puttying, the surfaces of walls and ceilings are ready for finishing. The result will exceed all expectations, if you closely follow the technology of the work..