How to make a drywall arch with your own hands
Arched elements are able to transform the room beyond recognition. Beautiful bends not only attract everyone’s attention, but also give the interior a special charm. But in view of the fact that the work of specialists often costs a decent amount, many think about the question of how to make an arch on their own and bring a little novelty and originality to the ordinary environment.
Content
- Views and architectural style of arches
- How to make an arch do it yourself
- Mounting the sides of the arch
- The formation and installation of the front side of the arch
The interior arch is a great alternative to the doorway. With the help of this detail, you can give the decoration of the room a special look. Arches can be made of various materials, but the most common option is drywall. It allows you to achieve remarkable results in the design, while avoiding standard.
In rooms with arched structures there will be more light and space, and the plasticity of the material will provide the opportunity to cut out any, even the most unusual forms.
Among other things, drywall arches ideally hide room defects. They are light and have virtually no effect on the walls. And if you decorate them with spotlights or shelves, you can easily create a unique look at home.
Views and architectural style of arches
The following types of the most popular arched structures are distinguished:
- arches of a classical form. This is the most common type, the hallmark of which is a rounded part with an ideal radius, which looks very impressive;
- Art Nouveau arches, characterized by a slight rise in the arc;
- arches in a romantic style that attract attention with a large number of both straight and rounded corners.

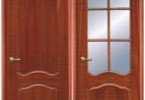
Classical Arch
In general, the arch can be arranged in any form and anywhere in the apartment. But most often, arched structures are erected in interior openings. You need to know that there is no point in mounting an arch in an opening whose height is less than 2 meters. A low arch can only degrade the appearance of the room. In addition, due to the visual reduction of the opening, when passing through such a detail of the decor, inevitably there will be a desire to tilt your head.
There is only one way to arrange an arch in a low opening – to hollow out the upper part, thereby increasing it.
Important! The higher the arch, the more attractive and harmonious it looks.
How to make an arch do it yourself
Mounting the sides of the arch
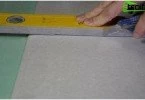
Before installing the arch, it is necessary to insert metal guides in the aperture, located horizontally and vertically, fixing them using any means of fasteners, for example, screws. Install two profiles on the sides, one on top. They need to be fixed in such a way that the sheet of drywall is located on the same level with the wall. Four rectangular triangles should be cut out of the prepared drywall so that their legs are longer than the planned arched rounding.
Note! You can cut the arched contour in different ways: with an assembly knife, a metal file (without installing it in the machine), but it is most convenient to do this with an electric jigsaw.

Making a rounding pattern
Make a rounding pattern for the arch. On drywall triangles, according to the marking, cut according to the rounding pattern. A second semicircle is likewise manufactured. Further, both parts are attached to the profile on both sides of the arch.
Important! Track the distance between the profiles that should match. Otherwise, from different sides, the arch will look different.
Fix the resulting figures in the corners of the opening, two on each side.
In order to stiffen and avoid cracking, drywall must be mounted opposite the dowels drilled in advance. And it is possible in the inter-arch space by installing additional parts of the profiles.
The formation and installation of the front side of the arch
To form an arch, it is necessary to incise the profile backs with a step of 7 cm, then bend the profile back in accordance with the rounding. Fix the structure between the triangles. At the junction of the metal profile with the opening, bend the metal inward and fasten it with dowels.
Remove the ends of the metal profile and the protruding parts of the drywall. Prepare a strip of drywall, adhering to the required dimensions: the length should exceed the arch bend by 10 cm. In the created strip, drill holes in 8 cm increments to get an imitation of a perforated tape. This is done to increase the flexibility of the strip, which will prevent increased fragility..

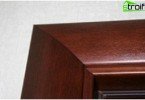
Drywall Arch – The Best Decoration
Note! The drywall elements are fixed to each other and to the aperture using the PN28 / 27 metal profile, which is good in that the wall thickness allows you to use the most convenient mounting material in this situation – self-tapping screws.
We pass directly to the drywall. For flexibility, dampen it with a damp cloth. Attach the strip from the end to the profiles, repeating the arched bend. Let the drywall dry (minimum 12 hours). After drying, it is necessary to putty the resulting structure, including joints and seams, but avoiding grazing screws. Then sand the protrusion elements with emery paper to round and debur.
After the completion of priming and puttying, you will still have to paint the arch and paste it with wallpaper.
Now you know how to make a drywall arch, which means you can make a memorable component yourself – an elegant touch that will decorate your home.