Installation of drywall is a process of sheathing surfaces with drywall sheets. This is the most economical and quickest way to hide existing base irregularities. Wall decoration using this material is the preliminary work before applying plaster, paint or wallpapering the walls. In addition to alignment, the installation of drywall allows you to insulate and soundproof the room.
Content
- List of required tools
- Drywall Mounting Options
- Fasten without frame
- Frame method – high quality, reliable
- Marking the surface for mounting the frame
List of required tools
To carry out the installation of drywall with your own hands, you will need a number of special tools that are best prepared in advance. Each stage of work has its own tools to make the workflow as convenient as possible..
Layout Tools:
- Level, laser level;
- Plumb line;
- Roulette;
- Pencil;
- Dyeing lace.
In the manufacture of the frame you will need:
- A hammer;
- Hammer drill;
- Bulgarian;
- Screwdriver;
- Pliers;
- Scissors for metal.
When working with drywall sheets, you should use the following tools:
- Hacksaw;
- Rail of the required length;
- Sharp knife;
- Plane.
For high-quality sealing of holes from screws, joints of sheets and corners, the following tools should be prepared:
- Spatulas;
- Capacity in which mixes will be mixed;
- Paint rollers and primers;
- Grater with mesh or sandpaper.
Of course, when working, you can not use all of the above tools or replace them with alternative accessories.
Drywall Mounting Options
Modern technology for installing drywall distinguishes two ways:
- Frameless version (special glue mixtures based on cement or gypsum are used);
- Frame option (use a frame made of metal profiles or a wooden beam).
Using any method should ensure the fulfillment of the main task – smooth, reliable and durable fastening of drywall sheets located in one plane.
Each of the options is reliable and durable; the main thing is to carry out the installation with high quality.
Fasten without frame
For use in the installation of the frameless method, the wall coating should not consist of exfoliating materials, be dry, dust-free and unpainted with enamel or oil paint. When using cement-polymer or gypsum adhesive, the base must be strong, primed and fairly even (only small differences are allowed). Under the drywall, arranged in this way, it is impossible to lay the insulation, so you have to apply a foam insulation cycle. The advantages of the frameless method are: excellent sound insulation from structural noise, a minimum set of tools used, a small distance from the front surface to the base.
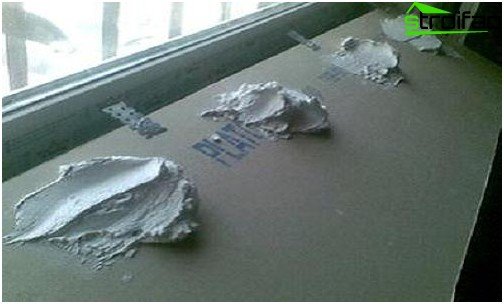
Drywall installation in a frameless manner using uniformly applied glue
Frame method – high quality, reliable
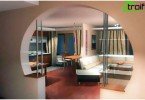
This method involves the installation of sheets on an already finished frame assembled from metal profiles or from a wooden beam. The frame method is suitable for more complex repairs, for example, when creating an arch or a multi-level complex ceiling structure. For such work, this type of installation is considered the most reliable..
For the manufacture of a metal frame, a galvanized steel profile is used, having a through hole for rigidity and through holes designed for its attachment to the surface. It should be noted that during installation by this method, poor sound insulation is achieved, requiring the use of additional measures to ensure it. The disadvantages include a fairly large set of tools needed to complete the work. The metal profile frame is durable and moisture resistant, it is characterized by standardization of the elements used. The advantage of this frame is its use on surfaces with large irregularities and the existing ability to lay thermal insulation.
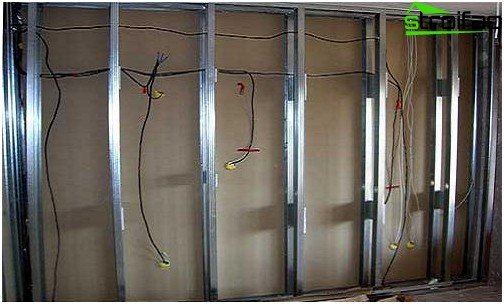
The frame made of metal profiles provides the opportunity to lay communications and an insulation layer under the drywall
For the manufacture of a wood frame, a dry, even, planed beam is used. Undoubtedly, this type of frame is environmentally friendly material, has good sound insulation and allows you to lay additional thermal insulation. After the wooden frame is assembled, it should be treated with a special impregnation that protects the material from moisture, mold, rot, bugs.
Marking the surface for mounting the frame
For high-quality repair work, mark the surface.
The marking of the walls is carried out in the following sequence. It is necessary to measure the distance of 5-6 cm from the corner and draw a vertical line on the adjacent wall. Similarly, you need to draw a line on the opposite wall and use a long rail to connect these lines on the ceiling and floor. Next, from the corner of the wall, you should mark the vertical lines at a distance of 60 cm and mark them in a checkerboard pattern after 50 cm – they will be the place for mounting the mounting bracket.
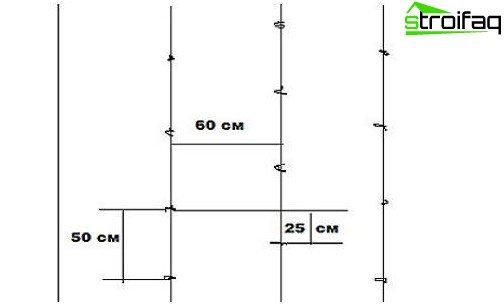
Marking the walls for the frame of metal profiles
When installing drywall on the ceiling, the horizontal level of the room should be noted as a matter of priority. To do this, you can use a laser level or hydraulic level. Small marks are made in all internal and external corners of the room, then in each corner the distance from these figures to the ceiling is measured and a mark is made with the value of the obtained distance. Such manipulation is necessary to determine the lowest point of the ceiling, from which should be repelled when it is lowered.
It is important! For frame mounting, the ceiling drops to a minimum of 4 cm from its lowest point..
The found height is marked in each corner, and the resulting marks are connected using the staff with horizontal lines. Next, the installation of the profile around the perimeter. On the surface of the ceiling along the wall are marked with an interval of 40 cm. Similarly, marks are placed on the opposite side, then the resulting points are connected in parallel lines. Each line is marked with a checkerboard pattern after 50 cm, which determines the mounting location of the suspension.
Carrying out wiring under drywall
After setting all the profiles, you should proceed with the communication: electrical wiring, network, telephone and television cables.
It should be remembered! The rules for installing electrical equipment require the placement of power wires located behind the plasterboard sheathing in a corrugated pipe, which does not support combustion. It can be a metal hose or a plastic corrugation marked NG (non-combustible).
Wires with safe voltage do not need a corrugation, but it can protect the wiring from damage by the sharp edges of the metal frame.
At this stage, you should consider the number of required points of consumption, determine their location and the passage of wires.
It’s important to know! The wire should extend vertically from the outlet or switch, and the horizontal sections of its passage should be at the same height as the junction boxes.
It is advisable to graphically depict how the wire will pass in order to avoid problems when laying it in the future.
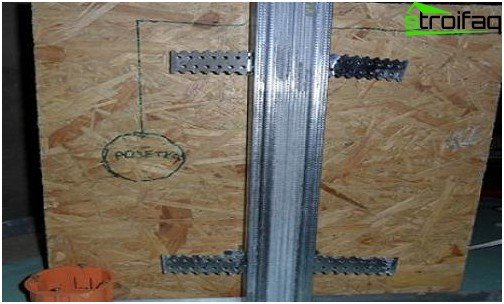
Wire marking
The wires are fixed to the wall, for the convenience of connecting outlets, the length of the wires should be left with a small margin from the surface.
How to cut
To correctly and efficiently cut drywall sheet, you will need the following tools: long rail, pencil, tape measure, sharp knife.
To perform this work is very simple, you need to follow the steps:
- Layout of drywall sheet;
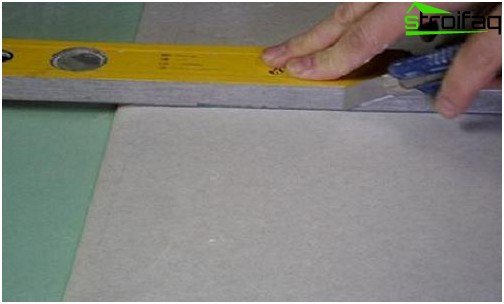
Stage 1: cut the first layer of paper along the drawn line using a ruler
- Stage 2 along the marked line is cut with a sharp knife one layer of paper;
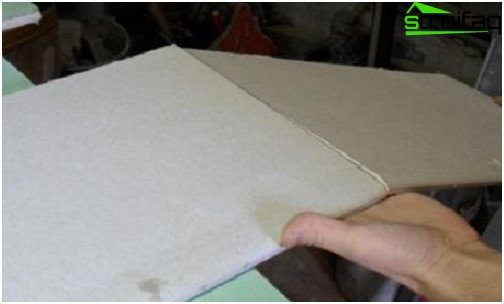
- It is necessary to break the sheet, while the gypsum base breaks along the cut line;
Stage 3: along the cut sheet of drywall breaks into two parts
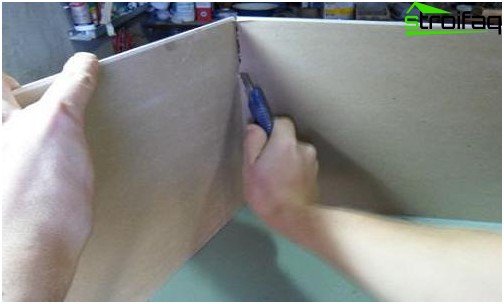
- Holding two halves of the sheet at right angles, you need to cut the paper layer from the back.
Stage 4: a cut from the back
Any irregularities in the ends, sticking out paper should be sanded with a plane intended for drywall, a file on a tree or a grater with sandpaper. In the end result, we get a portion of the drywall sheet of the required size with neat, even edges.
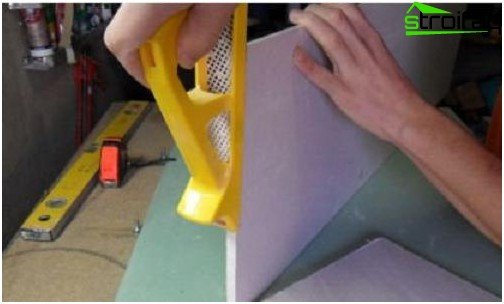
Improvement of the ends of drywall – grinding a cut with a planer
Drywall chamfering
When joining sheets with non-factory edges, you should remove the chamfer at an angle of 45 degrees. First, paper is cut parallel to the cut with an indent of 1 cm from the edge, and then the chamfer is removed with a knife.
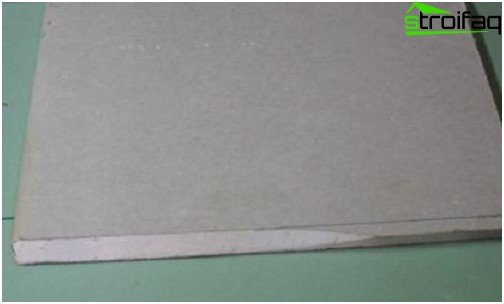
Chamfering
Subject to these recommendations, the paper on the front side of the sheet will not bulge..
How to make a cutout
There are two types of cuts: with the edge and in the middle of the sheet.
For a cutout from the edge, it is necessary to mark and cut the paper with a knife on one side, then make two cuts with a jigsaw or hacksaw in the direction from the edge. Gypsum plasterboard should be broken and paper cut from the back.
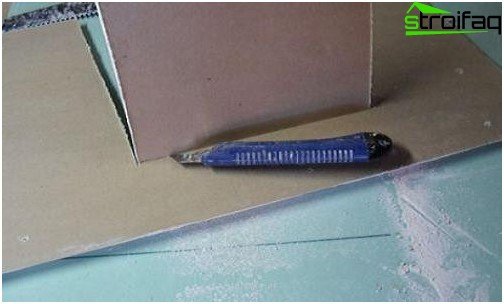
The cutout on the drywall sheet is carried out with a sharp knife along the previously drawn line
To cut a hole in the middle of the sheet, saw three sides and then break. Or immediately completely cut out the hole.
Installation of drywall sheets on profiles
After installing the frame and carrying out preparatory work, you should immediately proceed to the installation of drywall. For walls and ceiling, there is one way to fix it. It is necessary to closely attach the sheet to the finished frame so that one edge of the sheet is adjacent to the wall. Plasterboard sheets are attached to the profiles using self-tapping screws.
When performing work, it is necessary to deepen the self-tapping screw to such a distance that the tip does not protrude, but also is not too deeply located. It should be noted that when the upper cardboard layer is torn, the place of fasteners relaxes. The distance between the screws should be 20-25 cm.
If the height of the ceilings is greater than the dimensions of the drywall web, then it is necessary to fix the intermediate profile. All parts of the sheet must be fixed, as otherwise the joint will constantly crack. In this situation, subsequent panels need to be started up and down, in a checkerboard pattern – a whole sheet from below, clipping from above and vice versa. Using this method, the reliability of the entire structure is achieved..
Processing joints and recesses from self-tapping screws
After the installation of the drywall sheets is completed, the joints of the sheets should be processed and the recesses filled with self-tapping screws. For joints, a gypsum mixture is used, which when dried forms a very durable material. Chamfered edges must be primed.
A reinforcing mesh with a width of 80-100 mm is glued to all joints with the factory edge. In a situation where one or both edges of the sheet have a chamfer, you should cut the grid along and prevent its exit from the plane. If in this case we use a reinforcing mesh of normal width, then we will have to putty the entire surface with a layer of 1-2 mm more.
Attention! The reinforcing mesh should always be located in the middle of the putty.
About 60% of the volume of the recess is filled with the first layer of putty, then the net must be immersed in the putty and smoothed out. At the end, the remaining volume of the recess is filled.
Grooves from self-tapping screws also need to be putty, for this it is necessary to carry out a spatula in different directions to fill the groove with putty. When it dries, it retracts a little, which is a normal situation. The final processing of the recesses is carried out by finishing putty.
Putty, primer before finishing
It is desirable to putty the surface of the drywall under the wallpaper with a finishing putty, which will ensure its uniformity. The strength of their gluing will not change during these works. Before gluing the walls with wallpaper, the putty must be primed.
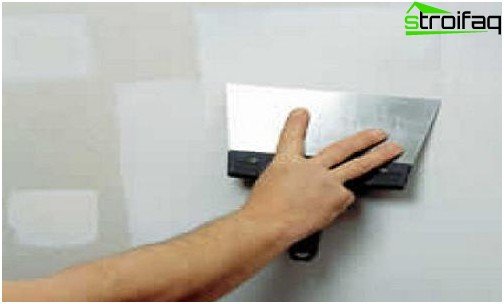
Finishing – the final stage of drywall installation
You can stick tiles on drywall immediately on a cardboard surface, only before that it needs to be primed.
Having familiarized yourself with the phased implementation of work, you can safely carry out the installation of drywall yourself. This process – installation of drywall with your own hands describes visually, allowing you to understand all the nuances. This article discusses the basics of drywall installation technology that allows you to perform all the repair work efficiently.


