How to install the door yourself
Repair in the house will have an unfinished look without installing such an element of the interior as doors. They protect the living space from external negative factors, contribute to heat and sound insulation, bring coziness and comfort. Ordinary, at first glance, they differ among themselves in material, shape, color, design, have many classifications and types. Despite their differences, all doors require certain knowledge and skills for their installation. This is a very painstaking and jewelry-accurate work for a team of two people. Despite the complexity of the work, installing doors with your own hands is quite affordable for anyone who skillfully handles the tool. The main thing is to do everything gradually, measuredly, without rushing, observing the rules for installing doors.
Content
- Preparing a doorway for installing doors
- Measurement, selection, purchase
- Preparation of places for fastening the lock and hinges
- Installation of hinges and locks
- Door frame collection
- Fixing additional parts
- Door frame installation
- Door leaf hanging
- Fixing the door frame with mounting foam; installation of platbands and door hardware
The technology of how to properly install the door can be divided into several stages:
- Measurements, selection, acquisition of doors.
- Preparing the opening for the installation of a new door.
- Installation of hinges and locks on the door leaf.
- Door frame assembly.
- Installation of additional elements.
- Fastening the door frame in the doorway.
- Door leaf to frame connection.
- Fixing the structure with foam.
- Fixing accessories and platbands.
To perform the work you will need a certain tool:
- a hammer;
- chisels for 16 and 20 mm;
- roulette;
- crowbar;
- level;
- screwdriver and screwdriver;
- a hacksaw for wood with small teeth;
- miter box;
- drill and punch;
- if possible milling machine, circular.
Materials for installing the door:
- door leaf and door frame;
- door hardware (handles, hinges, locks);
- polyurethane foam;
- wedges;
- nails, screws and dowels.
Preparing a doorway for installing doors

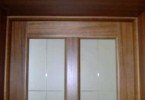
Plastered and prepared door slopes
Before installing the door, prepare the installation site. If there is an old door, then dismantle it. To do this, using a crowbar, avoiding strong and sharp movements, first remove the platbands. Carefully raise and remove the old door leaf from the hinges. Using the same crowbar, we dismantle the door frame, to facilitate the process, file the box in several places with a hacksaw. Quite often, in houses, the door frame was cemented. And to remove it, you have to break the cement with a hammer.
To facilitate installation of the door, the slopes can be leveled and plastered. At the end of the preparation, we clear the doorway from construction waste. If the doorway has never been used, then you can immediately proceed to its measurements.
Measurement, selection, purchase
To purchase the desired door, you will need dimensions in height and width, as well as dimensions of slopes of the doorway. Since in most cases the doorway has uneven edges, you should take measurements in several places and choose the smallest size.

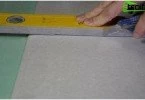
We put a floor covering for the correct installation of the box
Important! When taking measurements, the gap between the door frame and the doorway should be taken into account. It should be 10-15 mm. Doors are recommended to be installed after laying the flooring, if there isn’t one yet, then the dimensions should include the height of the flooring and the gap between the floor and the door. For a more visual measurement, you can put part of the flooring in the doorway. This is necessary in order to know the exact level of the floor, the free movement of the door depends on it. The clearance between the door and the floor is usually 10 mm.
Now that the old doors are dismantled, the dimensions are taken, and the slopes are aligned and puttied, you can order the doors. As a rule, the doors have standard sizes, but if necessary, you can make an individual order based on the dimensions of the doorway.
To choose the right doors, you need to know their types and purpose. For installation in the house, pay attention to the entrance, interior and, if necessary, to the kitchen doors.
We also choose according to the method of opening. The most popular option is swing doors. Doors are made using approximately the same technology – these are trim and internal filling. The power structure or skeleton of the door, where the lock is inserted and the hinges are attached, is sheathed with fiberboard, MDF or other material, and the internal space is filled.
There are several door designs – from solid, paneled and smooth.
Smooth doors, they are panel boards, they can be made with an outer layer of MDF and fiberboard, sometimes such doors are sheathed with plastic. They are usually painted, veneered or laminated. The price of such doors varies depending on the materials and method of lining. The most practical and affordable are the doors trimmed with a laminate. Paint-coated doors can be both cheap and expensive. It all depends on the type of material and the method of painting. The most expensive are doors veneered with natural veneer.
Panel doors stand out for their open design and the presence of drawings, patterned carvings and stained-glass windows. Such doors can be filled with glass, carved panels, as well as other materials. They are made from a solid array of valuable wood species or combined materials. The prices of panel doors depend on the type of materials. The cheapest and most affordable are made from soft woods, as well as from combined materials (MDF, HDF).
Solid doors made from precious wood. This affects primarily their price and weight, they are very high. The doors are coated with varnishes and various impregnations, thus they are well protected from damage by insects, fungi and mold..
Having selected the necessary doors and received them, we proceed to the phased installation of doors.
After the purchase, we unpack the door leaf, platbands, door frame, extras, accessories. We carefully check everything for cracks, chips or other damage. Until the moment when the lock, hinges or other door accessories are inserted, the doors can be returned to the manufacturer.
Preparation of places for fastening the lock and hinges

Hinge preparation

Installation of the door leaf on the floor for easy milling

Marking a place for a castle

Lock hole
Before assembling the door frame, mark and select with a mill or a chisel the place of fastening of the hinges and the lock on the door leaf and the upright. To do this, we install the door leaf in a vertical position on the wide side in special stands. In order not to damage the canvas, the inside of the stands is upholstered with fabric. We attach the lock and with a pencil we outline the place of its installation. To make it convenient to use the lock, install it at a height of 900 mm from the floor. To install the hinges, we measure 200 mm from the lower and upper edges of the door. We attach loops and outline the place for milling. Using a manual cutter or a chisel, select the excess so that the hinges and the lock lie flush. We put them back and drill holes for screws with a drill.
Finally, we apply a vertical pillar to the door leaf so that a gap of 2-3 mm remains between the horizontal crossbar of the door frame and the door leaf. We mark the place of attachment of the loops and the place for the tongue of the lock and select the excess using a milling machine or a chisel. We attach loops and drill holes for screws.
Important! Locking areas and hinges after cutting with a mill or a chisel must be varnished. In this simple way, the tree will be protected from moisture. It should be remembered that the entrance and heavy doors are mounted on three hinges, and two hinges will be sufficient for interior doors..
Installation of hinges and locks
When the places for the lock and the hinges are selected by the cutter, you can proceed with their installation.
Loops are simple. They only need to be screwed to the door leaf.

Embedded lock
Installing a lock, on the contrary, will require some effort. In order for the lock to become correct, it is applied to the side of the door and, as on a stencil, holes are planned for handles, valves and fasteners. Using a milling cutter or a chisel, select the place for the castle to the desired depth. Then we put it in place and fasten it.
Important! When choosing a lock, consider the width of the stand bar of the door. The depth of the hole for the lock should not exceed 1/3 of its width, otherwise deformation of the door leaf cannot be avoided.
Door frame collection

Door frame collection
Getting to the collection of the door frame, measure the vertical racks in height and cut them with the help of a miter box. Horizontal bars made to fit the door leaf.
Since collecting the box requires a lot of free space, the collection process itself is carried out on the floor. In order not to accidentally damage the door frame on the floor, we place two or three wooden slats under the racks for the entire length of the door leaf.
We apply a horizontal crossbar to the racks. The connection points can be tapped lightly with a hammer for a better connection, and using a screwdriver we fix the box by screwing screws into the corner joints.
Important! There are doors with a pre-assembled door frame. Installation of such doors is very simple. In this case, the door frame is simply adjusted in the doorway and fixed in it.

Installation of add-ons
Fixing additional parts
If the door width is several centimeters less than the slope of the door, you should install add-ons. You can do without their installation, but then you have to completely make slopes, and over time chips and dirt appear on them. Therefore, the installation of add-ons in such cases is the best way out.
As extensions, strips of the same color as the door are used, with a thickness of 8 to 12 mm. In the fixed state, they form a small portal, with the edges coinciding with the edges of the wall.
Installing the add-on is as follows. Using a cutter or chisel in the door frame, a quarter of 10×10 mm or 8×8 mm is selected, depending on the thickness of the extension strips. We do this around the entire outer contour of the door frame. We trim the vertical planks of the extension along the height of the box, as well as the horizontal bar of the extension. We install the door frame in place and fix it, then install it in the trimmed quarters of the extension bar. We fasten the planks to the slope with dowels and screws.
Door frame installation
Having completed the assembly of the door frame, proceed to its installation in the doorway.

Fixing the door frame with wedges from above
We start the box inside the opening and fix it with the help of wedges, 2-3 wedges for each rack and 2 on the crossbar. Align the door frame vertically and horizontally. You can adjust the tilt level with light strokes on the wedges. Now you can fix the box. To do this, drill or drill holes in the rack and wall with a drill or puncher. It remains to put the dowels and screw the box with screws.
Important! Wedges are best made of wood of the same density as the door frame.

Door hanging
Door leaf hanging
After installing the box proceed to hanging the door. First of all, we fasten the loops to previously prepared places. To do this, usually use the so-called card (plate) detachable hinges with a removable rod or a rod embedded in the hinge. There are still integral loops, but they are used less often. In the case of a hinge embedded in a hinge, the door leaf can be installed or removed just by gently lifting it to a small height of the hinge. If the design of the door frame does not allow lifting the doors, one-piece hinges or hinges with a removable hinge are used. To install one-piece hinges, it is enough just to fix them on the box, and then screw them to the door leaf. To install or remove the door leaf from the hinges with a removable hinge, it is necessary to remove the hinge from the hinge and then insert it back.
Now that the hinges are hung, you can put the door leaf in place. This is best done together when one person holds the door on the weight, and the second fixes one-piece hinges with self-tapping screws or guides them in place in the case of collapsible hinges.
Important! When choosing hinges, you should pay attention to which side the doors will open..
Fixing the door frame with foam
The gap between the doorway and the box is filled with mounting foam, which increases the heat and sound insulation of the doorway. This material allows you to fill all small cracks and crevices. The foam is easy to use and easy to apply on any surface, and thanks to its astringent properties, the structure will be stronger.

Fixing the door frame with foam
Before filling the gap between the doorway and the door frame, the door frame should be protected from foam accidentally falling on it. To protect the box, it is pasted over with a film or masking tape. If, however, the foam got on the door frame, then fresh foam can be cleaned with any alcohol-containing solution or solvent. But hardened foam can only be removed mechanically, which is fraught with scratches and scuffs.
Foam has the property of increasing in size from 50% to 250%, which can lead to deformation of the door frame. To prevent this from happening, spacers are installed between the uprights or a thick cardboard is laid between the already installed and tightly closed door leaf and door frame. Before filling with foam, shake the bottle with it thoroughly for a minute. For better adhesion of the foam to the surface, the opening and the outside of the door frame can be slightly moistened with water. The main thing is not to overdo it, otherwise the effect will be exactly the opposite.
For reinsurance against deformation and distortions of the door frame, mounting foam is best applied in two stages. For the first run, the foam is applied pointwise. Giving the foam to harden, after 1-3 hours you can fill the remaining voids. We cut off excess construction foam after it has completely hardened..
Important! In the case when the gap between the aperture and the door frame is too narrow, you can add a little bit to the foam tube of the spray gun, this will allow you to more conveniently, and most importantly, qualitatively fill all voids.
If the gap between the doorway and the frame is large, 8-9 cm or more, then we fill the free space with suitable material (wood, drywall, etc.) and then fill it with foam.
The vertical gap should be filled with foam, starting from the bottom and gradually moving up. Thus, the foam will create its own support. If there are additional materials, spacers should be additionally installed on them to avoid deformation..
Installation of platbands and door hardware
At the final stage of door installation, installation of platbands. First, trim the clypeus in height, then cut the upper edge of the vertical platbands at an angle of 45 degrees. We do the same pruning of 45 degrees for horizontal platbands from both ends. For these operations we use a miter box. You can fix the platband using small nails or universal mounting glue.

Glue application on platband

Installing door trim on door frame
Hammer nails in increments of 300 – 400 mm, starting from the top corner. If we use glue, then apply it to the back of the casing and to the wall. Press the platband tightly, if necessary, fix it with a clamp and leave it to dry completely.
The crown of all the work will be the installation of door accessories – handles, stop valves for the lock, couplers and latches, lock washers, door stops.
All door installation work can be completed in one day. It all depends on the skills of the craftsmen, as well as on the drying speed of certain materials that are used during assembly. The rules and recommendations presented above can also be used to install metal and plastic doors. The difference will only be in the necessary tool for the different types of materials the door is made of.