Important aspects of painting the ceiling with your own hands
Despite the existence of such modern types of ceiling finishes as suspended systems, suspended ceilings, PVC panels, the usual classic painting of the ceiling with your own hands remains the most economical, and therefore the most popular. At the same time, despite the apparent simplicity and accessibility of this method, the result is not always pleasing: either the surface of the ceiling does not look perfectly flat, then stains and spots appear on it. So that painting the ceiling with your own hands does not cause disappointment, it must be properly prepared for the finish, select the appropriate paint and apply it correctly on the surface.
Content
- How to prepare the ceiling for painting
- Prepare concrete slabs
- Drywall preparation for painting the ceiling
- Preparing a wooden ceiling for painting
How to prepare the ceiling for painting
Painting as a finish is most often used for three types of ceilings:
- from concrete slabs;
- from drywall;
- from wood.
Differences in the technology of painting each of the ceilings listed are insignificant, but in the preparation methods they are. So, before painting the ceiling, the room should be freed from furniture as much as possible, the ceiling chandelier should be removed, and the lampholder with a powerful lamp should be fixed instead. The floor and large items remaining in the room are covered with plastic wrap.
Prepare concrete slabs
Concrete ceilings require particularly careful preparation: how durable the new coating will depend on its quality.
If there is any old chalky whitewash, it must be washed off to concrete, having preliminarily wetted it with hot water using a roller. Too thick a layer of chalk is soaked several times, cleaned with a wide spatula, and then washed off.
The ceiling, covered with lime or water-based paint, is washed from dust and dirt with hot water, cleaning up areas with peeled or swollen paint to concrete.

The old chalky whitewash is removed from the concrete ceiling, the surface painted and covered with lime is thoroughly washed, the peeled finish is removed to concrete, cracks and defects are repaired
If there are cracks at the joints of concrete slabs, the seams are embroidered and thoroughly cleaned from old putty and paint to concrete.
After cleaning, the concrete ceiling is covered with a primer. Soil is necessary for strong adhesion of plaster and putty to concrete, it must be absorbent, but not film-forming – carefully read the instructions before buying. The primer is applied with a roller, in problematic and inaccessible places – with a brush, and left for 2-3 hours until the final drying.
Now you can start plastering the embroidered seams and restore the fallen fragments on the surface, after wetting the places to be treated with water. The gypsum plaster mixture is applied with a wide spatula, pushing it into the joints as deep as possible. Each plastered seam is reinforced with a special fiberglass tape, which will prevent cracking in the future and make the seams invisible.

Putty concrete ceiling is carried out in order to eliminate minor defects
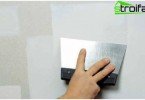
The next preparatory stage is puttying the ceiling. Any mineral filler mixtures diluted with water are suitable, which are applied with a wide spatula in two layers, with an intermediate drying for 4-24 hours. The first, thicker layer is leveling, masking all defects and irregularities of the ceiling. When applying a second thin layer of putty, smooth transitions and traces of the spatula.

Before painting, the ceiling is sanded to obtain a perfectly smooth surface.
To ensure an ideal surface, the putty ceiling is carefully sanded – sanded with not too rough sandpaper and a bar, periodically lighting it with a powerful light source, identifying and eliminating possible defects. A properly sanded ceiling can be heterogeneous in color, but must be perfectly smooth..
Drywall preparation for painting the ceiling
Before painting the ceiling from drywall, it should also be prepared. True, in this case it is not necessary to close the cracks, it is enough to remove the peeled off old paint or whitewash and wash off dust and dirt with water.

Butt joints and places for installing screws on a plasterboard ceiling are carefully sealed with putty
A putty layer is applied to the ceiling surface, reinforcing the joints of drywall sheets with fiberglass tape, and then ground.
Preparing a wooden ceiling for painting
Ceilings made of natural wood, wood panels or lining are more often found in country houses and cottages and painted to protect wood from decay, fungi, mold and insects. Preparation of a wooden ceiling for painting consists in leveling its surface with sand paper and in impregnation with stain or special protective impregnations of the Pinotex type.
Finally, before paint the ceiling correctly of any type, after puttying and grinding it must be primed again. The soil layer will significantly improve the adhesion of the ceiling surface with paint and at the same time will reduce paint consumption.
The best paint for the ceiling
Today, when whitewashing with lime and chalk is practically not used, it is more interesting and more difficult to decide which paint to paint the ceiling. A modern consumer from a wide range of water-based paints can choose the composition for both functional purpose and quality characteristics, including:
- environmental friendliness;
- safety;
- lack of smell;
- vapor tightness;
- safety;
- ease of maintenance.
The chemical composition distinguishes the following types of modern water-based paints:
- acrylic;
- silicate;
- silicone.
Paint it with acrylic paint.?

Acrylic paints are sensitive to the effects of steam and moisture, applicable for painting rest rooms, living rooms
Acrylics are the most popular in a large group of water-based paints, optimally combining excellent quality and affordable prices. To obtain a high-quality effective topcoat, just two layers of this type of paint are enough. It is elastic, perfectly covers cracks up to 1 mm wide, is easily cleaned from small impurities and looks excellent. Just before painting the ceiling with acrylic paint, please note that it is sensitive to steam and moisture. This paint is good for bedroom ceiling or living room, but not suitable for bathroom.
Where silicate paints are applicable
Paints of this type are resistant to steam and high humidity, and also have excellent antiseptic properties: they are not afraid of fungi and mold. Water-based silicate paints are used in industrial premises with difficult operating conditions. In living quarters, they are good for painting ceilings in basements, pools, saunas, bathrooms and kitchens, but are not appropriate for decorating a living room or bedroom..
Ceiling for silicone compounds
They are vapor tight, form a high-quality even coating with dirt-repellent properties, have increased elasticity and are able to cover even cracks 2 mm wide. Silicone paints are antiseptic and compatible with other types of paints, suitable for painting ceilings of premises for any purpose, but belong to the expensive price segment.
If the question of how much the ceiling painting costs is a priority for you when choosing a paint, keep in mind that its consumption depends not so much on the amount in the bank as on the coverage rate. Find the indicator of paint consumption per square meter on the package and it is possible that expensive, at first glance, paint will be the most economical choice.
Paints for wooden ceilings
For painting wood ceilings, phenolic, epoxy, water-soluble varnishes or translucent azure are most often used, which provide the surfaces with the necessary moisture-proof and antiseptic properties, but allow you to preserve and emphasize the beauty of the natural texture and color of natural wood.

Painted wood ceiling
Sometimes the style of the interior requires a change in the color of the wooden ceiling and then you can use water-based or even oil paint. Before painting the ceiling with water-based paint, to ensure good adhesion and durability of the coating, the wood is covered with a thin layer of PVA glue.
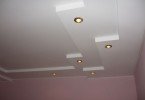
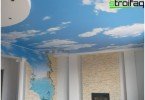
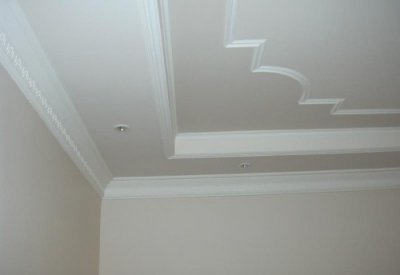
What color to paint the ceiling?
In creating the image and mood of the room, the color of the ceiling plays the same important role as the quality of its painting. When deciding what color to paint the ceiling in, they usually take into account the style of the interior, certain fashion trends, the advice of friends and relatives, but it does not hurt to remember some rules for the interaction of colors.
- A color scheme, forming a bright contrast, too tired eyes. Do not combine on the ceiling, for example, red and bright green, yellow and dark purple, blue and orange.
- The combination of even bright and saturated colors located next to each other in the spectrum and having close wavelengths is quite comfortable for the eye. That is, choosing the color of the ceiling, we must remember that from the longest wave in red this indicator gradually decreases to orange, yellow, green, blue, blue to the shortest wave of purple.

Neutral ceiling background
- Finally, if you need a neutral background that does not attract attention, soft, pale, pastel colors and combinations are used in its coloring.
What will we paint?
In solving the problem of how to paint the ceiling without stains, with a beautiful even layer, both skill and the right choice of a good tool play an important role. To apply paint to the ceiling surface, you can use
- rollers;
- brushes;
- electric spray gun.
Prepare the paint according to the manufacturer’s instructions: dilute with water or simply mix well with a special mixer nozzle for an electric drill.
Paint roller as a tool for the painter
Cook for work
- large roller with medium-length pile;
- small roller with a long pile;
- tassel.
The paint prepared for work should be poured into a special bath. The roller is carefully dipped in paint, not completely immersed in it. For uniform paint distribution, the roller should be rolled well along the inclined wall of the bath.

A special paint tray provides additional mixing to maintain uniformity
It is recommended to start applying paint to the surface from the corner of the room closest to the window, gradually moving towards the center. Good lighting will help to quickly identify unpainted spots or, conversely, excess paint. The wall areas are painted with a small roller, baguettes and corners are painted with a brush.
Master’s advice: the first strokes of the paint are best applied at a distance of 50-70 cm from the corner and move first towards you, and not from yourself.
During operation, the roller should not be held perpendicular above the head, but at an angle of 45 °. So the paint will not splash on the head, and the painted surface will be clearly visible. To avoid streaks and smudges, do not press on the tool – roller or brush.
Wizard’s tip: to avoid drips from excess paint periodically appearing on the roller, pull the net over any container and occasionally squeeze the roller.
Each next strip of paint is laid parallel to the previous one with an overlap of about 5 cm, making sure that there are no unpainted bald patches. This will avoid stains that cannot be repaired..

When painting, the roller is directed not perpendicular to the surface, but at an angle
To obtain a high-quality even coating usually requires the application of two to three layers of paint. Each subsequent layer is applied after the previous one has completely dried..
Paint the ceiling with a brush
Large areas are easier and more convenient to paint with a roller, but when decorating small rooms or ceilings of complex shapes, choosing a brush as the main tool is appropriate and justified. In this case, the painting technology is the same as when working with a roller, but the process of applying paint to the surface has its own nuances.
The main difficulty with this method of painting the ceiling is to maintain uniform pressure on the brush. Too much pressure on the brush leads to the appearance of sagging, and very weak – to a too thin coating and the appearance of bald patches and the notorious spots. Therefore, try not to press the brush very hard, but carefully blend the paint over the surface without leaving unpainted spots.
The second problem when working with a brush is dripping paint on hands and on the floor.
Master’s advice: so that the paint does not drip from the brush, you can strengthen the paper cup at its base or tie it with a strip of soft cloth that will hold and absorb all the excess.

A simple device to prevent paint from dripping off the brush
When applying paint strokes to the surface, guide the brush so that its base is as close to the ceiling as possible.
During breaks in work, do not forget to dip the brush into a jar of water or paint, but in order to avoid deformation, its bristles should not touch the bottom.
Painting the ceiling with an electric spray gun
An electric spray gun is the most advanced tool for applying a beautiful, thin and even layer to the ceiling of any room. Carefully read the manufacturer’s instructions and adjust the thickness of the paint to the optimum consistency for the appliance..
Work, as in previous cases, start from the corner closest to the window and try to keep the spray nozzle at a distance of about 70 cm from the ceiling. Too short a distance will cause paint to form on the surface, and if too long, the paint may simply not reach the ceiling.

The spray gun is not recommended to be placed close to the surface, otherwise there will be sag
Master’s advice: to get an even coating without drips, the spray gun must be kept at the same distance from the ceiling, constantly promoting it with smooth movements and not lingering for a long time in one place.
A few helpful tips to conclude.
- To paint on the ceiling dried evenly, paint it quickly, trying to keep within 15-20 minutes.
- When painting curly, multi-level ceilings in several colors for each type or color of paint, use a separate roller or brush.
- To obtain a neat, smooth edge at the junction of two surfaces or colors, use masking tape. Stick adhesive tape only to a completely dried painted surface..
- Install lamps and chandeliers only after the paint has completely dried.
- After painting, close and curtain the windows so that drafts and sunlight do not force drying of the paint in certain areas, violating the uniformity of the paint coating.
We hope that our recommendations and tips will help you paint the ceiling in any room of your apartment or home beautifully and efficiently.