So, if you are reading this article, then you are really interested in the question of how to paint the ceiling. Of course, you can not paint it at all, but, for example, wallpaper it or install a tension or suspension option. However, for some people, such costs are impossible because of the banal reason for the lack of money, although staining will also cost “a pretty penny.” Modern high-quality ceiling paints are not cheap, but you should not save on them, because it is on their properties and characteristics that your own satisfaction (or dissatisfaction) depends on the work done.
Content
- We select paint for the ceiling
- How to paint the ceiling
- Surface preparation before painting
- Ceiling painting tools
- Strict adherence to technology – great result
- Important trivia or minor importance
We select paint for the ceiling
First of all, of course, you need to find out what paint to paint the ceiling, because it is this thick mixture of varnishes, oils and dyes that determines the ease and simplicity of painting.
In general, emulsion paints are ideal for ceilings, as they provide a uniform and uniform application. The advantages of this type of paint include:
- rather high speed of their drying;
- lack of an unpleasant smell;
- ease of washing of the working tool, in particular brushes, and hands after completion of staining;
- non toxicity.
Aqueous emulsion paint is distinguished by remarkable adhesion (i.e. adhesion) to surfaces of concrete, brick, putty, plaster and others.
All water-based paints can be divided into three types:
- Silicate paints;
- Silicone paints;
- Acrylic paints.
Acrylic paints have the highest coefficient of water absorption, since the vapor-permeable film formed during their drying practically does not pass water and its vapors. Silicate paints are characterized by much greater water absorption, while silicone paints combine the advantages of the first two types – high vapor permeability and low water absorption.
But water-based paints can also differ in the degree of gloss. Matte paints are able to hide minor defects on the ceiling, and besides, they create the most harmonious and complete design than semi-gloss and even more so glossy. Glossy paint, like a litmus test, instantly gives out all the irregularities and errors that the master made during painting. Take this into account when choosing a paint, otherwise you are at great risk of spending more money than you planned.

Special ceiling paint
How to paint the ceiling
So, they chose the paint, prepared the ceiling … or not? Let’s dwell a little on how to prepare the surface of the ceiling for painting.
Surface preparation before painting
First, you need to get rid of the old whitewash or paint. The first is easily washed off with soap and water and a soft sponge, and the second with a special thin spatula with
use if necessary (if you can’t just scrape off) the solvent.
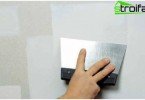
Secondly, if there are joints on the ceiling, they must be freed from the old plaster with the same spatula..

Ceiling joints before puttying
Thirdly, a clean ceiling must be primed, otherwise the risk of getting loose stucco on the head increases many times. It is the primer that allows the stucco to stay on the ceiling without any threat to your health. It is applied with a soft roller in one layer. The procedure is not complicated and does not take much time..
Fourth, we need to plaster our ceiling. Here the first problems may arise, because the event is not one of the most pleasant and easy. But this is the only way to achieve a perfectly flat surface. After finishing the putty, walk a thin sandpaper all over the ceiling to destroy the last defects and finally start painting.
Ceiling painting tools
The question of how to properly paint the ceiling is still relevant for you? Then we go further and choose a quality tool for these purposes.
The brush here, of course, is inappropriate, because you have to paint not the walls and not even the floor, but the ceiling. Hands during this work quickly numb, so the longest handle roller will be the surest and most correct solution.
It is this painting tool that determines the final result, which means that you need to choose it carefully. Foam rubber is absolutely not suitable – it gives bubbles that leave ugly spots. Velor is also not that – he takes a little paint. But the roller with a short natural pile is exactly what you need. He is the only one of all who shows the perfect result..
Stock up on several rollers at once – a couple with a short pile and one for finishing painting with an average pile length.

To paint the ceiling, rollers of different dimensions with different pile lengths will be required
Strict adherence to technology – great result
The most important thing in this complicated and tedious process is applying a uniform paint composition to the surface of the ceiling, but how to achieve this?
The answer to this question is the instruction, which is necessarily on every can of paint. We dilute, following this particular piece of paper. There are also paints that do not need to be diluted at all. Then just mix it and you can start coloring.
We take the roller and carefully dip it in a bucket of paint, but not completely, but only on one side. Then we roll it on a special tray (if it is not there, then take a piece of old linoleum, hardboard, etc.) until it is completely covered with paint.
Important: if you dip the roller in the paint and immediately roll it on the ceiling, you get the so-called neprokras, which, when dried, turn into spots.
If after the first “bathing” of the roller in the paint it has not been coated with it on all sides, dip it again and roll it out in the tray again. You can practice a little, for example, on the walls (if they are, of course, bare) or something else, which is not a pity.
We move on. Having learned to roll the roller on different surfaces, we begin to do the same, but already on the ceiling. It would seem that there is nothing complicated, but … it is here that the “dog is buried.” The paint must be applied evenly, that is, in no case should you miss a single area, and at the same time very quickly. But you should not have problems with speed, because the roller is moving fast enough. Just do not forget him as he gives all the paint to the ceiling, dip in the bucket again.

Painting the ceiling with a roller on a long handle: brushes are not suitable for painting this surface
We paint with strips of 0.5-1 meter wide. You need to lead them across the room so that the joints are less noticeable. One strip of paint should go beyond the borders of the previous one by 10-20 cm. After drying the first layer, apply the second, but the joints of the previous strip should not coincide with the joints of the new.

Application of the first coat of paint: each subsequent strip of the coloring composition should “go” to the previous minimum 10 cm
In the process of painting, consider the direction of the applied coating. The last layer should be applied towards the light source (window), and the previous – across.

The second coat of paint is applied perpendicular to the previous
Now about the “buried dog.” Standing with your head up and rolling the paint on the ceiling with a roller, you will not see those places where there are “bald spots.” It will seem to you that the entire surface is evenly painted, but this is most often not the case. You need to periodically step aside and look at your work from a different angle or to attract an assistant for these purposes, who, having noticed a lack of color, will immediately inform you that you will eliminate the defect in time.
Important: if you leave at least one small area unpainted, then a spot on the ceiling is provided to you. No matter how you later putty on it, it’s not going anywhere.
If you observe these nuances, the surface of your ceiling will turn out to be smooth and as matte as an egg shell.
Important trivia or minor importance
Naturally, you will not apply the paint in one layer, because you will not succeed in achieving the perfect result by smearing the paint with a thin layer. Each layer must be dry, so it’s best to paint the ceiling in the afternoon, then in the morning you can start the second procedure.
Important: if you apply a second coat of paint immediately after the first, then the structure of the already slightly dried bottom coat is broken, which can lead to ugly consequences.
It is possible that after drying the first layer you will notice spots, then you can apply another layer over the entire surface of the ceiling, but its consistency should be more liquid. You can’t just smear the spots with thick paint, applying it with dotted strokes.
So, now you know how to paint the ceiling with a water-based paint, but you may have another question: what to do if the stains still remain?
Unfortunately, practically nothing can be done in this situation, the only way out is that the work needs to be redone. To do this, we grind the entire surface of the unsuccessfully painted ceiling with a small emery cloth fixed to the bar. Make sure that there is not a single area that you would not touch the skin, otherwise you will have to repeat this procedure again and again.
If you notice spots after the first or second layer, then you are very lucky – you will like the result after polishing and there will be no more spots. But if you have already applied three or four layers and only then you have noticed flaws, then you can’t get rid of simple grinding – you will have to putty, grind, and paint everything from the very beginning.
Many people care about another question, how to paint a drywall ceiling? The answer is simple: just like a regular, concrete ceiling. The same paint technology, the same tools and the same possible problems.