How to make a two-level stretch ceiling
What can be more effective than a perfectly smooth smooth surface of a stretch ceiling? – Obviously, the question will be followed by the statement about the marvelous property of multi-level ceiling structures to transform the interior and in every way decorate the life of ordinary people who are inexperienced in design delights. But, contrary to expectations, we will not praise two-level stretch ceilings without any arguments, we will only consider design features, the feasibility of arrangement and some options for execution. Information on how to make a two-level stretch ceiling will undoubtedly be useful for those wishing to assess the possible amount of work.
Various kinds of training videos will give only a general idea of how two-level stretch ceilings are made – video editing involves the processing and restructuring of the footage. But the addition of printed explanations is likely to clarify the situation and help establish oneself in one’s own opinion. It will help you to learn how two-level stretch ceilings photo collections can be implemented in the interior – examples of interesting color combinations and game textures may inspire the feat of creating a ceiling structure of incredible beauty in the conditions of your own home. So, let’s get started …
Content
- Installation sequence
- Installation of a reliable frame
- Installation of a stretch ceiling
A two-level stretch ceiling, in contrast to a single-level, representing a straight plane and realized by a fabric stretched between the fastening profile (“baguette”) (fabric or PVC), is a more complex structure from a combination of stretch ceiling elements and various frame elements.
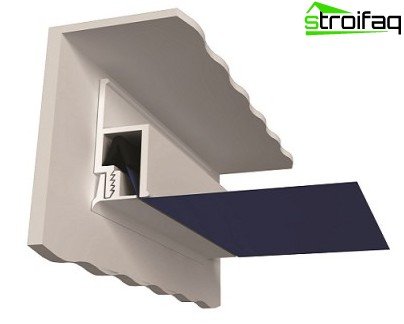
The principle of mounting a harpoon in a baguette
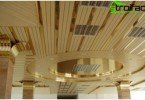
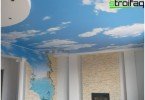
You can combine different versions of the ceiling with plasterboard designs, which allows you to realize various design ideas.
Consider the most common way of arranging a two-level ceiling, when the upper plane is represented by a stretch ceiling, the lower – by plasterboard.
Installation sequence
First of all, it is necessary to measure the room, draw the desired configuration on paper. When calculating the height of the structure, it is important to consider the height of the recessed fixtures and their subsequent location. From the drawing, you need to transfer the desired shape to the ceiling and only after that proceed with installation.
Installation of a reliable frame
First, we make the frame of metal profiles for plasterboard structures. The plane of the structure to be constructed must be strictly horizontal, the accuracy of the marking is necessary. Using a water or laser level, mark the marks in each corner of the room. A continuous line is drawn from these marks with a chop line around the entire perimeter of the room..
A U-shaped profile is fastened along the designated line with dowels and a perforator. The same profile is installed on the ceiling according to a pre-laid layout. The shape of the box can be curved and straight. To fix the profile along a curved line, it should be cut with metal scissors with an interval of 3-4 cm so that it can be bent to the required curvature. To the profile fixed to the ceiling we fasten the descents from the profile sections of the required height. The lower edge of the slopes should be at the same horizontal level with the wall profile. Together they have to form the lower plane of the structure. Fixing interval – 25-30 cm.
From two U-shaped profiles and profile sections we assemble a box, twisting it with metal screws so that a design similar to a pipe of rectangular cross section is obtained. This design must be attached to the previously set downs. We carry out all fastening work on the profile with self-tapping screws of the “klopik” type using a screwdriver.
We fasten the installed box to the wall profile with a wide supporting profile. Strict correspondence of verticals and contours is necessary, angles can be checked using the level. Thus, the whole frame is assembled around the perimeter of the room. A baguette for the stretch ceiling will subsequently be screwed to the box. The film of the stretch ceiling is tightened when cooling, the duct structure must be strong, designed for a load that can withstand the tension of the PVC film.
The next step is the wiring for lighting. Next – the skin of the frame with drywall. We cut out the sheets of the desired size and mount on the box, fixing with screws on drywall. After installing all the drywall elements, it is necessary to strengthen the corners with a perforated corner, which is fixed to the gypsum putty.
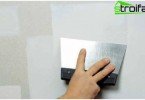
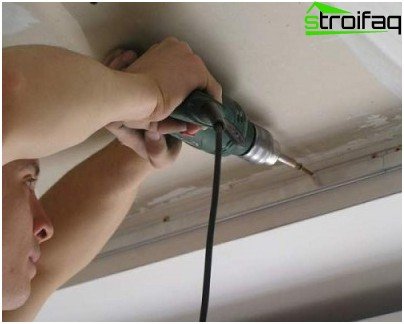
All seams and grooves from self-tapping screws should also be putty. After the putty hardens, the box is sanded with a special grinding grater. We mark the locations of the built-in fixtures and drill holes using the appropriate nozzle (“crown”), then the surface of the box is primed and painted (or glued with wallpaper). Thus, the lower level ceiling is performed. Installation of a stretch ceiling is much simpler in execution.
Installation of a stretch ceiling
To previously installed drywall box attach the mounting plate (“baguette”) for attaching the stretch ceiling.
Installation of a mounting strip (baguette)
If the installation of spotlights or a chandelier is envisaged, then appropriate preparation for installation is required (described in detail in one of the sections of the site). Installation of the design of a stretch ceiling requires a certain qualification and the use of appropriate equipment, it is possible to make a two-level stretch ceiling with your own hands, theoretically, but it is better to entrust its installation to experienced performers.
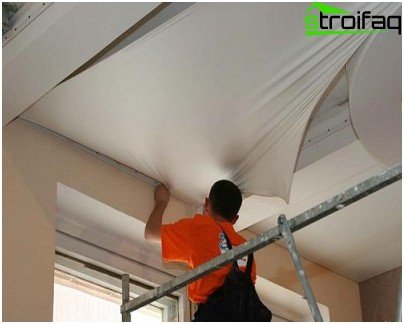
Nevertheless, we will consider the process in more detail: the PVC film is manufactured according to previously taken measurements by the manufacturer. Special harpoon-type fasteners are attached to the edges of the web. The packed web arrives at the customer’s tailored standards. Before installation, the panel is unpacked and fixed at the corners on special mounting braces. Then the air in the room is heated with a heat gun to 60 ° C.
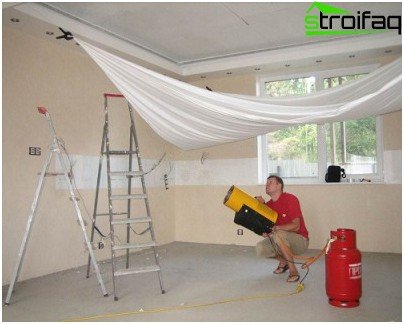
The heat gun heats the room
At this temperature, the PVC fabric becomes elastic, which allows you to attach it to a baguette. After cooling, the ceiling plane is leveled.
The heated PVC film is mounted in a baguette
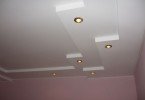
The next stage is the installation of fixtures.
Project development guidelines
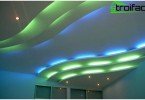
When developing a project, several important points should be taken into account: functional expediency and the desired aesthetic effect. Using a two-level ceiling design, you can hide the unevenness of the ceiling and effectively arrange additional lighting. The possibility of zoning the space with the help of ceiling structures should also not be discounted. A few words about the aesthetic component: the choice of forms and color combinations when arranging a multi-level stretch ceiling should be determined by the general concept of interior design. So, in a room with an interior that is concise in layout and color scheme, arranging a ceiling structure in the shape of a fancy curl is much brighter than other interior elements in color combinations..
Finally, a few tips for choosing color, pattern and texture. Undoubtedly, two-level stretch ceilings with photo printing are spectacular and unusual in essence. But focusing on the ceiling (unusual shape and pattern attracts the eye) can only be justified in a spacious room with high ceilings. When choosing a pattern and texture, consider the property of gloss “glare” and reflect the surface. The color selected in the shades catalog will be slightly darker on the ceiling than desired..