Making a garden shredder with your own hands
Own piece of land is not only relaxing on a green lawn, enjoying the trill of birds, enjoying nature and surprising a rich harvest. It is also a titanic work, rich imagination and genuine love for mother earth. To love your plot means to take care of it, to cherish and cherish, the benefit of modern technology allows the owners of household plots to share among themselves all the secrets of garden works. For example, in order to make a garden shredder with your own hands, you only need to have access to the Web and desire. Do not believe? In vain, now you understand that it’s just.
Content
- Why do you need a homemade garden shredder?
- Why a self-made chipper is better than purchased
- What materials will be required to make a homemade masterpiece
- Grinder assembly procedure
Why do you need a homemade garden shredder?
Many site owners do without this tool. And completely in vain. Why?
Firstly, thanks to the chipper, you can get excellent material for arranging tracks in the form of shredded branches. Sprinkle the paths with such a mixture, and you do not have to regularly clean them from breaking grass.
Secondly, a homemade garden shredder is an excellent fertilizer supplier, as detailed natural “trash” is the best basis for compost. You can use the mulch, which was a couple of years on the tracks, and fresh raw materials – only detailed. For quick preparation of fertilizer you should chopped garden “garbage” and move the organic matter into a compost pit.
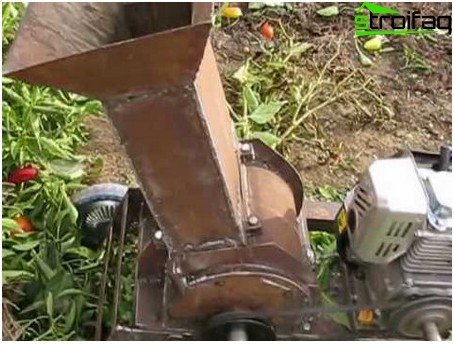
See what budget handsome men get from beginning gardeners
Thirdly, having a chipper in your household, you will protect Mother Nature from pollution. You must have seen that many gardeners get rid of natural “garbage” simply by burning it and thereby clogging the air, the environment, already affected by human proximity.
Fourth, a garden shredder will save your budget. You will get a good portion of organic compost for free. And the device itself at a price will be half the price of a store.
And the last: when you make a garden shredder with your own hands, believe me, you will be overwhelmed with pride from the fact that you yourself made such a serious unit.
Why a self-made chipper is better than purchased
When you know the prices of store models, you will be slightly surprised as they “bite”. Not every amateur gardener can immediately lay out such an amount, moreover, on a tool not of prime necessity. In addition to inadequate cost, the owners of personal plots are often disappointed by the apparatus itself, which serves in our conditions for a short time, and also requires delicate care, again with additional investments. What are the main disadvantages of purchased shredders amateur gardeners?
1. The short life of the case, which, as a rule, is plastic for overseas models. It looks great in a store window, but quickly loses its presentation in everyday life. In fact, a caressing glance, a brilliant, beautiful plastic case turns out to be a whimsical harm. Firstly, he does not tolerate winter well. Chipper owners often complain in the spring that cracks have appeared on the unit body. Trouble with the body can happen under the scorching sun, as the plastic overheats. The cheaper the model, the less durable the case. There are times when a garden shredder serves only a season. Then it remains only to annoy that the money wasted.
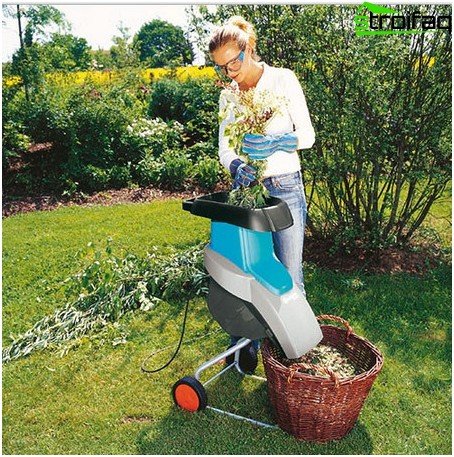
Pay attention to the fragility of the case. There are big doubts that he will last more than 1 season, agree?!
2. The problem with knives. First of all, the need to often sharpen cutting edges. As a rule, store chippers have several knives, and they quickly dull. It is not necessary to dream that the sharpness of the factory edges is enough for at least one season. Secondly, spare knives are not included in the complex of the purchased unit, so if one of the cutting mechanisms breaks down, you will be in great trouble, to the point that you will have to buy a new car.
3. Narrow neck. Many gardeners complain that overseas models resemble toy models because they have such tiny necks that it’s extremely difficult to recycle domestic garden “trash”.
4. Features of the location of the engine. Another surprise for buyers of factory garden shredders is the location of the motor, which is often located below. Everything would be fine, but only with such a design it is impossible to process wet raw materials, since moisture falling from above – from the body into the engine, destroys it. Agree, drying garden rubbish, especially in the rainy season, is quite troublesome. It comes to the point that the unit breaks even during the grinding of ordinary fresh grass – due to its abundant juiciness and the ingress of liquid into the motor.
So, if the purchase of a chopper does not fit into your budget, then you should not be upset. with your own hands you can make a no less powerful “assistant” in garden work. And now you will learn how to make a garden shredder yourself.
What materials will be required to make a homemade masterpiece
In fact, the device of a garden shredder is quite simple. It is possible that you will find all the components necessary for its manufacture in your barn. So, what details do you have to prepare?
1. Sheet metal to make a garden “garbage” receiver. However, in the form of a bunker, you can use other improvised structures, for example, a housing from an old vacuum cleaner, a bucket or a tank, as amateur gardeners often do with wise experience.
2. Motor is the heart of the unit. It depends on how powerful the engine will be, what kind of garden “garbage” will be able to handle your “beast”. But not only this is important when choosing a motor. The type of engine, which can be either electric or gasoline, also matters. Electric motors, as a rule, choose summer residents with a small area, so as not to buy kilometers of cable. Yes, and such power is more suitable for grinding small and soft debris. The gasoline “brother” looks much more serious, which has thick branches “tough”. Such a chopper will serve in your garden economy for a long time and in good condition. The main thing is to replenish your country gas station in time.
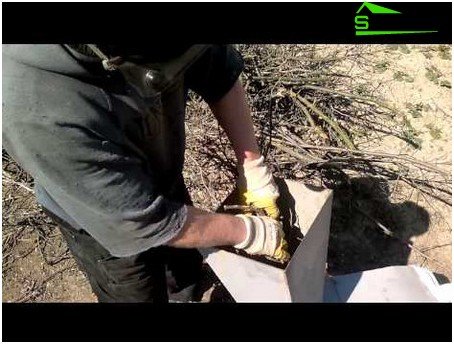
If possible, choose a gasoline engine, then you can even split large branches
3. Pipes from which to make a frame for the chipper. Any copies lying around in the barn are suitable, so do not be too smart.
4. Saws. It is better not to save on these components, but to buy a package (15-25 pieces) of high-quality steel disks. Do not collect used or rusty saws “in pieces”, such savings will come out, alas, sideways – the device simply will not fulfill its main function – grinding.
5. The axis or stud on which you will string the discs. By the way, you have to choose a stud of a diameter suitable for saws, otherwise the discs will hang out or simply will not fit on the axis.
6. Nuts, washers, which should also fit under the axle.
7. A pulley with bearings and a reliable belt. Often, master craftsmen for these purposes use spare parts from the generator of the domestic horse “Lada” or the pump, which is out of order or is simply no longer needed on the farm.
8. A tool to perform all of these operations.
Of course, besides all of the above, you still need time and desire, because without these components no business can argue.
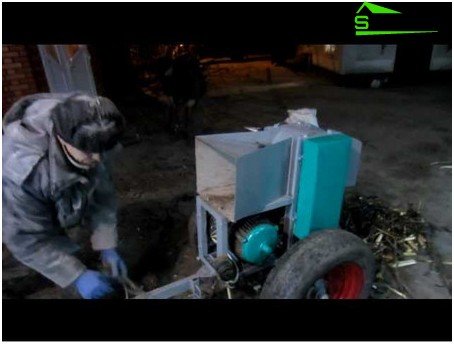
If your site is large, and the chopper will have to be moved often, put it on wheels, then you will not have to carry heavy loads
Worth paying attention to! With the help of a chipper you can grind not only garden “garbage”, but also household waste, as well as crush fruits without even removing seeds. So the specialization of the garden shredder is expanded.
Grinder assembly procedure
Creating a chipper, like any other thing that you want to do well, requires orderliness in actions, which means that you have to make a work plan and outline the device diagram. You can take this picture as a basis:
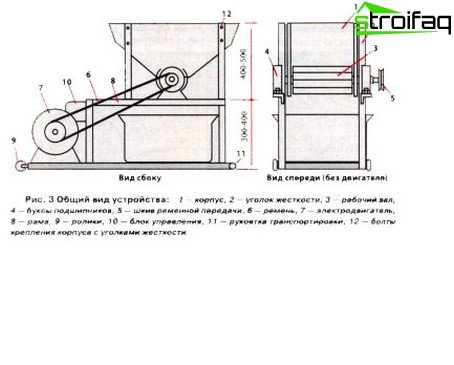
Your Chipper Manufacturing Tooltip
If all the details are found, it’s time to start assembling a homemade grinder.
So, the “three pillars” of the chipper is a waste receiver (or as it is more often called a bunker) with a chopping part, the base or frame and the heart of the unit is the engine. You will have to assemble these components separately (or find ready-made ones), and then make an integral structure from them. And now, first things first.
1. Frame – the base on which all the components of the chipper are mounted is made of pipes / metal profile. For these works, you will need a welding machine and a grinder or the help of a neighbor who has these devices on the farm. The essence of the operation is simple: cut the workpieces and weld the frame into a rectangle from them. At one end, it is necessary to fix a metal sheet by welding – a kind of “socket” for the motor. You should also weld 4 legs with a height of about 50 cm to the frame. You can vary with the dimensions, as you understand, but the general proportionality of the structures must be observed, otherwise the system will not work smoothly. For illustrative purposes, take a frame with dimensions of 80 cm by 40 cm (all parameters will be indicated below with reference to this base area).
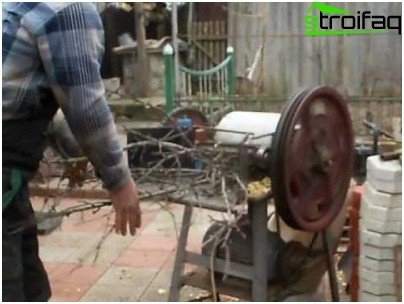
Adjust the height of the chipper at your discretion, it is not necessary to adhere to established standards. The main thing is ease of use for you personally
2. The grinding part. With the collection of the drum, too, everything is relatively simple. On an axis you string disks with a small distance between each other. To do this, use the washers, alternating them with saws. This step will not allow disks to cling to each other during operation. As we said above, the diameter of all these parts must match.
3. A hopper that can be welded from a sheet of metal or made from improvised means (a vacuum cleaner body, an iron tank or a bucket). The approximate dimensions are as follows: height – 40 cm, top – 30 cm by 40 cm. The grinding drum must be installed at the lower base of the casing (in its narrow part).
Further, all these parts, plus the engine must be attached to the frame. The method of fastening is left to you at the mercy, the main thing is that it be reliable. As for the axis, a pulley with bearings, which ensure rotation of the drum, is put on it. The engine is attached to the grinding part using a belt. An outlet bell can be attached to the exhaust window as long as you require. You can also “put” the shredder on wheels, then it will be convenient for you to move it around the territory.
Your versatile garden shredder is ready! The described model is “tough” to any garden “garbage”, including even thick branches with a diameter of 10 cm. So you can bring beauty to your site and make compost. Your homemade device will serve faithfully for more than one season, and the neighbors, you will see, will ask you to conduct a master class on making a garden chipper. Thus, you can improve your reputation in the district and improve your mood..


