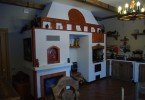
Brick stove for a bath
The traditional material used in the construction of the furnace for baths is a brick. Although the modern market offers a huge selection of building materials for bath stoves, a brick stove for a bath is most widely used. Building a stove with your own hands is not a very complicated process, requiring only small skills in construction, care and accuracy. It should be noted that brick stoves for the bath do not need to be plastered and lined. And when performing work, you will need ordinary tools, such as a trowel, square, emery tool, level, pliers and others, which almost any owner has.
Content
- About the preparation for the construction of the sauna furnace
- Selection of the necessary material
- Drawings of brick stoves for baths
- The foundation for the stove in the bath
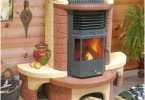
Due to its unique properties, a brick sauna stove has several advantages over gas, metal or electric stoves. It maintains a comfortable air temperature and optimal humidity, retains heat for a long time and at the same time does not burn with steam. The traditional brick stove in the bathhouse is a rather massive heating structure, which warms up the whole area well and gives the right amount of steam. It is distinguished by high reliability, durability, high efficiency and ease of operation..
About the preparation for the construction of the sauna furnace
The design of a traditional brick stove for a bath has not changed over the years, the device of each of its elements has been carefully tested. The furnace device includes a number of components:
- Firebox;
- Ashpit;
- Kamenka;
- Chimney.
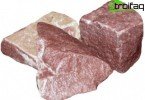
Selection of the necessary material
During the construction of a brick sauna stove, only high-quality material should be used, due to which the masonry will be reliable and strong. Apply red brick brand M with the following values from 75 to 150, which has a frost resistance of 25 cycles. The brick must be of the correct shape, cracks or extraneous inclusions should be absent. The quality of the material is easily checked with a simple tapping. A high-quality brick gives a metallic sound, and a low-quality firing brick will sound muffled. A furnace firebox exposed to high temperatures is preferably lined with refractory or refractory bricks.
The search for a suitable material should be taken very carefully, since the properties of the final structure depend on the right choice. Red brick is characterized by good heat transfer and gives the finished building a beautiful and interesting appearance that does not require additional decoration.
Drawings of brick stoves for baths
Brick stoves are quite complex structures that require special attention at the construction stage. Therefore, the developed drawings of brick furnaces should be detailed, describing in stages the process of performing work taking into account the peculiarities of construction. The ordering is a detailed drawing, clearly depicting the masonry of each row of bricks. Using special marks and hatching on the drawing, they display the shape of the brick necessary to create rounded surfaces.

Ordering a brick furnace for a bath – option 1

Ordering a brick furnace for a bath – option 2
There are also many others sauna stove orders, which you can find on other resources on the Internet.
The foundation for the stove in the bath
At the first stage of construction, the foundation is laid. First, dig a pit with a depth of about 0.7 m, the bottom of which should be located below the level of freezing of the soil. Any soil moves a little, which negatively affects the entire construction of the foundation. To avoid such problems during operation of the furnace, it is necessary to make the pit width at the lower level a little larger than the main excavation.
The bottom of the pit is covered with a layer of sand, which should cover it with a 15-cm layer. Sand must be filled with water and allowed to soak. A mixture of stone with broken brick is poured on top, the layer is made up to 20 cm thick. Next, a layer of crushed stone should be poured, formwork and a reinforced cage should be installed, but only after the sand layer ceases to shrink. All layers on top are poured with a layer of concrete, which should be at a distance of 15 cm from the soil surface. At the next stage, the formwork is dismantled by applying several layers of tar on the sides, and the resulting place is covered with fine gravel, large sand.
As the last layer of the foundation are two pieces of roofing material, which should coincide with its area. This layer performs a waterproofing function. Its arrangement is a very important measure that protects the surface of bricks from moisture, which can cause not only a loss of strength of the entire structure, but also its premature destruction. The implementation of the waterproofing device completes the process of erecting the foundation for the sauna stove.

Waterproofing and foundation level check
Brick oven construction
The finished foundation is checked by the level for horizontal. Using the bricks of the intermediate row and mortar, you can remove the shortcomings that have arisen when pouring the foundation. Next, you need to cut the bricks and lay out a protective wall, for the laying of which you need a cement-sand mortar. This wall consists of five rows and is designed to provide reliable protection of the lining from fire.
Next, it is necessary to accurately determine the outer contour of the furnace and correlate it with the opening located in the inter-beam ceiling. This area is the exit point of the chimney to the attic. The distance between the two beams must strictly correspond to 90 cm. On a wooden meter rail, you need to make a small indentation in the middle, into which the plumb line is laid. Its sharp end is placed above the future first row of masonry. When fastening the cable, you must carefully monitor compliance with the vertical position. The first brick row is positioned according to a point on the foundation, to which the plumb line indicates. The position of the bricks must strictly comply with the order.
After laying out the first row, it is necessary to switch to a clay solution.
Mortar preparation
Clay for the solution is extracted from a depth of 0.5 m or more. It must be thoroughly cleaned of various impurities and soaked in water containers for several days. The sand intended for solution is subject to sifting and cleaning of garbage. The main thing is that, together with grains of sand, small particles of pebbles do not get into the solution. The preparation of the solution begins with kneading clay, gradually adding water to it. Using a puncher, the mixture is thoroughly mixed until a thick sour cream is homogeneous. Prepared and slightly moistened sand is added to the finished mixture..

Preparation of mortar for masonry: kneading preferably with a construction mixer to obtain a homogeneous consistency
Before using the solution, it must be checked for readiness. To do this, dip a dry, clean stick into the mixture and analyze the layer of solution remaining on the stick. A good solution leaves a layer of about 2 mm. If the layer on the stick reaches more than 3 mm, then sand should be added to the solution. And if the layer is less than 1 mm, then in this case clay is added. Mixing the solution is carried out in small quantities, since over time it loses its unique properties..
Masonry rules
After laying the first and subsequent rows, the angles must be checked, which must be kept strictly straight, and reconciliation with the order is made. The thickness of the joints between the brick rows should be no more than 3-5 mm, and the bricks should be closely adjacent to each other. One of the factors for fulfilling this requirement is a quality solution prepared without stones and debris. The second row is laid so that each brick overlaps the joints of the lower bricks. All subsequent rows are laid out similarly..
Installation of the blower door is carried out at the stage of laying the third row of bricks.

Blower door installation
Blower door installation
The door is mounted using galvanized wire or strips of steel sheet. Bricks above the doors need to be filed a little.

Sawing up the brick to install the door
The future brick oven in the bath before the fourth row device should be checked for evenness of the surface of the walls and compliance with the straightness of the corners. Laying the fourth row is associated with laying a well for ash and grate, which is a special grill, necessary for the air duct and cleaning the fuel compartment of ash. To install it, it is necessary to hollow out the recesses in the bricks, leaving small gaps of one centimeter necessary for the thermal expansion of the grate. The rear wall under the grill is made round in order to achieve minimal resistance to air entering the combustion chamber.

Installing a grate for a brick oven
In the sixth row of masonry, the door for the blower is installed, and in the seventh – the installation of the grate and the door of the furnace. In most cases, brick stoves for baths are equipped with cast-iron doors, which are considered the most durable and refractory elements..
The eighth row of masonry must be done with a partition, since it is from it that the chimney will begin. Similarly, all subsequent rows are laid down to the fourteenth row, in which channels are installed – metal products resembling the letter P. In the front wall of the furnace, an opening should be made for a container for hot water. The container should be vertically held on the side walls of the masonry, but at the same time touch the previously laid channels.
For the fifteenth row, halves of bricks are used, which are laid to each other at an angle. This will be the basis for the laying of the separation wall. The next three rows lie in the same way as the first – each brick should close the joints in the previous row.
The nineteenth row is associated with the installation of the door necessary to remove steam. The twentieth and twenty-first rows are fastened with thin strips of mild steel. On the twenty-first row, the door for steam is closed, a container is placed under hot water, which is surrounded by brick fragments. On the twenty third row, the installation of the pipe begins, its height will depend on the height of the bath.

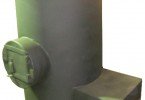
Preparing to install a furnace pipe
The design of the sauna furnace has a direct impact on the choice of pipe. For example, a massive stove in a brick bath requires a large pipe, and for a lighter construction, a smaller pipe will be needed. It should be borne in mind that the thickness of the walls of the furnace and pipe, as well as the cross section of the smoke ducts, cannot be less than half the brick. The chimney should rise no less than half a meter above the roof surface. When laying pipes use lime or cement mortar, which does not lose its properties under the influence of condensate.
The finished brick oven can be plastered to improve its appearance and provide additional protection for the bath from fire.
The process of self-construction of a brick furnace for a bath is not so complicated, provided that you carefully study the nuances of the construction scheme. Compliance with all conditions and recommendations will allow you to build a new brick oven, which will fully fulfill its functions..