How to properly insulate the ceiling in the house
What could be more important for a person than a warm and comfortable house, where the whole family gathers in the evenings. To make a house cozy is the mistress’s task, but to make it truly warm is the owner’s duty. However, very often a situation arises when the window units are replaced, the walls are insulated, the heating system is in perfect order, and the heat from the house flows like water through your fingers. What is the reason? But after all, from the school course of physics, everyone is well aware that warm air rises, which means the most likely place of continuing heat loss is the ceiling. And if in multi-storey buildings you should not pay attention to this, because there is another apartment above you, then the owner of the house in the private sector will sooner or later think about how to insulate the ceiling.
Content
- Which side to insulate
- Thermal insulation from the attic
- Materials required for ceiling insulation
- Tools needed by performers
- Ceiling insulation: sequence of work
Which side to insulate
The ceiling can be insulated both from the side of the living rooms and from the attic. Which of these methods to choose depends on a lot. If the house has been renovated and plasterboard structures have already been installed, breaking them for the sake of warming is stupid. But if the repair with the use of suspended ceilings is only in the plans, it is worth taking a moment to place the insulating layer in the inter-ceiling space. However, warming the ceiling from the attic is much more effective.
Thermal insulation from the attic
In order to insulate the ceiling from the attic side, it is first necessary to throw out all the accumulated rubbish from there and clean the floor beams from the old insulation.

Insulation of the ceiling from the attic
Mineral wool or polystyrene is most often used as the main heat-insulating material..
We recommend using both. This will maximize the effect..
Materials required for ceiling insulation
- Mineral wool in rolls or slabs
- Styrofoam
- Vapor barrier film
- Edged board or USB board
- Polyurethane foam
- Nails or screws
- Thin wood slats
Tools needed by performers
- Electric jigsaw or conventional wood saw
- Hammer or screwdriver (for attaching a USB-plate to self-tapping screws)
- Sharp construction knife
Ceiling insulation: sequence of work
Warming is made in the space between the ceiling beams in several layers..
- First, there is a layer of waterproofing, the role of which in our case will be played by the “vapor barrier”. The width of the film should be 10-15 cm greater than the distance between the beams. We lay the insulation and fasten it to the beams with the help of strips.
- The next layer is foam. This is where a sharp knife comes in handy. The foam should be laid as tightly as possible, that is, so that the gap between the insulation and the beam is minimal. Given the fact that the beams may not be completely even, it is better to leave a small margin, and then trim “in place”.
- To improve sealing, we blow the cracks between the sheets of foam with foam and allow to dry. Then remove excess foam with a knife. Laying another layer of “vapor barrier”.
- The turn of mineral wool came. It is necessary to install it so that the edge of the insulation coincides with the edge of the beam. If you have purchased mineral wool of insufficient thickness, you can lay it in two layers. In this case, the joints of the sheets of the first layer must be in the middle of the sheets of the second layer.

The edge of the mineral wool should “rest” on the beam
If you have a dry attic, then in order to save on this it is quite possible to stop. But, you must admit, operating an attic with such a floor is rather inconvenient. So, if the means allow, place a trim board or USB board on top of the beams.
Tip. The floor in the attic is best made from USB – boards. Thanks to special impregnation, this material is not afraid of temperature extremes and high humidity.
How to insulate the ceiling of a private house from the inside
Unfortunately, it is not always possible to insulate the ceiling from the attic. Sometimes the roof of the house is designed in such a way that it simply does not exist..
In this case, insulation must be done from the inside. It is recommended to use this method only as a last resort, since it has a number of significant disadvantages:
- The ceiling in the house becomes much lower.
- At the end of the insulation work, the room will probably require repair.
- Some heat-insulating materials during operation emit substances harmful to the human body.

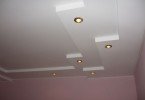
Insulation of the ceiling from the inside with mineral wool
Quite often, the ceiling is insulated during the installation of suspended ceiling structures. To do this, it is enough to lay a layer of mineral wool under the plasterboard or plastic ceiling or stick foam. However, these methods are not effective enough. In addition, the ceiling height in private houses does not always allow lowering it by another 15-20cm.
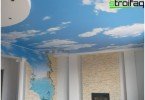
So what is better to insulate the ceiling from the inside? Often the best way out of the situation is to use aerated concrete. In addition to low thermal conductivity, this material has another indispensable quality – it is lightweight. So, you can just stick it to the ceiling. To do this, you will need:

Lightweight aerated concrete slabs for insulation of the ceiling will help quickly and effortlessly improve the thermal insulation of the ceiling
- Aerated concrete 8-10cm thick.
- Adhesive for polystyrene boards.
- Wide notched trowel.
- Deep penetration primer.
- Wood hacksaw.
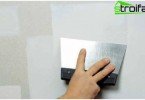
Before starting work, the ceiling must be carefully primed and allowed to dry. It is advisable to ground the plates on the side that will be adjacent to the ceiling and from the ends. Now we apply glue on the plate with a notched trowel and press it to the ceiling. Thus we glue one row. Plates of the next row must be glued in a “checkerboard” order.
Important! If the ceiling in your house is crooked, it can be leveled in the process of insulation. For this, the position of each plate is sufficient to check the level.
When the ceiling is completely pasted over, it must be primed, stretched the paint net and putty.
Now you know how to properly insulate the ceiling. Whatever method you choose, your work will not be wasted, and next winter it will be much warmer in your house than the previous.