As a rule, completely sow the yard in the country with a lawn, few decide. After all, after heavy rain and cloudy weather it will not be possible to go outside. At least for this reason, you should make one full path from the entrance to the house to the gate. And for those who like to delve into the garden or just spend time in the yard, you just can not do without paved paths between flower beds or a full site. People living in a private house prefer to do everything on their own, so paving slabs will be done on their own. How this process is going on and other nuances will be discussed later..
Content
- Choose size and layout
- Laying methods and work steps
- Preparatory work
- Laying segments and fixing them
Choose size and layout
When choosing a particular form of elements, you cannot give any clear advice. Still, the owners are guided by the fact that they are more to their taste, as well as by the style in which the design of the courtyard or garden is made. In this issue, everything is individual.
As for the size, here is almost the same situation. The only thing worth paying attention to is the aspect ratio. The larger the area of the area on which paving slabs are planned to be laid in the country or near the house, the larger the size of the individual elements. Firstly, it will facilitate the calculation process. Secondly, the work will be significantly accelerated. But if, for you, time is not critical, then you can use small segments, it will not affect the appearance at all.
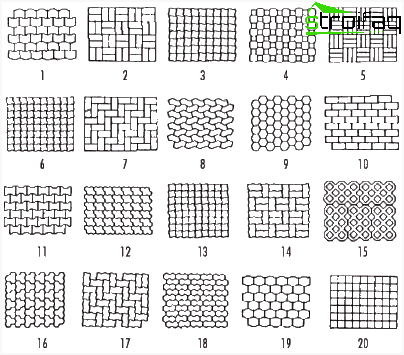
This diagram shows several options for laying tiles of various shapes and sizes. You can try to fine-tune the calculation order to fit the shape of the elements you choose
The order of calculation of the elements is also chosen at your discretion. But in this case, you can give at least a clear direction that will help to understand a huge number of options. In general, the paving slab laying scheme can be performed in three specific variations:
- geometric;
Most popular options: herringbone, checkerboard pattern and wicker.
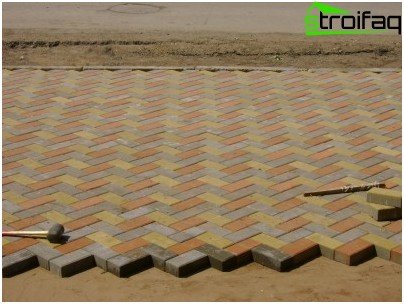
You can make the boring and ordered form of the display more attractive with the help of color. By arranging several different colors, you can get a bright and interesting track or site
- chaotic;
As such, it does not have a circuit, the elements are laid out in complete disarray.
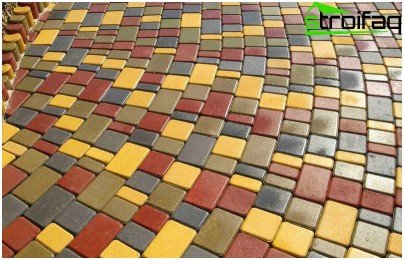
When using this calculation method, it is possible to interconnect elements that not only differ in color, but also in shape and size
- art;
With the help of this material, real works of art are created on the sites. The complexity of the picture depends only on your talent, strength and patience..
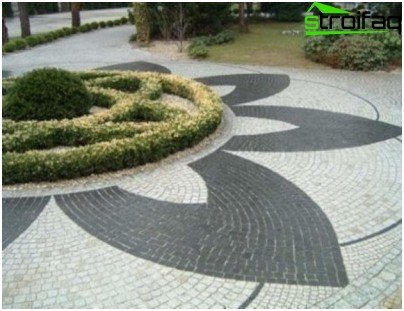
The easiest option for this layout scheme is a method in which no more than two colors of segments of the same size are used
Laying methods and work steps
All options for laying paving slabs differ from each other in the material used to fix the elements. Preparatory work in almost all cases takes place on the same principle, unlike the installation process itself. Depending on how reliably you want to fix the segments, the following methods of laying paving slabs are highlighted:
- using sand (the easiest option to perform, it is not attractive in that the fasteners of the elements are not durable and after a while repairs will be required);
- using a dry mixture of sand and cement (medium in severity of execution and in grip quality);
- using a ready-made mortar of sand and cement (the most difficult method in terms of implementation, laborious, but the result is almost eternal).
The progress of the work includes the following stages:
- site preparation;
- installation of segments;
- final fixation.
Preparatory work
Any laying of paving slabs with your own hands begins from the same stage – site preparation. This process looks like this.
- The topsoil is removed. The depth of the fence is equal to the sum of the thicknesses of all layers: sand, gravel, mortar or mixture, the tile itself. Please note that the final shrinkage can reach up to 2 cm. If this track height does not suit you, then subtract these centimeters when removing the globe.
- We level the site with the help of a garden rake, be sure to break up large lumps. In the case when the soil is very soft, it is necessary to make it more dense. To do this, it is necessary to pour water on it and even it again if washouts have formed. After the platform is rammed.

If there is no desire to remove the topsoil, then it is possible to lay directly on the grassy ground. But before a layer of sand a layer of crushed stone is necessarily poured
- Pegs are driven into the ground along the perimeter of the dug area. Marks are made on them at a height of 5 to 7 cm. At this level, a rope is pulled that connects all the stakes. It is on it that we will be guided when filling and leveling sand.
- The sand cushion is also leveled with a rake. After that, the first layer is moistened. It is not necessary to pour water with a powerful jet, it is best to purchase a nozzle – a spray. Moisturize until large puddles form on the surface.
- The waiting time for drying depends on the air temperature and ranges from several hours to a day. The mass should not be too wet, but not completely dry. After drying, level the area with a profile or wooden battens..
Laying segments and fixing them
When using the lightest option, the masonry is done like this:
- Segments are laid out on the aligned sand cushion. Each of them must be hit with a rubber mallet for good shrinkage..
- After laying out all the elements, the platform is covered with sand, which is scattered with an ordinary broom or broom. Make sure that all slots are filled.
- Above the platform is abundantly poured with water, but again not with a powerful stream.
Having chosen the installation method of average complexity, the second stage of work must be carried out as follows:
- A second thread is pulled onto the stakes, which rises 3-4 cm above the first. A layer of dry connecting mixture is poured along the height of the second thread.
- The tile is laid out according to the selected scheme. The same dry mixture is poured onto the collected site and scattered around the site.
- After high-quality filling of the joints, the area is poured with water from the sprayer..
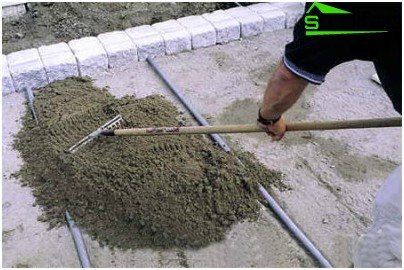
If the tile is not laid on a narrow track, but on a large area, metal guides will help maintain horizontal position. The step between them is 50 cm
When using the most difficult option, the rules for laying paving slabs will be as follows:
- The sides are going around the perimeter of the site, they will not let the mixture go beyond the edges of the track.
- A solution layer is poured with a thickness of 3 or 4 cm (for reference, the thread is stretched, as in the previous case). The entire surface is leveled with a trowel.
- The segments are laid, each of which is tapped with a hammer. No final fix required.
To better understand the principle of performing all stages, you can see a photo of paving slabs or videos on this topic. But the technology, in fact, is not at all complicated, just quite laborious. The most important point that cannot be missed is the preparation of the site at a slope (it should be at least 5 degrees). Due to this, during precipitation, puddles will not form on the masonry surface.


