How to make your own bathroom floor
Repairing the bathroom is one of the most time-consuming tasks. The reason for this lies in the fact that communication pipes and constantly increased humidity are located in the bathroom. You will have to get around more than one obstacle, equipping the floor, and use special moisture-resistant materials. In this article, we will tell you how to make the bathroom floor aesthetic, strong, durable and protect yourself and your neighbors from flooding.
Content
- Floor device in the bathroom
- Preparing a rough surface
- Waterproofing the bathroom floor
- Coating waterproofing
- Easy painting method
Floor device in the bathroom
There are various options. flooring in the bathrooms. It depends on the material of the base of the floor and many other factors. In almost all apartments of multi-storey buildings of our vast Motherland, the device of the floor in the bathroom can be a pie:
- Concrete floor slab – initial base.
- Roll or surfaced waterproofing.
- Concrete screed about 5 cm thick – in old Soviet buildings it was not made very well.
- Waterproofing again – at this stage it can be coated or painted.
- Leveling screed – from cement-sand mixture or modern self-leveling mixture.
- Flooring: various tiles, wood, waterproof laminate, cork flooring, linoleum, bulk floor
- .

The scheme of “warm floor” in the bathroom
A relative innovation is the “floor heating” system, which can also be installed in the bathroom. It is mounted at the leveling screed and will make the stay in the bathroom even more comfortable. The presented floor arrangement scheme in the bathroom is universal. For its high-quality implementation, it is necessary to responsibly and painstakingly carry out the following stages of work.
Preparing a rough surface
If repairs are made in a residential apartment, the first thing we do is remove any old flooring. If it was linoleum, then pry it with a spatula or knife and strip it off. But most often in the bathrooms the tiles were laid on the floor, so that you can not do without a punch. We break the tile and remove all the remains. During the dismantling of the tile or other type of tile, the screed will most likely be broken: cracks, splits will appear, it may crumble at all.
Therefore, it is desirable to remove the screed too. A concrete foundation should appear before us in all its glory. We sweep out all the construction debris from the bathroom, then vacuum it to get rid of the dust particles. At this stage, it is necessary to close all the cracks and openings that are visible to the naked eye so that they do not increase in the future. To do this, you can use the “tiled” glue.
If the floor in the apartment “after the builders” is equipped, there will be less preparatory work, since nothing needs to be removed. Concrete floor must be cleaned of debris, dirt and close visible cracks.
Waterproofing the bathroom floor
Before applying waterproofing, the surface should be primed. Therefore, we process the floor with a primer, thereby improving the adhesion of the waterproofing material to the floor surface.
When choosing a material for waterproofing, you should be guided by what stage it is applied to and what part of the surface we want to insulate.

The bathroom floor is waterproofed with a 10 cm wall lining
If we have a floor slab in front of us, and not a concrete floor, then for a start we take a rolled or surfaced waterproofing. You can use bitumen mastic and treat the entire surface, cracks and joints with walls well, making them at least 25 cm inlet.
Coating or painting waterproofing can be applied to the concrete floor. And if you plan to insulate the walls, for example, at the junction of the shower cubicle or washbasin, then it is worth choosing glued waterproofing.
Coating waterproofing
- Cooking the mixture. To do this, pour the dry component into the container, fill it with the liquid component and stir. The ratio should be 1: 1, knead thoroughly until a homogeneous consistency is obtained..
- Using a roller, apply the mixture to the entire surface of the floor. In inaccessible places and places of connection with walls and communications, you can use a spatula or brush. Consumption is approximately 2 – 3 kg / m3, but more accurate numbers are indicated on the packaging.
- In places of joints and joints we lay waterproofing tape.
- We form a “trough” that protects against water seeping through the walls. To do this, in parallel with the flooring, we apply the mixture to the walls so that its upper edge protrudes 5-10 cm above the level of the future floor.
- The waterproofing mixture is applied in two layers. After applying the first, take a break of 4-6 hours. Then apply the next layer and wait for it to dry. We resume all subsequent work after a minimum of 24 hours..
Easy painting method

Painting waterproofing the bathroom floor is short-lived
The painting method is easier than coating. Its essential disadvantage is fragility. Average service life of paint waterproofing 3 – 5 years.
If you nevertheless decided to use this particular method, then we apply the solution on the floor and walls with a brush or roller.
Important! Waterproofing the floor in a wooden house will require additional action. To protect the wood from moisture, a thin linoleum is laid on the draft floor with an inlet on the walls of 5 – 10 cm. This will provide additional protection.
What you need to decide before filling the floor
Since you have decided to make the floor in the bathroom with your own hands, it is quite possible that you will want to move the toilet to another place, equip the drain so as not to flood the neighbors, or install a “warm floor” system. Decide whether such design changes will be undertaken at this stage..
If you plan to transfer the toilet, it must be connected by a pipe to the sewer. For this pipe to function correctly, it must be angled. In this case, the general floor level will rise by at least 10-15 cm, or the toilet will have to be installed on a separate pedestal. Therefore, at this stage, we dismantle the old toilet bowl, install it in a new place and connect it to the fan pipe. You can not install the toilet yet, but only mount the pipe.
Drain equipment will also raise the floor a few centimeters for the same reason. In addition, it will be necessary to fill the floor with a bias towards the drain, so that water from the entire area of the bath flows precisely to it. We install the drain and mount the outlet pipe. In the future, it will be necessary to ensure that the neck of the drain protrudes above the screed. In the meantime, in order not to clog the pipe, it is temporarily worth plugging it with something, for example, a rag.

Pipes of water “warm floor” in the bathroom are mounted before filling the floor
Increasingly, in the bathrooms mounted system “warm floor”. The tile is very cold to the touch, it is not too pleasant to stand barefoot on it in the morning after a warm comfortable bed. A “warm floor” can provide a very comfortable feeling. In the bathroom, you can mount a water floor or electric. The “warm floor” system, consisting of pipes through which warm water passes, is connected directly to the heating pipe, if one is provided in the bathroom. Another way is to connect to pipes with hot water or heated towel rails. Despite the doubts of the masses, the electric “underfloor heating” can also be safely laid in the bathroom. The only drawback of this choice is the high cost of electricity, but the electric floor is extremely easy to install.
Important! If you want, in case of flooding, the water remains in the bathroom and does not flood the entire apartment or house, the floor in the bathroom must be made lower than the general level of the rest of the rooms. The second solution to the problem is to equip a high sill so that water does not overflow.
Therefore, before pouring the floor in the bathroom, we install all the additional communications and determine at what level the floor and the threshold should be.
Leveling the floor – screed
Leveling the bathroom floor is a must. Any floor covering, whatever you choose, requires an almost perfectly even base, especially if it is a tile. High-quality screed – the key to durability and durability of the finish coating. That is why it is worth approaching this issue with all responsibility..

A leveling cement-sand screed in the bathroom is necessary if the base has significant imperfections or elevations
Previously, there wasn’t much choice, and everyone was screeding the floor with a cement-sand mixture. Today, the market can offer a lot of building mixtures based on non-shrink cement, as well as other self-leveling mixtures. All of these options have a right to life..
Screed execution technologies by different materials are not too different and have a common structure:
- On the walls, we outline the level to which we will fill the screed, given whether we have additional pipes that need to be hidden. You can use the water or laser level for this..
- We install beacons at a distance of 1 m from each other. You can use wooden bars, metal corners, or you can purchase a plastic T – shaped profile. We fix them on a cement mortar. To do this, lay out the tubercles of the solution on the floor, into which the alabaster is added. We lay the beacons and, constantly monitoring the horizontal level, push them into the solution. Align the beacons with the marks on the wall.
- We prepare a solution for screed. This can be a traditional cement-sand mixture, or self-leveling in case the floor has minor irregularities. Knead them in a bucket with a drill. We comply with the instructions on the packaging with a self-leveling mixture. We make sure that the amount of water is optimal.
- Fill the mixture to the upper edge of the lighthouses. A self-leveling mixture will fill the entire empty space without outside interference, and we use the rule to level the cement mixture.
- We apply a rule, the length of which is at least 20 cm longer than the distance between the beacons, to the beams of the beacons. We stretch it towards ourselves, thereby filling the voids, leveling the solution and removing excesses that extend beyond the lighthouses.
- To remove air bubbles in a self-leveling mixture, roll it with a needle roller.
- We are waiting for the screed to dry. The term depends on the grade and composition of the leveling mixture. It is imperative to adhere to the instructions and maintain the required indoor climate, avoiding drafts.
Important! If you decide to install an electric “warm floor”, then the screed is filled in two stages. Lighthouses can not be installed. Fill the first layer, wait for complete drying. We lay the thermal insulation and spread the “warm floor”. Pour the second portion of the leveling mixture and level.
What flooring to choose?
It is possible to lay any finishing flooring on the floor surface leveled with screed. This will be the final stage of flooring in the bathroom.
Linoleum in the bathroom is rarely stacked. Rather, it is an economical option or a temporary exit. It is very easy to lay linoleum, it does not require additional care, it is easy to clean, it serves as a waterproofing, but it quickly “wipes” and becomes unpresentable.

Natural cork floor in the bathroom – a good solution for lovers of comfort and warmth
Cork flooring in the bathroom provides maximum comfort. The cork is very pleasant to the touch, it is impossible to slip on it, which can not be said about the tile. Very springy, returning to its original state. In addition, it does not absorb extraneous odors and water, and is also resistant to the influence of pathogenic flora; fungi on it simply do not multiply. There is a very significant nuance. Only cork masses have the ability to not absorb moisture, not HDF-based floors. You should choose a cork array 4-6 mm thick, glued to the base. Another important advantages of cork flooring are its naturalness, environmental friendliness and hypoallergenicity.

The bulk floor in the bathroom is able to mentally move you to other edges
The floor in the bathroom began to be equipped relatively recently. Firstly, this floor is easy to install. In fact, the last layer of the leveling screed can be the filling of the self-leveling floor. Secondly, such a floor in itself has water-repellent properties, the need for additional waterproofing disappears by itself. Thirdly, the temperature mode of operation of the bulk floor allows you to mount the “warm floor” system directly into it. And one of the main advantages of this gender is the variety of patterns and colors. You can arrange a floor that mimics natural stone, or use other decorative fillers.
But this technology has a number of disadvantages:
- It is necessary to prepare a perfectly flat base..
- Freshly prepared mixture is extremely toxic and flammable..
- Unnatural coating.
How to make a bulk floor in the bathroom
All preparatory work has already been completed: the waterproofing has been completed, the screed has been flooded. It remains only to apply the mixture of the bulk floor:
1. Prepare the mixture. To do this, pour the dry component into the water and knead it with a break for 1-2 minutes, until a uniform consistency is obtained.
Important! Please note that for the preparation of the bulk floor mixture, it is the dry component that is poured into the water, and not vice versa, as is the case with other mixtures. The resulting solution begins to harden in half an hour – 40 minutes, so it makes sense to cook it in portions, and not all at once.
2. Be sure to observe the temperature and humidity conditions. The optimum temperature is +15 – +25 ° С, humidity not more than 80%.
3. We will fill the mixture with stripes. Fill the first strip along the wall, starting from the corner opposite the doorway.
4. Level and adjust the layer thickness with a squeegee or spatula.
5. Roll the layer with a needle roller to remove air bubbles.
6. We fill in all other strips according to this algorithm: filled, straightened, removed air.
7. The bulk floor dries for about 3 days, but you can use it already 6 to 12 hours after pouring, by which time it will have acquired sufficient hardness.
Important! The “warm floor” system can be turned on no earlier than in a week.

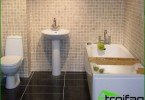
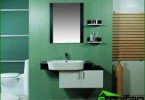
Tiles in the bathroom on the floor – a classic traditional option
Tile on the floor in the bathroom “entered” a confident step for a long time and continues to occupy a leading position among the floor coverings for the bathroom. A variety of shapes and materials can satisfy the taste of even the most sophisticated customer. The disadvantage of tile is its relative fragility. If the tile is cracked, it must be replaced, and while the damaged one will be dismantled, others nearby can be damaged..

The wooden floor in the bathroom looks very nice, but not very practical
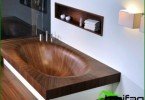
The wooden floor in the bathroom can only be made of teak or larch, as not every wood can withstand a constant change in humidity. The arrangement of such a floor requires thorough additional waterproofing. And although the wooden floor is natural, warm, beautiful, it makes sense to lay a moisture resistant laminate instead.
Laying the flooring will mark the end of work on the arrangement of the floor in the bathroom. No matter how much time this painstaking process takes, this is an indispensable experience that should be in the baggage of every quick owner.