How to make a warm floor in the bathroom
A bathroom is a room where each of us can be charged with positive energy for the whole day or relax after busy workdays. For this reason, the issue of arranging a comfortable environment in this corner of the apartment cannot be ignored. A task requiring a first-rate solution and a competent approach is to create the optimum temperature, the implementation of which will not present any problems if you want to install a warm floor in the bathroom.
Content
- Ancient “roots” of warm floors
- Varieties of underfloor heating
- Water heating system
- Electric underfloor heating
- Film (infrared) option
Do you think the “warm floor” system is a curiosity of the present century? But no. This heating technology is rooted in the distant past..
Ancient “roots” of warm floors
Who would have thought that the warm floor was used already in ancient Rome. Of course, the technology was not as perfect as it is today, but the principle of heating the Roman baths was no different. The smoke from the stove, passing through special channels laid under the floor, contributed to the rapid heating of the room. With the advent of water (steam) heating, this principle, which carries heat, has not lost relevance. Warm floors, heated by water, are actively used today.
Varieties of underfloor heating
Have you decided to arrange a warm floor in the bathroom? Perfect solution! It remains only to choose the type of such a coating, because it turns out to be different.
Water heating system
Water heated floor in the bathroom consists of plastic pipes through which water circulates. The thermostat allows you to adjust the temperature depending on your mood and preferences. The advantages of this sex include low cost, the absence of harmful electromagnetic radiation and the ability to significantly save on electricity.
The disadvantages are a difficult installation, requiring both theoretical and practical knowledge.
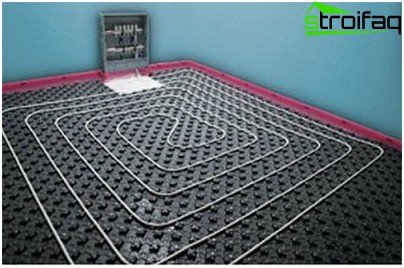
Water floor
Electric underfloor heating
Extremely popular due to its easy installation, which you can do on your own. The floor consists of cables laid under the screed and a temperature insulator. Electric underfloor heating in the bathroom is laid directly under the tiles.
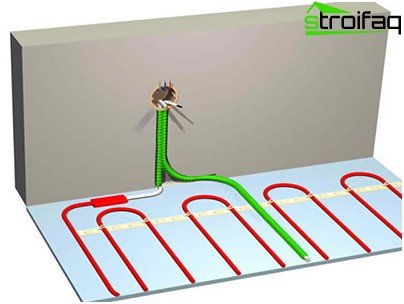
Electric floor
It is important! Electric floor heating, as a rule, is not mounted on large areas, because designed for small rooms.
Of the minuses, it is worth highlighting electromagnetic radiation and high energy consumption (especially in winter).
Film (infrared) option
Recently, this variety of warm floors has become very popular. It is allowed to lay infrared heat-insulated floor in a bathroom under any covering. The film can be used not only for floor heating, but also for other areas.
The advantages of such a coating mass. The screed during installation is not needed, which means that raising the floor is useless. The strips are connected in parallel (unlike the electric floor), i.e. if one strip is out of order, the bathroom will still be warm.
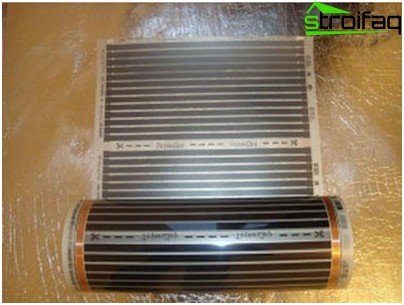
Film floor
You need to know! The complete set of the film floor includes a temperature regulator, a thermofilm with electric wiring, a temperature sensor, insulation.
We install underfloor heating in the bathroom
Installation of a warm floor is best done during the construction process or overhaul. This eliminates the need to dismantle the old flooring..
Installation of electric underfloor heating
1. On the plan, we determine the location of the thermostat, sensor and cable connection area. We put the laying scheme on the existing plan, not forgetting to take into account the rated power of the system and follow the instructions that specify the distance between the strips. We do not take plumbing devices into account, as their heating is not included in our plans.
It is important! Do not discard the circuit after installation – in the future it may come in handy.
2. The next step is thermal insulation. We lay the insulation on the basis. Do not pay attention to the existing irregularities – there is nothing wrong with that. If the insulation is without a reflective film, it is necessary to supplement it with aluminum foil.
3. Cable management. Fix the cable on a metal mesh, which will not only prevent it from “drowning” in thermal insulation, but will also add strength to the structure. Remember, you cannot cross rows! After checking the cable resistance, fix the electrical and thermal parts so that the resulting connection is as close as possible to the thermostat.
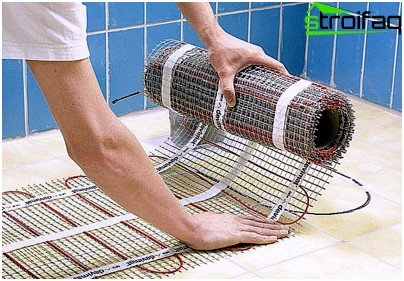
Installation of electric floor
It is important! The distance from the connection zone to the wall should not exceed 20 cm. The length of the message between the thermostat and the heat cable should be even.
4. The regulator is installed at a height of 1 meter from the floor in accordance with the assembly and installation diagram. The sensor is placed in the tube and is located between adjacent rows of cable. Make sure that the pipe with the sensor is higher than the cement screed when pouring cement.
5. Pouring cement. Again, check the connector, cable resistance and integrity of all components. We evenly distribute the cement mortar on the floor and level it along the cable.
It is important! There should be no voids in the screed. This can lead to overheating, lower heat dissipation and system failure..
The thickness of the screed should be about 5 cm. We check the integrity of the cable with a tester, and if no defects are found, leave the concrete screed to solidify.
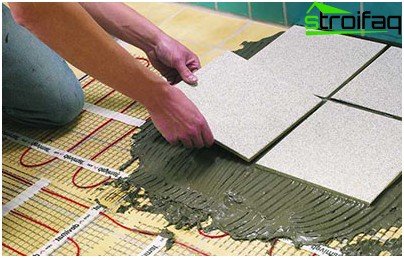
Tile laying – final stage
You can turn on the system only after 30 days. Otherwise, there may be a violation of the integrity of the cable and the formation of cracks in the screed.
Installing an infrared floor
Installation of a floor from film elements is not particularly difficult. Everything is extremely simple..
1. Removing the old flooring.
2. Stacking the right amount of thermal components. Sensor and temperature control connection.
3. Checking the health of the system.
4. Insulation of thermal elements with a protective film (dry installation) or pouring cement screed (wet installation).
Installation of a water system of underfloor heating
Installing a water floor is not much different from installing an electric floor.
1. If polypropylene risers for hot water have not been previously installed, then the process begins with this.
2. Piping layout.
3. Laying reliable waterproofing. We overlap overlapping strips of waterproofing material with a soldering iron or a blow gun.
4. Pouring a rough (first) screed from a mixture of cement and expanded clay. The level should be approximately 7 cm below the final floor level..
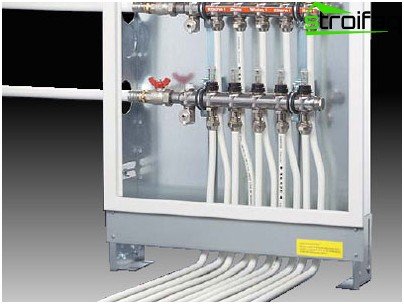
Installation of water floor
It is important! For convenience, make a preliminary mark on the wall and use the level to transfer it around the perimeter.
Do not pay attention to small irregularities. Wet the screed with water for several days so that it does not crack..
5. Foil application. Joints must be glued with a special aluminum tape.
6. Installation of a water floor. We attach the polypropylene pipe in accordance with the plan to the screed. The distance between the parts of the pipe is at least 15 cm. We connect the curved system through the control valve to the supply and return risers. Let the floor cool.
7. Filling the second screed (the solution is the same). Here it is important to ensure that the surface is as flat as possible.
Now that you know what underfloor heating is and how to install a heated floor in the bathroom with your own hands, a comfortable atmosphere in the house is provided.


