DIY sandbox for children
Games in a golden sand are not just children’s fun, but an important part of the development of a growing man. With the help of paddle blades, little architects not only hone fine motor skills, but also develop a wealth of imagination, spatial thinking. So if there is a cottage, a summer cottage, a country house with a courtyard, a platform for the construction of mini-towers and castle walls should certainly appear. Moreover, a sandbox with your own hands is built relatively easily and quickly. This is what we will try to prove.
Content
- DIY sandbox for children
- More comfort – more complex project
- Constructive for the benefit of kids
- Finally
In order to avoid the biggest troubles accompanying the emergence of the future “micro-construction site” (cats, “leakage” of loose mass and weeds), some efforts will have to be made. Even for the simplest construction (closing for the night) we need a lot: at least 8 boards about 1.20 m long, a plane, a meter long beam, an emery crust, plywood (dense, moisture resistant), agrofibre (1.20 by 1.50), self-tapping screws, a screwdriver, a stapler , 8 door hinges. Add paint to the list.

The easiest way is to make a sandbox without a cover, but cats in this case will not please you

There are many lid options for sandboxes, including a hard shield knocked down from boards
DIY sandbox for children
We successively describe the main stages of the construction of the simplest (but not without a touch of comfort) variety of our facility.
- Boards are carefully processed: with the help of a plane, thorns are cut off, sanded with an emery surface. It should be absolutely smooth on all sides – in order to avoid injuring the child.
- The next step is the preparation of the timber (try on the width of the board). With a board 10 cm wide, we will saw off four 20-centimeter bars: two boards will go on each side. With a plane, sandpaper we put in order the bars.
- Getting to the collection of the frame. We install the beam in the corners, screw the screws to fasten the lower level of the boards to it (at least twice on each fold). Make sure that the metal caps do not stick out above the surface.
- It was the turn of the second tier. After screwing the boards we get the finished box. Square it or rectangular – you decide for yourself (a sandbox with a lid with your own hands may well be oblong).
- The dimensions of the hull (side length, side height) are recorded with maximum accuracy – to mark out the plywood sheet, which will later turn into the cover of our structure.
- We draw the sheet, providing for its division into 4 parts: for two horizontal seats and two supports for future benches holding them. Cut the plywood along the lines – we get 4 rectangles.
- Now let’s do the loops. They must be screwed to the lid on the outside from the outside – so that the inner laths of the lid bend upward when opened. We do the same with the opposite part.
- Before you start attaching the cover elements to the sandbox, you need to paint the frame and both halves of the cover (it is also benches), from all sides. The best choice is two-layer nitro-paint.
- Let’s go to the bottom. We spread the agrofibre on the bottom, after which we attach it to the sides of the tank with a stapler. Raising and folding the edges in the corners, we fix the layer at mid-height. Having wrapped the edges, we fix them outside.
- The final moment has come – screwing both fragments of the bench cover to the sides of the box of the future children’s “construction site”. Self-tapping screws will be used.
Now we know how to make a sandbox with a lid with our own hands – convenient for children and not requiring daily checks for signs of a cat’s toilet in it. If desired, the design can be improved by attaching small handles to the upper horizontal. All four rectangles “work” on the outer fold. Twice bending in this way, each component turns into a long bench-seat for babies. Both center lines of the plywood cover are reached by the edge of the earth outside the box. Agrofibre lets water through – rain doesn’t do much damage.
More comfort – more complex project

Convenient sandbox with a double lid turning into wooden benches
Benches of an improved type – with backs – can also be provided for when building sandboxes for children with their own hands exclusively from boards. Why from the boards? Yes, because plywood for such a constructive idea will turn out to be a “weak” material. Since building a solid, solid thing, designed, perhaps, not for one, but for two or three children, which adults can join, it makes sense to invest in more serious building materials. The boards will go longer, and it is advisable to replace the door hinges with gates.
The foregoing is not the entire set of useful additions that can turn the subject of our description into a structure designed for years of successful operation. When several children grow up in a family, the parents are hospitable and glad to accept comrades and relatives, accustomed to “be friends with their families”, they will think about, perhaps, more significant details. For example, on how to make the sandbox safe not only for small participants in the process, but also for adults who like to remember childhood and “come off” in architectural improvisation.

A complicated version of the sandbox with a lid turning into benches: without a back (open part) and with a back (now it is closed)
Agree, this will require a more stable and extensive creative site. Why not provide the sandbox with long support legs that will go deep enough into the ground and communicate stability to the frame. Many will find such an innovation thoughtful and reasonable. And to whom will the benches with backs be damaged? However, for such a “bouquet” of ergonomic improvements, the cover will have to be made of three stripes. The seats will become double, and the third “lid” row will turn into a reclining stand under the backs of children and parents who have “played in childhood”. Such a powerful bench will stand everyone.

The most convenient type of cover, transforming into two benches with backs
Constructive for the benefit of kids
What is most important for a child of tender age – say, from a year to three or four? Perhaps, do not overheat in the sun, carried away by the game in friable slides, paschi. For such inhabitants of the sandy mini-quarries, it is not bad to provide a roof – plank or cloth. It is difficult to pull over impressive “buildings”, but to build a small baby trough-square is not a question. Of course, you will need racks: in the corners of the square or in the center (on both sides). The latter will make it possible to realize the dream of a sailing boat or yacht. You may be inspired by a photo of a sandbox in the shape of a boat with your own hands for the smallest?

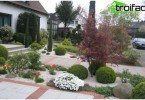
A sandbox with a log fence and side fungus looks pretty aesthetically pleasing
A solid canopy can be made both from boards, and from plastic, straw, reed. It can only be held by a wooden or metal frame, including two to four vertical racks. The container itself, the vessel for the sand in such cases is not large – as a rule, the area of 2 square meters. m is enough for the games of toddlers. Simple sides with a height of 30-35 cm will become more convenient if a narrow smooth board around the entire perimeter is nailed to their upper edge. She will serve as a small bench and will not allow sand to get enough sleep. The depth of such boxes is small, and the removable lid will fit one-piece – based on an adult hand.
You will get a cute sandbox-house-gazebo-sandbox reminiscent of a forest and a hut on chicken legs if you show your imagination and enclose the space under a canopy in the form of a bungalow mushroom with log saw cuts. The chain of decks will serve for jumping games. It’s always possible to sit on any of the stumps – just like lining up pasochki-molds-sovochki in a row. Such a platform inside a natural fence of arbitrary configuration will turn into a whole kingdom, if you divide it into several sections. And when the child grows up, inside the makeshift stumps forming a barrier, it will be possible to break a flower bed. You will build a larger sandbox nearby.

Sandbox-boat with a canopy awning on four pillars
A fungus hat on one leg is a great idea for those who are puzzled by the thought of how to make a children’s sandbox at the cost of little time and material costs. For the leg you will need an even rounded log or a beam of 10-12 cm thickness – square or round diameter. Since the lower part will go deeper into the ground by at least a meter, the total length of the log beam will be 3 meters, no less. An antiseptic for impregnating a support should not be neglected – so the “roof” will last longer. Pieces for hats are best cut in the form of plank triangles. They are nailed to a vertical log from the inside. The outer part is lined with plywood and painted – can be in different colors.

A structure with a wooden canopy roof and benches may look like this
Finally

Toddler boat sandbox with removable awning
Sand for games is best to choose river: it is cleaner and least damaged by extraneous impurities. Quartz sand from the department of building materials is also suitable. But remember: any filler needs sifting, since any objects can get into the total mass. Inside the sandbox inventive adults sometimes set interesting figures and entertaining details: a ship steering wheel, a funny gnome, a wooden trough for water. All this is permissible provided that the surfaces of the “ornaments” are carefully crafted, devoid of sharp protrusions and slivers of hooks. Then your baby will be really comfortable playing in the sand kingdom.

Do not count creative projects of sandboxes with your own hands – here is one of them