A waterfall in the country is a dream that seems impossible to many. In fact, it is carried out quite easily. You can make a real waterfall in the garden with your own hands during one weekend. The most important thing is to have some building skills. And our recommendations will help you determine the choice of materials and technology. Imagine just a few hours of simple work in the fresh air, and a country waterfall will delight you and your children for many years. Want to know how to do it quickly and correctly – read on!
Content
- Decorative waterfall for the garden – form and content
- Do-it-yourself waterfall in the country – stages of creation
- Foundation pit
- Waterproofing
Decorative waterfall for the garden – form and content
If you have a pond or a small pool in the garden, then almost half of the work, consider it done. After all, the design of a mini-waterfall implies the presence of three components:
- decorative hill, on which water escapes;
- containers where it flows;
- electric pump, which, in fact, ensures the circulation of water flow.
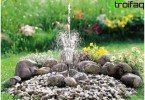
If there is no pond yet, then before making a waterfall in the garden, you need to find a suitable place for it and choose an interesting shape. It all depends on your imagination and personal preferences..
A little tip: in nature, regular geometric shapes are almost never found. Therefore, the reservoir “a la naturel” will look more natural.

An adorable corner in your garden
But, even if you are a supporter of the correct geometric shapes, in any case – boldly embody this, as they say, “in stone and concrete” or other improvised building materials to your heart. Moreover, there are plenty of examples of such landscape solutions.

Modern waterfall for people who love clarity throughout
Country waterfalls of the correct geometry, by the way, look great on areas decorated in hi-tech or modern style.
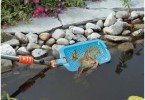
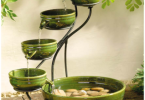
Well, if your garden fascinates with its refined negligence, then the additions in the same vintage style will give it undeniable charm. What is noteworthy, to create such a charm, everything will do:
- pipes remaining from repair;
- broken pots and shards;
- old watering cans, buckets, bowls;
- second-hand plumbing.
Make a waterfall in the garden with your own hands from a picturesque pile of stones, and then at dusk listen to the mysterious murmur of gentle streams – what else does a romantic soul need for relaxation?

The romantic charm of natural beauty
To notebook: Already at the design stage, decide whether there will be fish and plants in your pond. Garden waterfall is very beneficial for fish and various algae:
- firstly, it supplies them with oxygen;
- secondly, the fish feel much more comfortable in moving water than in stagnant water;
- thirdly, the waterfall maintains a comfortable water temperature for the inhabitants, which is especially important in hot summers.
On the other hand, for some flowers, such as water lilies, running water is too depressing – they will feel discomfort. Therefore, when choosing a waterfall flora and fauna, make an amendment for “think for yourself, decide for yourself – to have or not to have”.

A whole backwater of goldfish – imagine how many wishes can come true!
Now let’s get down to business. How to make a waterfall in the garden, you will learn right now. We drink coffee and proceed!
Do-it-yourself waterfall in the country – stages of creation
Foundation pit
Having decided on the shape of the pond in the head and on paper, we draw this shape on the ground..
- Step number 1. We clear the territory. We clear the area from stones, turf and other unnecessary things. And if necessary, remove unnecessary elevations with a shovel. Ideally, the place for the future pool should be as flat as possible;
- Step number 2. We mark the contours (for example, with pegs with a rope or lime remaining from whitewashing) or circle the finished plastic form;

Marking a place under the waterfall. Please note – the site is carefully cleaned and leveled.
- Step number 3. We arm ourselves with an ordinary shovel (1 pc.) And start digging.
In no case do we scoop up the dug up land, anyhow, over the site, but collect it somewhere separately. It is useful for the device of the waterfall itself..
Tip: When digging up the earth, immediately clean it of any twigs, stones, roots, debris, if any. Then it will be much more convenient to work with clean land.
In the process of digging, the earth will crumble from the walls. Do not be afraid of this. Such inconvenience is eliminated very easily: during digging the walls, periodically moisten with water and tamp, carefully slamming with your hands.
When the desired depth of the pond is reached, do not stop there (after all, the process is so addictive!) – Dig another 10-15 cm layer and fill this place with fine river sand. Now he, too, needs to be carefully tamped, and the easiest option is to jump from the heart there. And the funniest option is to invite the children and freely jump on the sand as you wish.

As if they were looking for a treasure …
Waterproofing
If you have chosen a finished mold as a bowl for a pond, then you can safely skip this paragraph – the problem of waterproofing is automatically solved. If, however, you dug a pond from scratch, then you cannot do without proper waterproofing, otherwise the pond will constantly dry up. On the contrary, the garden waterfall will last a very long time, if you approach this stage with all responsibility.
There are several options for waterproof coating:
- PVC film;
- butyl rubber film;
- EPDM film;
- excavation concreting.
We consider each of them individually.
PVC film is the most common option for covering a foundation pit for a future pond. Its service life is quite substantial: from 10 to 15 years. Advantage – low price. The main drawback is that garden waterfalls with such waterproofing require special care. Water will have to be drained for the winter, otherwise the ice will tear the film.
Butyl rubber film is a material specifically designed to cover the bottom of decorative ponds and pools. It is not afraid of frosts (up to -45? C), very elastic (stretches up to 430% of the original length) and wear-resistant. Warranty period of operation is 45-50 years. The price of this material corresponds to quality – about 2000 rubles per linear meter + costs for the necessary set of components (special parts for joining film strips, accessories for the pump, etc.).
EPDM Synthetic Rubber is a state-of-the-art rubber film that generally has similar characteristics to butyl rubber. The main advantages of the material are its unique elasticity (due to the porous structure) and ease of installation. Therefore, this coating applies to premium materials. The cost of EPDM is within 400 rubles per “square” (3800-4000 rubles per linear meter).
Butyl rubber film and synthetic rubber are sold in three thicknesses: 0.75 mm, 1.125 mm and 1.5 mm. Of course, the most durable modification (1.5 mm) is the most resistant to mechanical damage. But in a form with whimsical bends it will be more difficult to fit it. This is especially true for butyl rubber..
Recommendations of a seasoned master: before laying a flexible coating, the soil should be freed from stones, plant roots and other “foreign elements”. But it is best to lay the film on an already protected surface. Use geotextiles or thick cardboard as a protective material. Economy option: old linoleum or simply newsprint. The optimum thickness of the “draft” protective layer is 2.5 cm.

Cover the earth with a blanket
Concreting is the most reliable option for waterproofing a pond. If concrete is your choice, then you should mentally prepare for the following operations:
- we cover the bottom of the pit with a protective layer (pillow + waterproofing), we use PVC film or ordinary polyethylene as insulation material – cheap and reliable;
- we make a frame of reinforcement (for the bottom of the pool and the pool walls separately), during installation we use plastic clips;
- install the formwork and fill the bottom with concrete (cement M300 and higher, crushed stone fraction from 5 to 20 mm.);
- we are waiting for the bottom to freeze and only after that we get down to the walls (installation of formwork + pouring); it is important to remember: the reinforcement for the wall frame is tied with wire without the use of welding.
As you can see, nothing complicated. It would be time and desire. By the way, if both are in short supply, you can just buy a ready-made plastic pool.

And here is the concrete bowl
Helpful hints:
- Before laying flexible material (EPDM, butyl rubber), let it lie in the sun for about 15 minutes. The film will become softer and installation will be greatly simplified.
- 1 meter
- After installation, you must definitely let the water into the pond to see if the level is even and if there are any leaks..
Optimum cascade height
Usually the height of the cottage falls does not exceed 1.5 meters. Yes, frankly, not Niagara, but the pump will cope with its work “on the top five.” If stone ledges are provided for in the waterfall project, it is best to use sandstone – it is easy to process and naturally looks.
We begin to lay the ledges from the bottom. The first tier should be as even as possible. But the following ones can be any – depending on your preferences. Here are some interesting options:
- mirror water wall – the stones from which the stream flows must be absolutely even and flat;
- separately falling jets – this effect will be provided by ledges with furrows and an uneven rugged surface;
- water flows smoothly and slowly – this requires stones with indentations in the middle; in this case, a kind of bowl is formed, and water, filling such a bowl, will gradually and slowly pour down;
- a powerful stream breaking into small splashes on the lower tier – water flows under pressure between two closely located stones. Waterfall height – from 1 meter and above.
Stacking stones for the tiers of the waterfall should be fastened together with mounting foam or cement mortar. It’s better to make small sides along the edges so that the water flows in the channel you set, and does not spill into a wide puddle.
Tip: when gluing stones with foam, it often ugly protrudes over the edge. To mask this defect, immediately after gluing, shower the protruding foam with a handful of ordinary river sand. So it will look very natural.

Steps of Peace
Choosing a pump for a waterfall
Well, now we turn to the heart of the waterfall – the electric pump, because it is clear that in itself the water in an artificial reservoir will not run upstairs. For a waterfall with a height of about one and a half meters, a pump with a capacity of 70 W will be quite enough.
Naturally, the higher the waterfall, the more powerful the pump should be..
It is placed at the bottom of the pond so that neither he nor the cables are visible from the outside. The pump itself should have two windows: it is sucked in through one water (the hose coming from it is attached to the top of the waterfall), it is pushed out through the other (this hose will remain at the bottom of the pond). Moreover, the pump must be connected to a low-voltage transformer, and the transformer must be in the room. If you need to extend the connection cable, then surely need connectors that are not afraid of water.

A bit of technical tricks: if you want your waterfall to be high (more than 1.5 meters) you will need a powerful electric pump from 100 W and above
Waterfall decoration
So, the pond is ready, the hill is built, the pump is working, and the waterfall begins to murmur. Now comes the most creative part of our work – decoration. This is where imagination can go unlimited! These are small sculptures, and alpine slides, and various flowers, and decorative plants, and LED flashlights – in a word, what the soul wants!
Colorful pebbles and large gravel will look wonderful on the shores of your reservoir. A constant humidity will allow many plants to grow comfortably, such as a hemophobia, valerian, iris and many others.
For yourself, you can install a bench, which has a rest, or, even better, hang a hammock. And for the kids – put the wonderful figures of fairy tale heroes.
In a word, the waterfall is ready. Now it’s not a sin to relax – near your own pond, to the sound of a waterfall and the flickering water splashes, to the splashing of goldfish and the fragrance of flowers nearby … Paradise on Earth exists, and you just created it yourself!

Paradise probably looked like this