Sooner or later, each of us is concerned with the issue of repair work in the bathroom. The fact is that this is exactly the room that we use with enviable regularity. In the bathroom, we wash, wash, and take hygiene procedures. Which of us does not like to bask in a perfectly white and clean bath? However, often in a fairly short period of operation, this plumbing loses its presentable appearance. In this case, we think how to paint the bath ourselves and whether it is possible.
Content
- DIY bathtub painting
- Preparing the bath for painting
- Application of the coloring composition
It is no secret that such a thought was visited by everyone who was faced with the problem of losing the bathroom aesthetic appearance. Of course, if there is enough money, the bath can be easily replaced with a shower or the same new bath. However, in most cases, a change of bath entails changes to the entire room, often quite complex. This is hardly desirable if it was not planned a major overhaul, but only cosmetic, or if only a bath replacement is needed.

Yellowed bath: the destroyed top layer of enamel will have to be removed
In addition, cast-iron bathtubs are characterized by a long service life, and are not subject to the destructive effect of rust that is firmly entangled in enamel. That is why it is just a shame to throw out these products due to the appearance of yellowness. And again we return to the question, which includes the three simplest words “how to paint the bath”.
DIY bathtub painting
Perhaps it will become clear even to a simple layman that ordinary paints are not suitable for painting a bath. The fact is that such compositions do not differ in a sufficient degree of adhesion. This is fraught with the fact that in the near future, after staining, the paint will simply begin to lag behind the product surface.
It is in order to avoid such undesirable consequences that special three-component coloring compositions should be used. All components are mixed immediately before application to the previously prepared surface of the bathroom. After application, such a paint dries, during which the solvent contained in the composition evaporates. This allows the paint to chemically burn..
Preparing the bath for painting
After making a decision on painting, it is necessary to begin preparatory work. First, measures should be taken to remove greasy and calcareous deposits from the surface of the bath. An alkaline detergent may be used for this. The degreasing procedure is carried out after removing the old paint. To check the quality of cleaning the surface of the bath, you just need to wet it. If the surface is wetted with an even layer, and the water does not collect in drops and jets, then the degreasing stage can be considered completed.
Then you need to start removing the old enamel. You can remove it either completely or by removing only the top layer. In the latter case, we get a rough bath surface. To remove the enamel, you will need a special power tool with abrasive nozzles. It can be a grinder or a traditional drill. When using these tools to remove old enamel, hands, eyes and lungs should be protected from dust without fail. Therefore, it is best to prepare gloves, a respirator and special glasses in advance..

Removing old enamel with a power tool
In some places, it is impossible to remove the enamel layer with a drill, then you must resort to the use of a hand tool. Its role may be sandpaper or a metal brush. Of course, you can completely clean the bathtub with a hand tool, but this will be time-consuming..
Application of the coloring composition
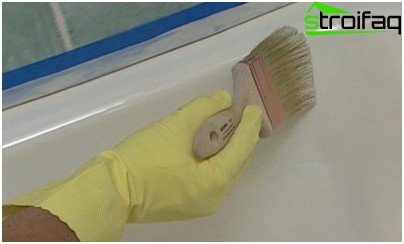
After cleaning, thoroughly wash off all dust from the surface of the bath and dry it. For drying, even an ordinary hair dryer can be used. The dried surface is coated with a primer and the application of a coloring composition is started..
It is worth paying attention to the fact that during painting and within 5 hours after it all windows and doors should be closed. This will prevent dust from entering the freshly painted bath surface. Experts recommend increasing this time to 24 hours in order to eliminate the negative impact on the drying process of paint changes in humidity and air temperature.
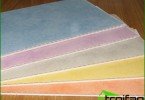
To color the bath, you can now purchase compositions of different colors: beige, cream, pink, lime, blue and others
Currently, you can choose not only white paint, but also blue or light green. These colors are preferred by most consumers. They make the bath not only attractive, but also successfully mask light pollution.
Is it worth it to paint the bath yourself?
It is definitely impossible to answer the question of whether to paint the bath with your own hands. For some, this is the only solution to the problem of yellowing the bath, someone just wants to save money, and someone wants to experiment. However, it should be remembered that it is only necessary to use special formulations. Attempts to paint the bath with the usual alkyd or oil paint will only lead to even more deplorable results..
Another important nuance is the fact that not every old bath can be painted. So, if, in addition to yellowing, cracks in the enamel also occur, then painting the bath will not help. A short-term solution can only be the replacement of the enamel layer.
It is obvious that at home it is impossible to obtain such a high-quality and durable coating as in the factory. That is why, starting to stain, you need to prepare yourself for the fact that this process will have to be repeated after a couple of years. And this under good circumstances.
Thus, everyone himself must decide, based on opportunities and preferences, whether it is worth painting the bath with his own hands..