Floor insulation on the balcony and loggia
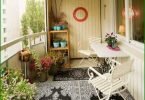
It is no secret that one of the most common problems in apartments, both old and new, is the lack of coveted square meters. In this situation, the desire to use every centimeter of usable area is more than justified. This is most directly related to the balcony, because with a competent approach, a place that often serves as a place to store homework and unnecessary things turns into a cozy corner. But to make this corner comfortable for your stay not only in summer but also in winter, you need to think floor insulation on the balcony.
Content
- Types of acceptable insulation
- Tools and Supplies
- Insulation of the floor on the loggia: stages
- The first stage: laying the bars
- The second stage: insulation with penofol
- Third stage: raise the floor
- The fourth stage: we lay plywood
Insulation of the floor on the loggia – the process is not so complicated and everyone can do it, it would be a desire, and of course, the necessary materials.
Types of acceptable insulation
Options for insulation of the balcony depend on the material you have chosen as a heat insulator. The construction industry today offers a lot of options, but these were the most popular:

Each of the heaters has its own pros and cons, you should choose based on the properties that are predominant for you personally
1. Penoplex. The thickness is selected depending on the purpose of the balcony, if it is not directly combined with the living room, then a thickness of 40 mm is sufficient. If it is supposed to make the loggia a permanent habitat, then the thickness of the foam for high-quality thermal insulation increases to 60 mm. The cut boards are attached to the floor with plastic dowels, and the joints are filled with summer mounting foam (toluene is present in the winter – polystyrene dissolving substance).
2. Polyfoam is the most economical material. It is lightweight, non-hygroscopic, perfectly retains heat, but is unstable, therefore requires the installation of a wooden crate.
3. Penofol (foamed polyethylene) – the most attractive and reliable way of insulation. With a thickness of only 4 mm, this material can replace a board with a thickness of 100 mm. The service life is more than 50 years. It is we who we will use to warm our balcony.
Tools and Supplies
First of all, you should worry about the availability of necessary tools and materials that will help in the implementation of such an important task as thermal insulation of the balcony floor.
So, we need:
- drill with a drill;
- hammer, construction knife;
- drill with nozzles for screwing in screws;
- jigsaw;
- tape measure, pencil;
- dowels, screws (65 mm);
- bars (4×3 cm);
- insulation – polystyrene 5 mm (50×250 cm);
- Chipboard or plywood;
- penofol (roll 10 mm thick).
Insulation of the floor on the loggia: stages
After we have prepared everything necessary for work, we can proceed to the first stage.
The first stage: laying the bars
Before floor insulation you need to carefully sweep it. Further along the entire perimeter of the loggia we lay foam, cutting with a knife if necessary. It is recommended to lay in whole pieces so that the joints are as few as possible. After laying the first layer, the seams and joints need to foam. Then the second layer is laid. If possible, avoid suturing each other, i.e. should be laid with an offset.
The next moment – measuring the transverse distance of the loggia on the floor.
It is important!
Note that the lateral distance at different angles may vary. be careful.
We measure the distance in the left corner, subtract about one and a half centimeters and saw off a beam with a jigsaw. The first beam must be laid indented 10 cm from the wall. We calculate how many bars we need if the distance between them is 50-60 cm. Then everything is elementary: we retreat this distance, subtract 1.5 cm, saw off and actually lay. But do not rush to fix. When the turn reaches the outer beam, you need to make it 10-15 cm from the wall. To do this, you can move the second and third bars from the end, distributing the distance between them evenly.

Floor insulation scheme
Now you can fix what you will need: a hammer, puncher, screws, screwdriver or drill. Each bar is attached to 4 self-tapping screws 65 cm long, the last of which should be 10 cm from the wall. This is done simply: drill a hole, insert the dowel and drive it with a hammer. Then we insert a self-tapping screw and hammer it through a bar into concrete. For better fixation, twist with a screwdriver. We fix all the other bars in the same way..
The second stage: insulation with penofol
After the bars are laid, the openings between them need to be laid with insulation. The optimum thickness is 30 mm, then it will stand flush with the bars, which, in principle, is required. Try to avoid cracks when laying the heat insulator.
It is important!
Thick insulation is conveniently cut along the guide. With effort, draw a knife over it several times, bend the kink on the knee – it breaks easily and precisely along the cut line.
If there are still gaps, polyurethane foam will easily correct the situation. Now arm yourself with a pencil and mark on the walls near the floor the location of the ends of the bars – you will not have to guess then!

In order to eliminate heat loss and gaps, fill with foam
We pass to penofol. After the length of the balcony is determined, we wrap it on top with 40 cm and cut the penofol. Do not forget that you need to lay the material with the foil up, it is also necessary to ensure that it goes behind each wall by 20 cm.
Third stage: raise the floor
For this procedure you will need: jigsaw, timber, screwdriver, self-tapping screw (65 mm), tape measure, level, pencil, large sheets of plywood or chipboard (20 mm thick), circular saw.
We cut the bars and stack them in several rows (4-5). Guided by the notes made, with the help of a drill and self-tapping screws we fasten the upper bar to the bottom to the stop. Then you need to align it horizontally. The construction level should be no less than a meter – it’s much more convenient to work this way.
We find the highest point on the loggia, for which we put a level on top along each beam and determine the difference. Which angle you need to raise to the horizon is lower. After determining which side, left or right, above, we find the highest point – the reference point.
Cut “chopiki” – pieces of timber 4 cm long (for the beginning of pieces 10). Using a screwdriver, or even better a drill with a nozzle, we twist the screws away from the highest point in depth, and then across. This stage will require a fair amount of patience, but it is very important, believe me. Be precise!

We twist the screws a little
Having unscrewed the screws by 1.5 cm, we raise the beam to their hats, carefully put it on top and find out the level of the beam. We take a “chopik”, applying it to the gap between the timber itself and the penofol, note the thickness. We pin the “chopik” at this mark with a hammer and knife. We unscrew the self-tapping screw, insert the “chopik” (for a perfect fixation) and fully tighten the self-tapping screw.
First we align the distant beam, then we raise the intermediate bars to the required level, again we fix the “choppers”. This needs to be done across the floor. Now, with a felt-tip pen on the wall, you need to mark the central part of each of the bars, so that after laying the flooring you need to know where to attach.
It is important!
If it seems to you that it will not be warm enough, you can lay another layer of insulation (300 mm) and another layer of penofol on top of the timber set at a level.
The fourth stage: we lay plywood
The time has come for laying plywood, you can, of course, use chipboard, but plywood is much better and more environmentally friendly. We measure the dimensions for the outline of plywood, try to take into account the angles between the walls. We transfer the dimensions to the plywood, we attract a partner, and using a circular saw we cut a piece with bends and turns.
It is important!
Please note that the actual perimeter dimensions need to be reduced by about 1 cm. Do not forget about penofol protruding beyond the floor level.

We lay the plywood so that around the perimeter of the loggia there is a gap of 1 cm
After laying the plywood over the entire area, we look for previously made marks (center of the beam). We draw a straight line from one wall to another, so we will know where the timber is under the plywood. Using a drill, we fix plywood sheets, the distance between the screws is 45 cm.
The insulation of the floor is completed, it remains only to cut the penofol along the perimeter with a paint knife. That’s all.
How else can you insulate the floor on the balcony?

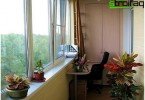
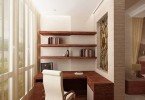
Now you can enjoy the comfort
If the floor on the balcony is wooden, you can use mineral wool – a material that, in terms of its thermal insulation characteristics, is practically no different from polystyrene foam. If on the floor there is a cement screed, then expanded clay concrete, warm linoleum, and a felt substrate for a laminate will be the best option.
Well, if you want something more modern, you can install a warm floor system, which can be water, infrared or electric.
There are a lot of options, as you see. Choose the one that seems most suitable for you, and enjoy the time spent on a warm and comfortable loggia, even during the most severe winter frosts.