Do-it-yourself laying laminate flooring
Laminate is one of the most popular flooring, comparing favorably with other types of quickness and ease of installation. It is a sheet with a thickness of 6-11 mm and a width of about 20 cm. The design of the laminate is multilayer. It includes a top layer, which is a wear-resistant film, a paper layer with a variety of applied textures and colors, a high-density carrier layer of fiberboard treated with moisture-resistant impregnation, and a finish layer consisting of resin-impregnated paper. It should be noted that laying the laminate with your own hands is a fairly simple process that does not require special skills.
Content
- Tools and materials that will be required
- Preparatory work before laying
- Laminate Laying Technology
- How to lay laminate flooring with Click locks
- How to lay a laminate with “Lock” locks
- How to lay an adhesive laminate
Tools and materials that will be required
To lay the laminate, you must prepare the following tools and materials:
- Laminate;
- Laminate underlay
- Jigsaw or miter saw;
- Roulette;
- Square;
- Light hammer;
- Level;
- Masking tape;
- Limiters;
- Knife.
Preparatory work before laying
How to lay a laminate with your own hands? A thorough answer to such a question must begin with coverage of the preparatory phase prior to the implementation of the main work. The purchased laminate should be kept at room temperature for several days, preferably at least two. This will allow the material to adapt to the temperature, humidity of the room in which it will be laid.
One of the main conditions providing high-quality laying of a laminate is a carefully leveled surface. It is necessary to carefully measure the level over the entire surface area, especially in the corners. The maximum allowable roughness is 1-2 mm of deviation from the level at 2 m of the base, a two-meter level is used to determine it.
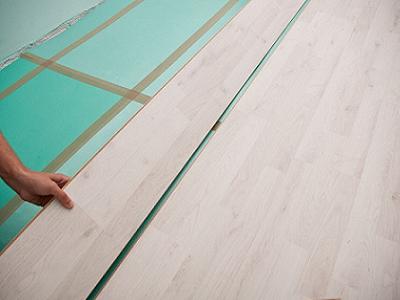
If the laminate is laid on a concrete screed, then a plastic film should be laid, which performs the function of protecting the flooring from moisture formed on the base. The next layer you need to put a substrate that acts as sound absorption, and then laminate.
The film is spread on the side from which the flooring will be laid. Its ends are bent onto the wall, and the strips of plastic film are overlapped by 20 cm. The strips of moisture-proof coating can be fastened with masking tape or polyurethane foam, which will provide more reliable protection for the laminate and protect the strips from shifting. When laying this flooring on a wooden base, insulation is not required.
Laminate Laying Technology
First you need to choose the right direction for laying the flooring. If in the room all the windows are located on one side, it is best to carry out direct styling along the direction of the incident light. If the installation will be made across the sun, the joints of the panels will be more noticeable. If you want the floor covering to have a neat and attractive appearance, this should be avoided..
Depending on the connection method, a lock (glueless) and adhesive laminate are isolated. In addition, the lock is divided into 2 types, characterized by a snap system. Collapsible locks (“Click” locks) belong to the first type, and latches (“Lock” locks) to the second type. Type of connection affects technology laminate installation. “Click” locks are characterized by high joint strength and a low percentage of damaged panels during installation. Laminate with “Lock” -locks has more affordable prices, but has a lower quality of joining of cover panels.
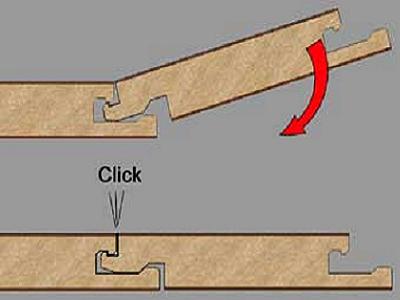
Click Laminate
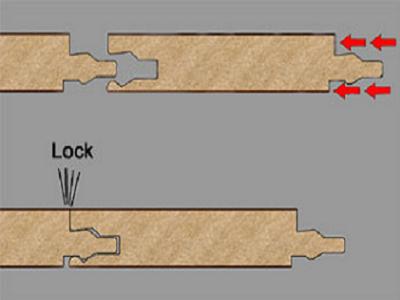
Laminate with locks
How to lay laminate flooring with Click locks
Let us dwell on the main points of the technology used when laying. At the first stage, using the tape measure, measure the width of the room and make calculations to determine the width of the last row of panels, which will be laid out near the wall. With its value less than 5 cm, it is necessary to cut the panels, which will be in the first and also the last row, so as to achieve the same width.
In addition, you must not forget to leave gaps from each of the walls about 10 mm.
Laying the laminate is done by the long side of the panel, usually along the room in the direction of daylight. As noted above, spacer wedges with a thickness of about 10 mm are installed, which will then be the necessary gap. After all work has been completed, they will need to be removed. The presence of gaps is a must, since, otherwise, during thermal expansion, the laminate can “stand on end”.
The very first laminate panel is laid in the left corner of the room. Then the next panel is inserted into it at a thirty-degree angle from the end side of the groove and is latched by pressing the laminate to the floor. The procedure is repeated until the end of the wall..
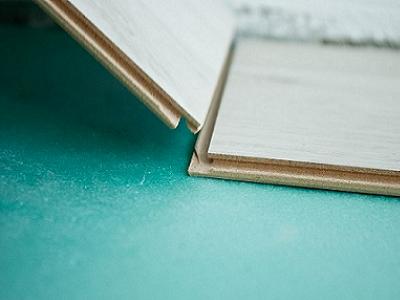
Laminate panels with Click locks
But, in order to evenly distribute the pressure exerted on the floor covering, it is necessary to arrange the laminate panels in a checkerboard pattern. To do this, they are offset when laying the next row up to 30-40 centimeters or more relative to the first row. The panels of the second row are joined together like the previous one, and then the rows are connected together. Laminate of the second row must be raised above the floor at a thirty-degree angle and inserted into the comb of the laid first row, snap into place by pressing to the floor.
Connecting rows when laying laminate flooring with Click locks
In addition, the laying of the second row can begin with the connection of the long sides of the laminate, and only then connect the end parts by knocking out with a light hammer. To carry out the work carefully and not damage the panel, it is better to attach a bar to it.
All subsequent rows are stacked in the same way according to the chosen method..
How to lay a laminate with “Lock” locks
When laying laminate flooring with “Lock” locks, the spike of the first panel is placed in a groove located on another panel. When carrying out this manipulation, both panels should lie on a horizontal plane. Next we knock them out using a bar or a hammer. In a similar way, the entire first row of laminate is laid.
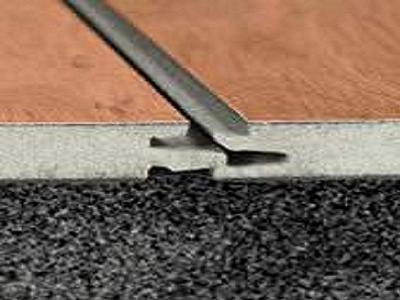
Laminate panels with “Lock” locks
When laying the next (second) row, do not forget about the displacement of the panels in order to achieve a checkerboard pattern. We connect the first panel of the second row of the flooring with the previous row, inserting a spike into the groove, and then gently knock out. The next panel of the second row is first combined with the first row, slightly departing from the end side, and then with the help of knocking we attach the second panel of the laminate to the first in this row.
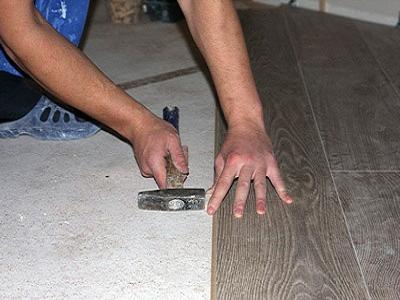
Connection of rows when laying laminate with “Lock” locks, it is inadmissible to unite panels with a hammer without a special intermediary bar
How to lay an adhesive laminate
We have examined how to lay a laminate with our own hands in a glueless way. But, there is also a glue method. It is distinguished by the complexity of laying, additional costs for glue and requires certain skills when applying it. Currently, this method is almost never used..
Of course, this method allows you to extend the life of the floor due to reliable protection against moisture inside. The adhesive laminate cannot be dismantled, since the panels are very tightly connected to each other.
Compliance with all recommendations for laying laminate flooring will allow you to get a beautiful and durable flooring. You can also lay laminate diagonally, to get an interesting and beautiful drawing.