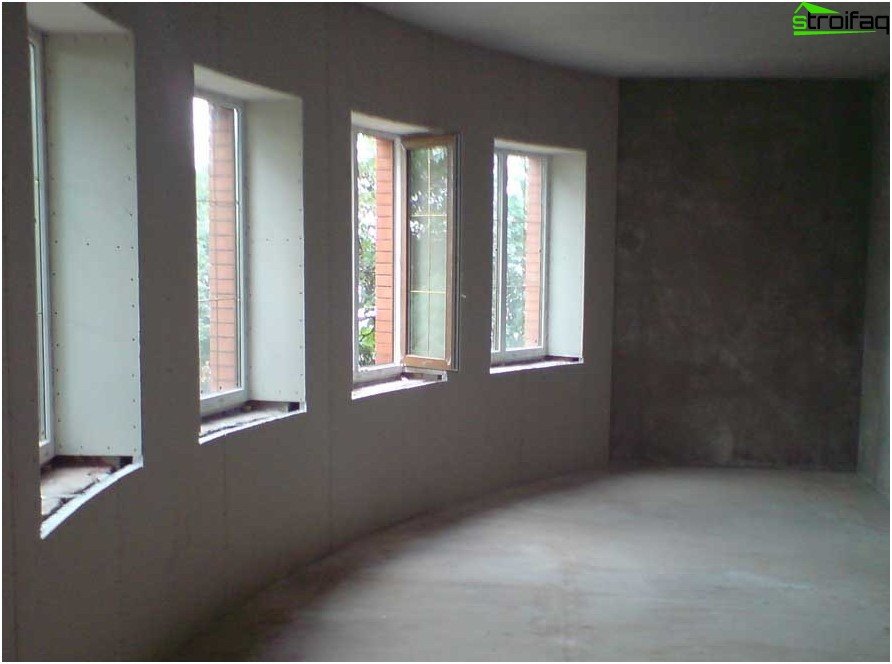
When ordering the installation of new plastic windows, you can save on finishing work. Do the slopes from drywall with your own hands under the force of any man who knows how to hold the simplest tools in his hands. This finishing method is incredibly simple and convenient. Moreover, all the work takes a little time, the loss of which, of course, differs between the beginner and the professional. Previously, window slopes were finished with stucco, during the application of which the craftsmen had difficulty working with corners. The ideal was always far away. In addition, the applied plaster dried for several days, depending on the thickness of the layer. Many people do not like plastic slopes for aesthetic reasons, because such a finish resembles office windows. Therefore, the most common building material, which is drywall, allows you to achieve the desired result without much effort and material costs..
Content
- Methods for finishing window slopes
- Mounting with a metal profile
- We glue slopes on polyurethane foam
- We fasten slopes to putty or glue
- Drywall slopes: video instruction
- Installation of plasterboard door slopes
- Myths and fallacies
Methods for finishing window slopes
There are several ways to finish slopes with drywall blanks. Some craftsmen use a metal profile for their fastening, which is used for decorating walls and ceilings. Others prefer to stick drywall to foam, and sometimes even to putty. Some craftsmen manage to combine the above methods, taking into account the design features of the window opening. With any approach, the quality of the finish will be ensured one hundred percent, you just have to adhere to the correct technology of work. Let’s consider in more detail each option.

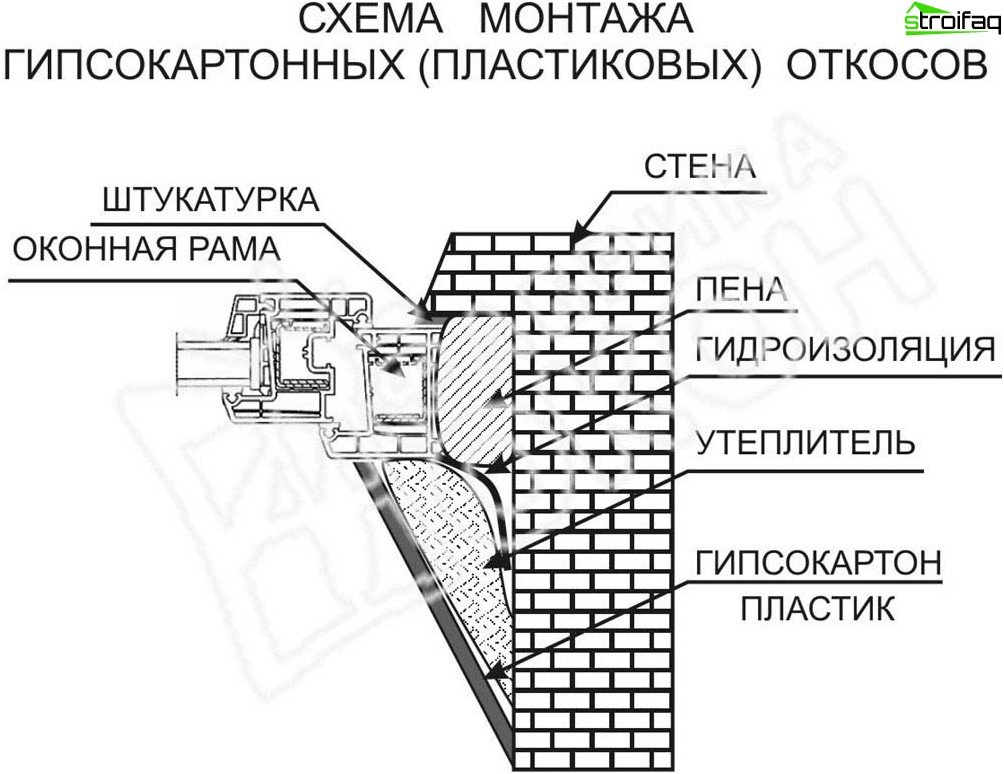
Drywall installation scheme
Mounting with a metal profile
This method of attaching slopes cut from a sheet of drywall fits organically when finishing the walls of the room with this material. In this case, a single frame is created, which is supplemented by several elements necessary for reliable fixation of slopes. Plasterboard slopes are attached to the metal profile just like on the walls. The following procedure is followed:
1. Expose profiles in horizontal and vertical levels;
2. measure and cut the slope from the drywall sheet with a construction knife;
3. a layer of mineral wool is laid as a heater;
4. screw drywall using screws with a screwdriver;
5. the joints between the sheets of drywall are sealed with a sickle;
6. then putty is applied over the sickle;
7. The angle formed by the wall and the slope is closed by a perforated corner, which can be fixed with a stapler. Some craftsmen glue the corner on the putty.
8. Further, the entire surface of the slopes is plastered, after hardening, it is peeled to a perfectly even state and, at the final stage, it is painted.
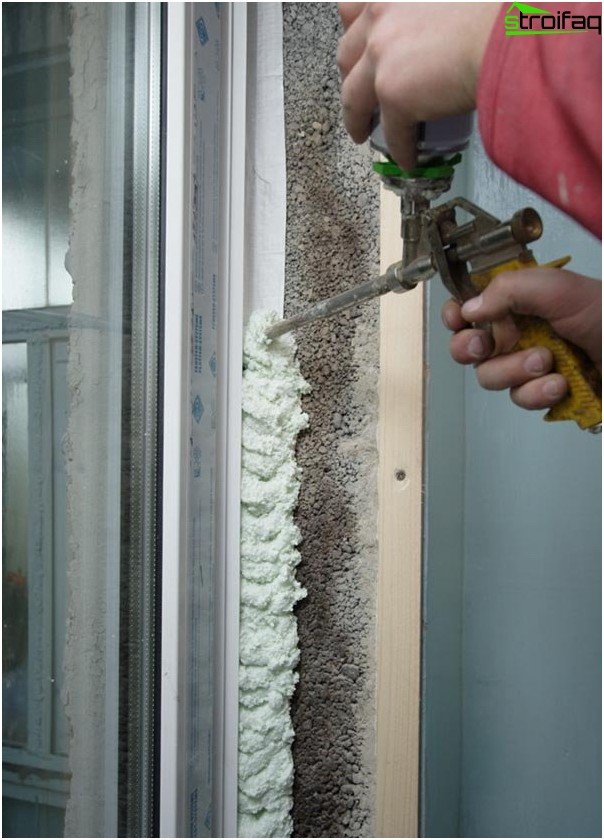
Sometimes, foam is used as insulation, while taking into account its unique ability to expand.
With small gaps, this is the only option. Fastening to the profile and foam insulation is a good example of combining methods of mounting slopes from drywall.

Fastening slopes from drywall to the profile
Benefits:
- quick and relatively “clean” installation method.
Disadvantages:
- reduction of the window opening;
- the need to fill the “void” with insulation.
We glue slopes on polyurethane foam
This method of mounting window slopes is used in cases where other options are unacceptable. For example, there is not enough space for fastening the metal profile or the porous structure of the wall does not hold the dowel. Putty does not stick to the surface of the wall. This problem is familiar to the owners of old individual houses where wooden window frames are installed. Therefore, mounting foam remains the only material capable of reliably fixing plasterboard slopes by gluing them to the wall surface. To align the slopes, experts advise fixing them for the duration of the polymerization of the foam with self-tapping screws having long caps. After some time, the foam hardens and the screws twist out as unnecessary.

Installation of slopes from drywall
Benefits:
- work with any surfaces;
- foam and glues and insulates.
Disadvantages:
- it is difficult to level the surface of the drywall slope, since the mounting foam, expanding, contributes to the “bulging” of the finishing material.
We fasten slopes to putty or glue
This method is the most common because of the simplicity of the execution technology. The work is carried out according to the following algorithm:
1. At the initial stage, the mounting foam used for window installation is trimmed. Thoroughly clean the surface of the slopes from the old finish: plaster, paint, wallpaper.
2. Next, a primer is used, which treats the surface allotted for the slopes. Moreover, the owners of apartments located on the ground floors, experts advise to additionally treat with an antifungal primer.
3. For gluing cut strips of gypsum board, any gypsum putty is suitable. Most often, in the recommendations of consultants of building stores, Perlfix brand construction adhesive sounds, which is ideal for these purposes.
4. If there are deep cracks and potholes on the wall surface, work is being done to seal them, for which plaster or putty is used. With minor damage, this step is skipped because the putty applied to the drywall sheet will still fill all the bumps and roughnesses..
5. In accordance with the measurements, blanks for slopes are cut from the sheet of moisture-proof drywall. In this case, the upper paper shell of the drywall is cut with a construction knife, then lightly press on the material, and it breaks exactly along the given line. Then the knife carefully cut the bottom cardboard cover.

Hard putty for installation of slopes from gypsum cardboard
6. Start the installation of slopes from drywall from the top panel. A putty layer or Perlfix mounting adhesive is applied to the cut workpiece with a spatula on the side adjacent to the window. On the rest of the surface, the mixture is applied pointwise, observing a distance between the places of application equal to 30 cm.
7. The blank is applied to the upper panel, while inserting a centimeter groove into the layer prepared in advance in the layer of mounting foam.
8. If necessary, fix the glued drywall sheet using self-tapping screws or a backup.
9. Give time for drying of the mounting adhesive (putty), the value of which can be found by reading the instructions.
10. Proceed to fastening the perforated corners using a stapler or putty.
11. Close up joints with putty and putty.
12. When preparing the slopes for the painting procedure, putty is carried out in three layers. In this case, the last layer is leveled with a fine trowel brush. To identify defects in the filler layer, direct the light of the lamp or lantern tangentially to the slope.
13. The void formed between the wall and the windowsill is blown with foam, the excess of which, after drying, is carefully cut with a knife. Seam puttying.
Please note: polyurethane foam undergoes a large expansion during polymerization, so dose it carefully.
14. Staining is carried out with acrylic or oil paints. You can also trim the slopes with wallpaper or even ceramic tiles..
15. At the final stage, experts recommend treating the seam between the slope and the window frame with acrylic sealant. Before this, a protective film is removed from the frame. Excess sealant is easily removed with a damp cloth. The sealant will fix the putty and prevent it from peeling off for a long time.
Installation of plasterboard door slopes
Drywall is also used for finishing door slopes. In this case, methods of gluing the material with the help of mounting foam or putty are most often used. The technology of work is a little different. Let’s consider one of the options.
- Before you make slopes from drywall on doorway, need to prepare the surface. In this case, you should pay attention to the plane of the future slope, making sure that it will not protrude beyond the door frame.
- Work begins with the installation of a side door slope, cutting it out of drywall according to the measurements taken. Moreover, the width of the workpiece is increased by 10 mm in order to insert a sheet at this distance into a groove made in advance in a mounting foam that fills the space between the opening and the door frame. For the height of the slope take the same indicator of the door frame.
- Next, a sheet of drywall is inserted into the groove made in the foam and the desired angle is measured, which can be either straight or blunt. In this case, they say that the slopes go to the “dawn”.
- Now, without removing the edges of the sheet from the groove, take it a little to the side and apply the foam with a gun. If the slope is wide, then the foam is applied along the central part of the slope throughout its length.
- The slope is pressed against the wall, maintaining a given angle, while the opposite edge of the drywall is fixed using masking tape. Existing gaps fill with polyurethane foam.
- Similarly, work is carried out on the installation of a second side slope.
- Next, proceed with the installation of the upper door slope.
- At the same time, a groove is made in the foam layer, therefore, when cutting, one centimeter is added to the slope width. Measured along the length so that the sheet lies on the ribs of the side slopes.
- Set the edge of the slope in the groove, check the accuracy of the angle that the slope should form with the plane of the door frame. Foam is also introduced with a gun and the slope is pressed.
- A day later, they begin to finish finishing glued slopes: puttying corners and the entire surface as a whole, painting or wallpapering.
Myths and fallacies
1. Under the surface of the drywall slope, fungus multiplies.
If the technology for the installation of slopes is observed, then no fungus will begin its vital activity there. Do not forget to treat the surface of the wall with a primer with antifungal additives. Press the sheet of drywall firmly against the wall onto a layer of putty or mounting adhesive.
2. Slopes made of drywall easily break as a result of mechanical stress.
Of course, if you hit with all your might with a hammer, not only drywall will break, but also other finishing materials: plastic, plaster, etc..
3. Plastering is easier.
Well-done “lighthouse” plaster takes too much time. In addition, its cost exceeds the costs required for drywall and related supplies. It is impossible to classify work with plaster as “clean” work.
4. Plasterboard slopes are not waterproof enough.
Drywall is available in different types, among which there is a moisture resistant material. This is exactly what you need to buy. And do not forget that this finishing material is used only indoors. After high-quality puttying and painting, drywall is able to withstand high humidity.
As you can see, making slopes from drywall with your own hands is not at all difficult. You just need to purchase the necessary materials, get the necessary tools from the pantry, read this article again and begin the process of creativity.


