DIY installation of built-in lights is a relatively simple process. If you want to save on the services of specialists, remember that this is possible, but the work should be done carefully and without undue haste.
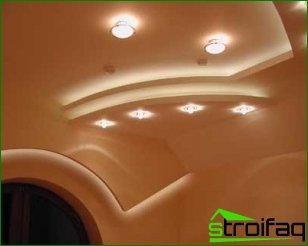
Recessed spotlights are especially popular when developing lighting for suspended ceilings. And with their help, you can create the necessary level of illumination of the room, as well as provide a modern and stylish look of the ceiling.
Choose a lamp
The power of the lamps of the built-in lamps is in the range of 30-150 watts. Their case is made of glass, plastic, brass or metal. The standard device has an electric box, which is somewhat removed from the glass bulb – the lamp is seriously heated during operation. Therefore, you should not place the bulb in close proximity with flammable materials, it is better that the distance between them is at least 2 centimeters.
If we talk about the design of lighting devices, then everything is in your hands and depends on your imagination. Today, there is an unimaginable array of spotlights of various configurations and sizes. Some people like light bulbs deeply recessed in their bodies, others prefer mobile models, there are those who buy lamps with a rotary device, so you can always create any direction of light. When choosing the type of device, it is necessary to take into account the appearance of the ceiling and the entire room, zoning of the territory and other factors.
Necessary tools
To do it yourself you need to purchase a junction box, the required number of spotlights, as well as an electric cable (most often it comes with lighting equipment).
As in any work with electricity, you can not do without protective caps for wires and insulation tape, you also need to find a tester. A suitable tool would be a drill, a long drill, a nozzle on the drill, used to make holes, crimping pliers or pliers, wire cutters and a screwdriver. Safety glasses take care of your eyes..
Do-it-yourself installation process
DIY installation of built-in lights is a relatively simple process. If you want to save on the services of specialists, remember that this is possible, but the work should be done carefully and without undue haste.Recessed spotlights are especially popular when developing lighting for suspended ceilings. And with their help, you can create the necessary level of illumination of the room, as well as provide a modern and stylish look of the ceiling.
Choose a lamp
The power of the lamps of the built-in lamps is in the range of 30-150 watts. Their case is made of glass, plastic, brass or metal. The standard device has an electric box, which is somewhat removed from the glass bulb – the lamp is seriously heated during operation. Therefore, you should not place the bulb in close proximity with flammable materials, it is better that the distance between them is at least 2 centimeters.
If we talk about the design of lighting devices, then everything is in your hands and depends on your imagination. Today, there is an unimaginable array of spotlights of various configurations and sizes. Some people like light bulbs deeply recessed in their bodies, others prefer mobile models, there are those who buy lamps with a rotary device, so you can always create any direction of light. When choosing the type of device, it is necessary to take into account the appearance of the ceiling and the entire room, zoning of the territory and other factors.
Necessary tools
To do it yourself you need to purchase a junction box, the required number of spotlights, as well as an electric cable (most often it comes with lighting equipment).
As in any work with electricity, you can not do without protective caps for wires and insulation tape, you also need to find a tester. A suitable tool would be a drill, a long drill, a nozzle on the drill, used to make holes, crimping pliers or pliers, wire cutters and a screwdriver. Safety glasses take care of your eyes..
Do-it-yourself installation process
From the very beginning, it is necessary to de-energize the room, and the tester will help you make sure that there is no electric current. On the ceiling plane, determine the location of the fixtures and use a pencil to make the necessary marking.
Wear safety glasses – they will protect your eyes from crumbs and dust. Using a drill with a round nozzle, make a hole in the ceiling of the required diameter: it must exactly match the diameter of the housing.
Next, we will deal with the electricity supply. It is necessary to stretch the cable from the junction box of the lamp to a common source of electricity. Do not cut the cable back to back: leave a margin of at least 30 centimeters, and even better – 50. Work should be done carefully, and a long drill will help to avoid unnecessary expansion of holes.
Connect the extended cable to the junction box of the luminaire. To do this, use wire cutters to remove the insulation at the end of the cable and connect the box wires to the stripped wiring. By twisting the wires together, achieve the color matching: black connect with black, and white with white. Then crimp them with pliers. Cover them with a protective cap. All wiring should be packed in a box and close the lid..
Install the lamp housing in the hole in the ceiling (the junction box should already be behind the ceiling panel). Using clips, fix the structure (most often there are four). They snap automatically.
Now it’s the turn to install the bulb. Each case has fasteners (coil springs or hooks), with which you can easily fix it in the case.
When all the work is done, we can evaluate the appearance of the ceiling. After admiring it, connect the electricity and look at the fruits of your efforts. Doing repairs with your own hands is not at all difficult, but installation of recessed fixtures in general is an elementary affair. The main thing is not to make a mistake in the markup!
