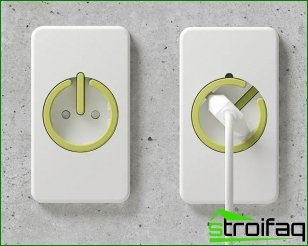
Since in an apartment lighting sources can be both chandeliers and lamps, wall sconces, and table lamps, then in case of their malfunction it is necessary to repair switches and sockets. After all, most often lighting malfunctions come down to problems associated with contact closure. In this case, you must perform DIY outlet repair.
Since in an apartment lighting sources can be both chandeliers and lamps, wall sconces, and table lamps, then in case of their malfunction it is necessary to repair switches and sockets. After all, most often lighting malfunctions come down to problems associated with contact closure. In this case, you must perform DIY outlet repair.Before proceeding with the repair of electrical wiring, disconnect the voltage in the apartment or house. After this, you should make sure that there is no electric current (this can be done with a simple indicator screwdriver). Only now you can start work.
Start Testing Outlet
Outlets are most damaged. One reason is excessive stress. If you include several household appliances in one outlet, especially with high power, the likelihood of its breakdown increases significantly.
If the outlet fails, the first thing you should pay attention to is whether electricity is supplied to it at all. To perform such a test, you must remove the front panel of the outlet and check the voltage at the contacts (at the junction of the plug and the plates). A suitable tool for this would be a voltage indicator with two poles, thanks to which you can check both phase and zero. For the same purpose, you can use a digital multimeter or an old analog known as «shop».
If the contact plates show voltage, then the malfunction of the outlet lies in the lack of contact with the plug of the appliance (this is a typical malfunction for most old domestic outlets, the design of which does not provide for the installation of springs). All that is needed now is to squeeze the contact sockets with the help of pliers. But for this step you need to turn off the voltage.
This solution will be effective only when the outlet does not experience heavy loads. Otherwise, the situation may repeat itself, the question is only when. Therefore, do not skimp on a new outlet – replacing the old one will be the best option.
In the case when the contacts of the outlet do not have voltage, you need to check its presence on the terminals. After you remove the voltage, you need to release the mounting of the outlet and remove it from the installation box. Maybe the wire just fell out of the terminal, or because of the large amount of current and weak contact, a deposit appeared on it, which interferes with the good flow of electricity. To fix this, simply tighten the screws on the terminals..
The problem may be in the junction box.
If the screws on the terminals are tightened well, there are no broken wires, and no voltage is supplied to the outlet, then the cause of the malfunction is most likely hidden in the junction box. Most often, they are located above the outlet in the wall slightly below the ceiling. The most widely used electrical circuit, in which the power to the room is sent first to the junction box, and only then to sockets, lamps, switches, etc..
After you remove the cover from the junction box, you should carefully inspect the wires in case of breaks, kinks and evaluate the integrity of the insulation. In those cases when the twisted wires were heated, the insulation will be brittle and brittle. Remove all insulation from the twists and tighten them with pliers – maybe the outlet does not work due to poor contacts in the box.
If there are no visible signs of heating or broken wires, check to see if voltage reaches the box at all. To do this, it is necessary to establish which terminals or twists are supplied with voltage.
The supply twists are determined visually – they use a larger number of wires (especially if the wiring is already many years old, then the sockets and lighting are connected in one group). In modern wiring, sockets and lighting, as a rule, are divided into groups, so it is much easier to find a malfunction during repair, because each group has its own wire section.
Wire break in the wall
In the case when the supply voltage for the outlet in the junction box is present, and the current does not reach the terminals of the outlet, then there is only one cause of failure – a wire break in the wall. It could be interrupted during repairs or the electrical installation might not be performed in the highest quality, and sometimes just defective wires.
All that remains now is to simply replace the faulty wire or stretch it from the nearest box or outlet.
If the power supply voltage of the outlet is absent, then the cause of the malfunction is even before the box – in the electrical panel. Try to measure the voltage on traffic jams or machines, also check the wires, maybe they are broken. If voltage is present in another junction box, then you can connect to it.
As seen DIY outlet repair relatively simple process. However, for him it is necessary to have practical knowledge. If you lack them, then do-it-yourself repairs are not a place for experimentation, because this is a very dangerous job. If you feel at least a bit of uncertainty – it is better to seek help from specialists.


